
Grand Voyager V6-3.3L VIN G Flex Fuel (1999)
Timing Chain Case Cover
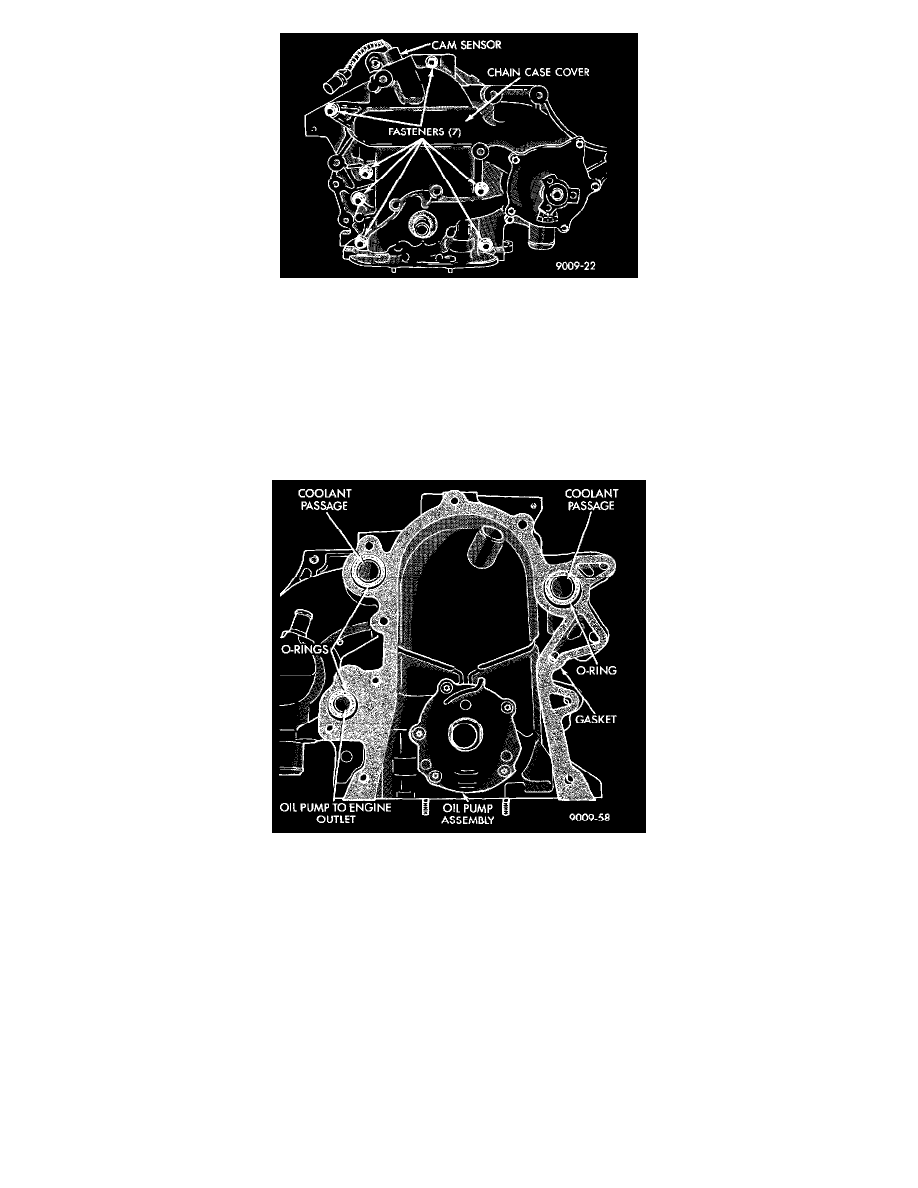
13. Remove cam sensor from timing chain cover.
14. Remove timing chain cover.
INSTALLATION
1. Be sure mating surfaces of chain case cover and cylinder block are clean and free from burrs. Crankshaft oil seal must be removed to insure
correct oil pump engagement.
NOTE: DO NOT USE SEALER ON COVER GASKET
Timing Chain Case Cover Gaskets And O-Rings
2. Use a new cover gasket, and O-rings.
Adhere new gasket to chain case cover, making sure that the lower edge of the gasket is flush to 0.5 mm (0.020 inch) past the lower edge of the
cover.
3. Rotate crankshaft so that the oil pump drive flats are in the vertical position.
4. Position oil pump inner rotor so the mating flats are in the same position as the crankshaft drive flats.
CAUTION: Make sure the oil pump is engaged on the crankshaft correctly or severe damage may result.
5. Install cover onto crankshaft.
6. Install timing chain cover screws and torque to 27 Nm (20 ft. lbs.).