
Grand Voyager V6-3.8L VIN L (1999)
4. Remove (3) straps securing underbody lines.
5. Separate and remove A/C lines from vehicle.
INSTALLATION
1. Before installation, replace all O-rings and gaskets. Coat all sealing surfaces with approved wax-free refrigerant oil. Then, reverse the above
procedures.
2. Evacuate and recharge system.
Rear Heater Lines
REMOVAL
NOTE: Review Safety Precautions and Warnings before proceeding with this operation.
1. Partially drain engine cooling system.
Front Lines Connected To Rear Lines
2. Loosen clamp at the front end of the hose located at the right, outboard side of the underbody, rearward of the front crossmember.
3. Carefully rotate hose back and forth while tugging slightly away from connector nipple. If the hose will not come off, slice the hose at the
connector nipple and peel off heater hose. This method will require heater hose replacement.
CAUTION: When removing hoses from outlet nipples, do not use excessive force. Outlet nipples may become damaged and leak engine coolant.
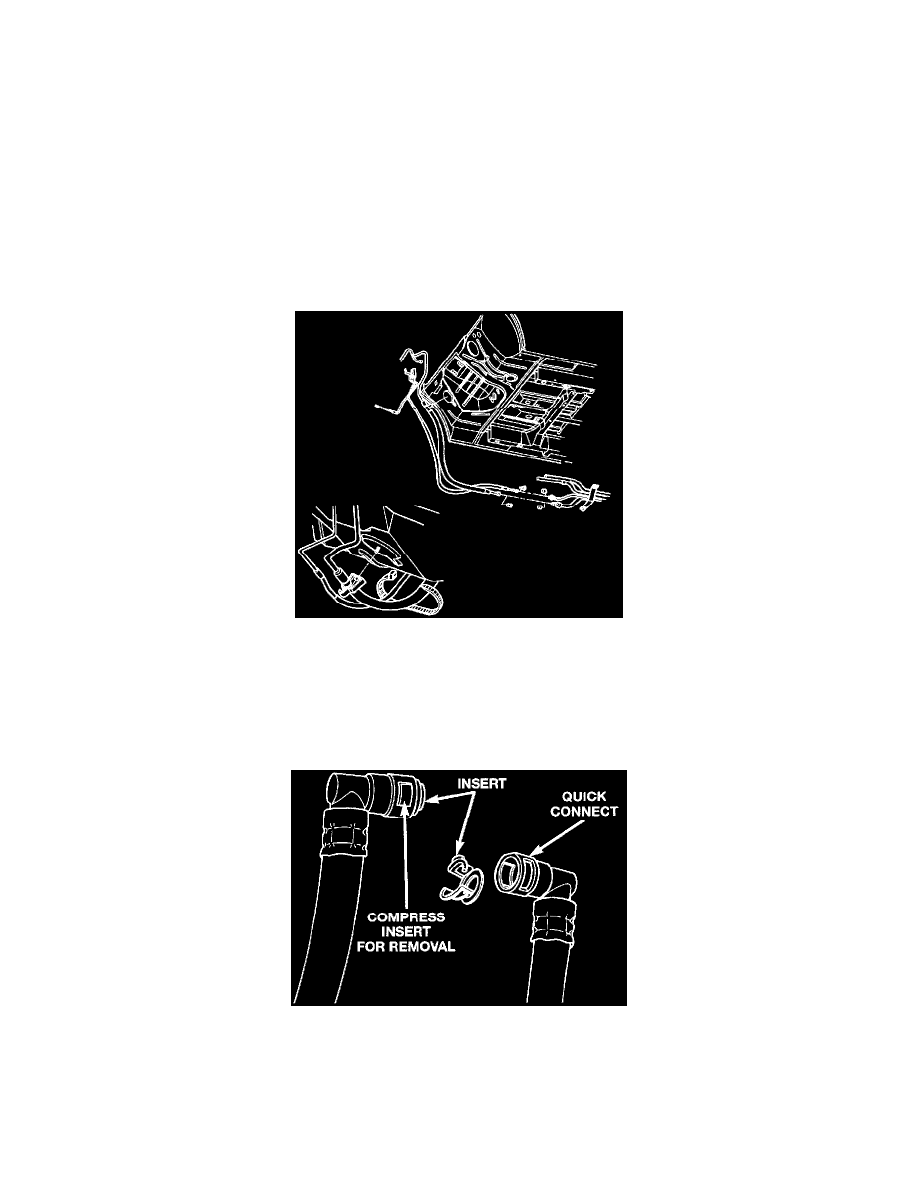
Rear Heater Hose Quick Connects
4. Compress insert in rear heater hose quick connection and pull downward on hose.