
Horizon/TC3 L4-105 1720cc 1.7L SOHC VIN A 2-bbl (1982)
when installing (Figure 11) to prevent damage to the sealing rings. While installing the pinion, be sure to line up the marks previously made
on the housing with the flat on the stub shaft.
CAUTION: USE EXTREME CARE TO NOT DAMAGE LOWER SEAL.
I.
Install remaining pinion parts as outlined in Steps "J" through "P" under "Pinion Stub Shaft Seals" in this bulletin.
IIB
THE FOLLOWING INSTRUCTIONS ARE FOR THE TRW ASSEMBLY
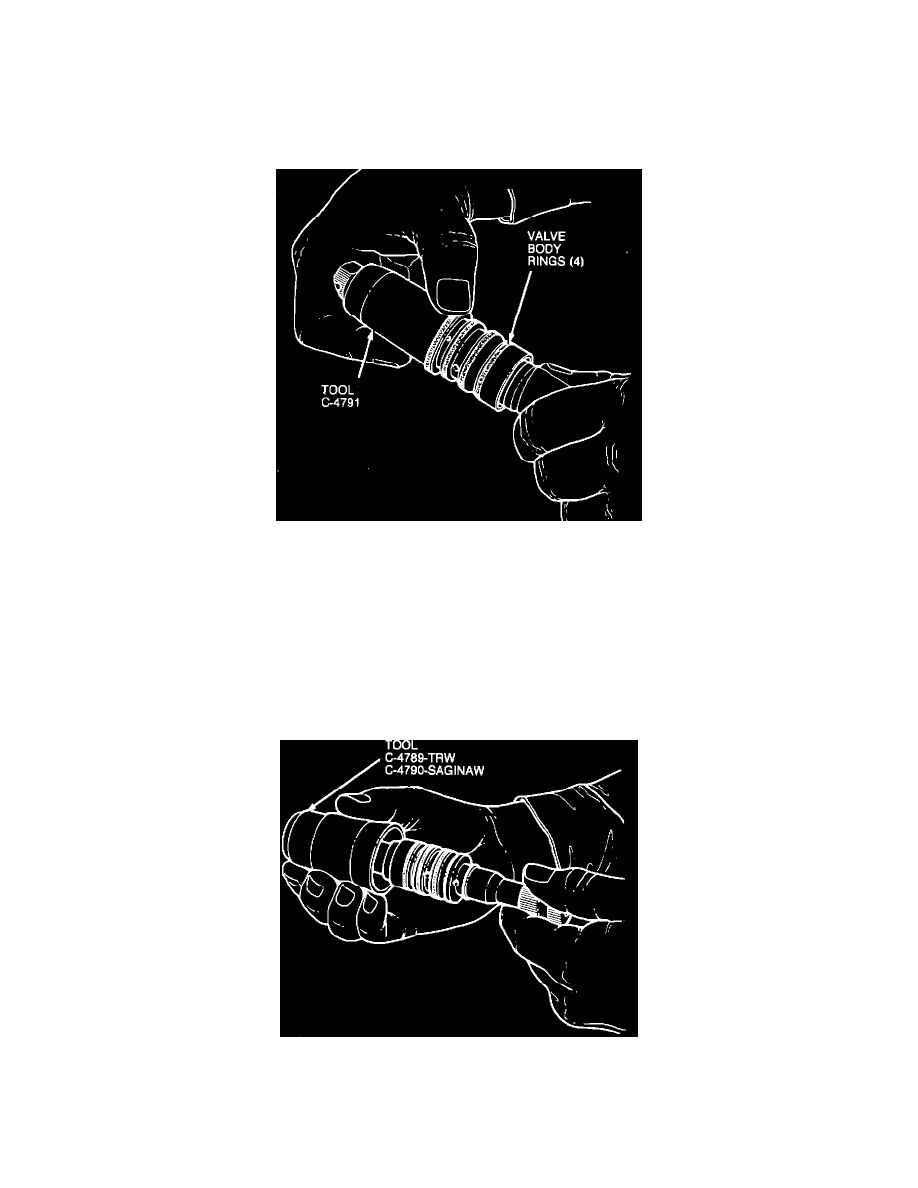
FIGURE 14 - INSTALL SEALING RINGS ON VALVE (TRW)
A.
Remove valve body rings.
B.
Lubricate sealing rings and Special Tool C-4791 with power steering fluid (Figure 14). Carefully slide the rings onto Tool C-4791 (Figure 14).
This will expand the rings for proper installation onto the valve assembly.
CAUTION: DO NOT USE HOT WATER ON SEALING RINGS ON TRW ASSEMBLY. They are made of different MATERIAL AND WILL
BE DAMAGED, AFFECTING THE SEALING CAPABILITY.
C.
Install the ring expander tool over the valve and slide each ring off of the tool into the proper ring grooves (Figure 14).
FIGURE 9 - SEAL RING RESIZING & PROTECTOR SEAL (TRW & SAGINAW)