
Laser FWD L4-1997cc 2.0L DOHC (1992)
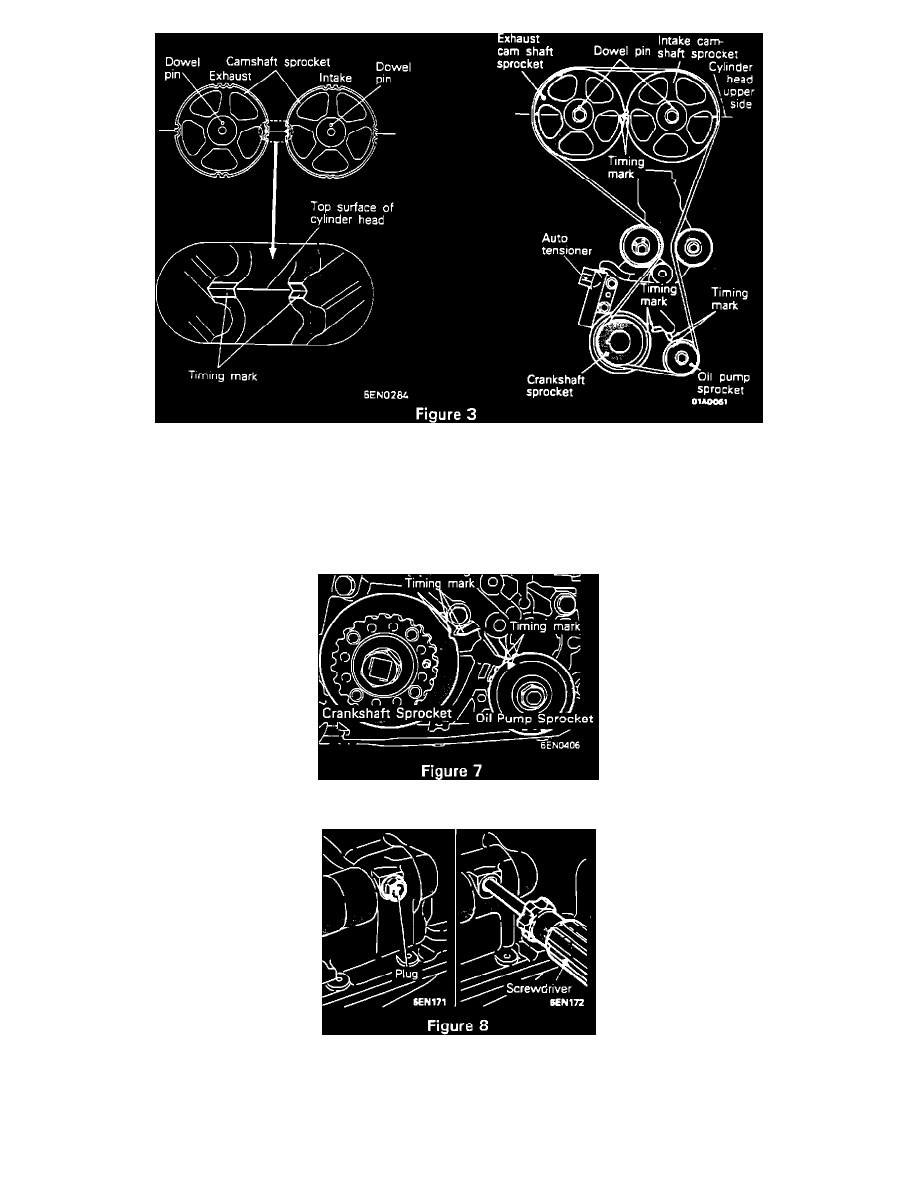
B2. Make sure the camshaft sprocket dowel pins are located at the 12 o'clock position and the camshaft sprocket timing marks are aligned together
(left sprocket at the 3 o'clock and right sprocket at the 9 o'clock positions). Both camshaft sprocket timing marks should be in line with the top
surface of the cylinder head (Figure 3).
Note:
The exhaust camshaft sprocket, may rotate in the counterclockwise direction. This should be considered when installing the timing belt on the
sprockets.
B3. Make sure notch on the crankshaft sprocket and arrow on the oil pump sprocket is aligned with timing mark pointers (Figure 7).
B4. Remove the balance shaft plug on the rear side of the cylinder block and insert a Phillips screwdriver [shank diameter 8 mm (.31 in.)] through the
hole (Figure 8). The balance shaft is in the correct position if the screwdriver can be inserted at least 60 mm (2.4 in.). If the inserted depth is less
than this (only 20-25 mm (.8-1.0 in.), the oil pump sprocket must be rotated one full turn and timing marks realigned. Recheck the balance shaft
position using the screwdriver to ensure that it can be inserted 60 mm (2.4 in.) or more. Keep the screwdriver inserted until timing belt installation
is complete.