
Laser FWD L4-1997cc 2.0L DOHC Turbo (1993)
Camshaft: Service and Repair
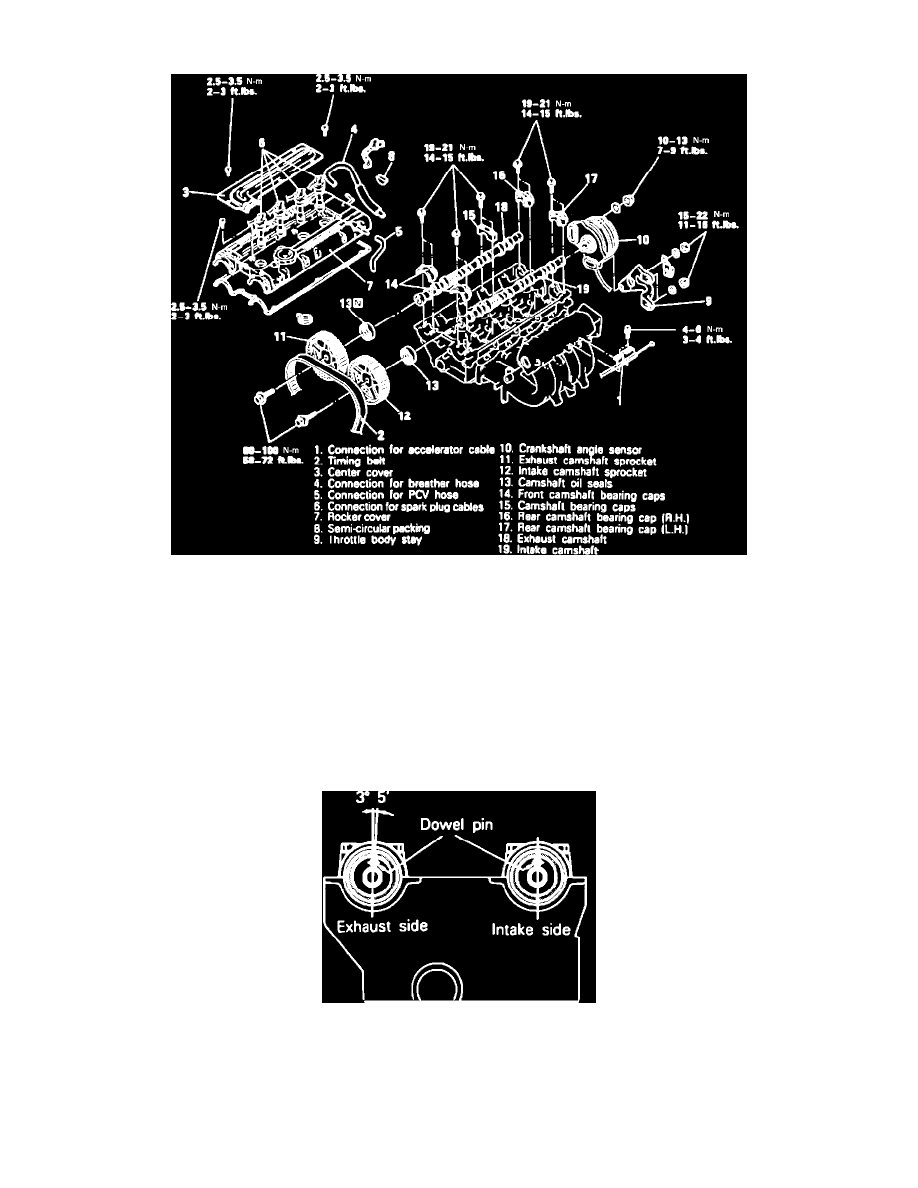
Fig. 67 Camshaft Assembly.
REMOVAL
Remove camshaft in numbered sequence, Fig. 67, noting the following:
1.
Remove timing belt, refer to TIMING BELT.
2.
Remove camshaft sprockets as follows:
a. While holding camshaft in position with a crescent wrench at hexagon between No. 2 and No. 3 journals, remove camshaft sprocket bolt.
b. Remove camshaft sprockets.
3.
Remove camshaft oil seals using a suitable screwdriver.
4.
Remove camshaft bearing caps by loosening installation bolts in two or three steps. If bearing cap is difficult to remove, gently tap on the rear
portion of the camshaft with a plastic hammer.
Fig. 68 Installing Camshafts.
INSTALLATION
Reverse removal procedure to install, noting the following:
1.
Install the camshafts on the cylinder head. Ensure intake side camshaft is installed on intake side and exhaust side camshaft is installed on exhaust
side. Intake side camshaft has a slot machined in the back end to drive the crank angle sensor. Once installed, the camshaft dowel pins should be in