
Laser FWD L4-1997cc 2.0L DOHC Turbo (1993)
16.
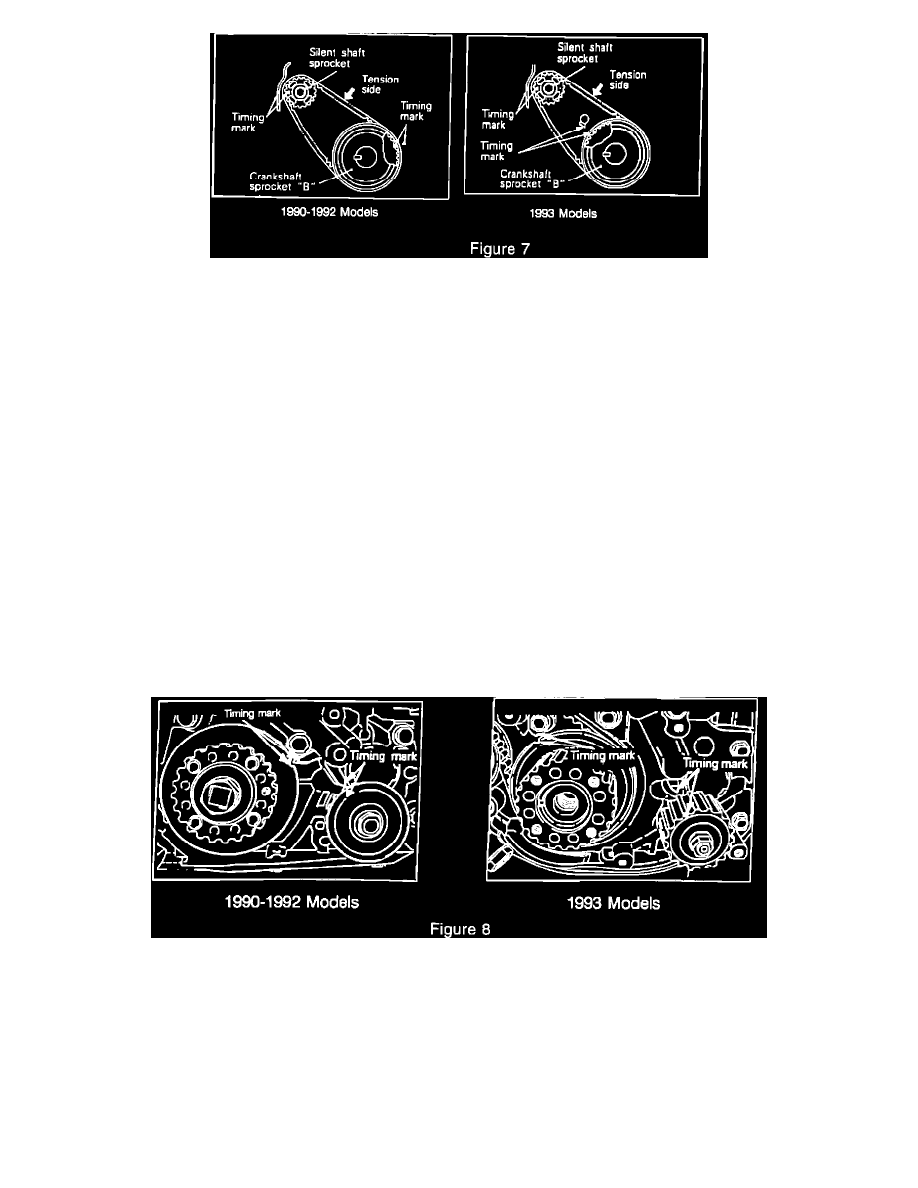
Ensure that the crankshaft sprocket and the silent shaft sprocket timing marks are aligned. Install new timing belt "B" over crankshaft sprocket
"B", around the tensioner pulley, and over the silent shaft sprocket. Do not leave any slack on the tension side of the belt (Figure 7).
17.
Push the timing belt "B" tensioner up to place pressure on the timing belt so that the tension side is taut. Belt tension should be 5-7 mm (.20-.28
in.) using the belt deflection method. Tighten the tensioner center bolt and torque to 15-22 N m (11-16 ft.lbs.) (Figure 7).
CAUTION:
WHEN TIGHTENING THE BOLT, ENSURE THAT THE TENSIONER PULLEY SHAFT DOES NOT ROTATE WITH THE BOLT.
ALLOWING IT TO ROTATE CAN CAUSE EXCESSIVE TENSION ON THE BELT.
CAMSHAFT TIMING BELT:
18.
Rotate the camshaft timing belt tensioner pulley so that the pinholes are to the left of the center bolt. Tighten the center bolt finger-tight (Figure 4).
NOTE:
LEAVE THE ALLEN WRENCH INSTALLED IN THE AUTO TENSIONER.
19.
Make sure the camshaft sprocket dowel pins are located at the 12 o'clock position and the camshaft sprocket timing marks are aligned together
(left sprocket at the 3 o'clock and right sprocket at the 9 o'clock positions). Both camshaft sprocket timing marks should be in line with the top
surface of the cylinder head (Figure 2).
NOTE:
THE EXHAUST CAMSHAFT SPROCKET MAY ROTATE IN THE COUNTERCLOCKWISE DIRECTION. THIS SHOULD BE
CONSIDERED WHEN INSTALLING THE TIMING BELT.
20.
Make sure that the crankshaft sprocket and the oil pump sprocket is aligned with the timing mark pointers (Figure 8).