
Laser FWD L4-1997cc 2.0L DOHC Turbo (1993)
Intercooler: Service and Repair
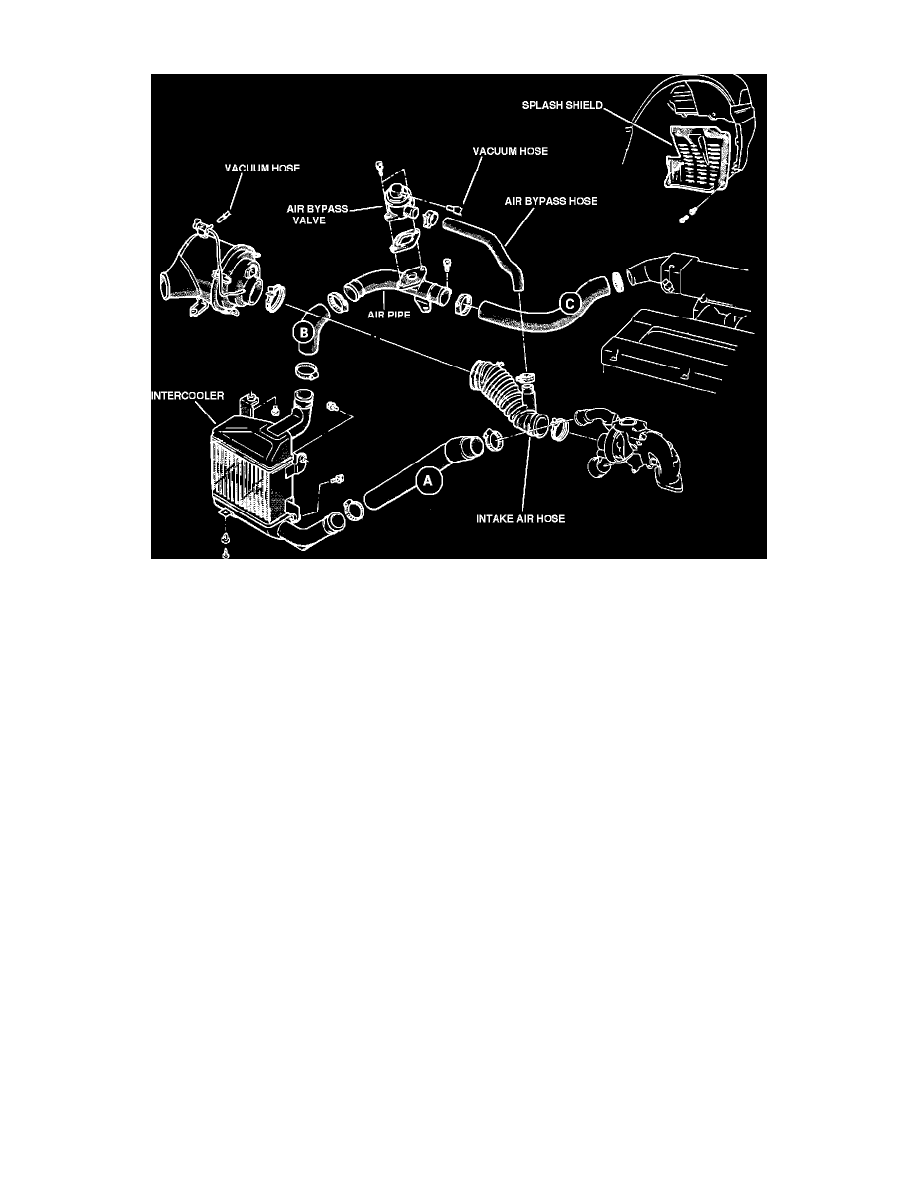
Intercooler And Components
Note: For removal of the intercooler only, use steps #9, #10, #11, #12.
Removal
1. Disconnect the air bypass hose from the air bypass valve.
2. Disconnect the intake air hose to the air cleaner.
3. Disconnect the vacuum hose to the air cleaner.
4. Disconnect the vacuum hose to the air bypass valve.
5. Disconnect the electrical harness connectors to the air cleaner.
6. Unbolt the air cleaner and secure it out of the way.
7. Remove air hose C.
8. Remove the air pipe with the air bypass valve.
9. Remove air hose B.
10. Remove the splash shield.
11. Remove air hose A.
12. Remove the intercooler through the fenderwell.
Inspection
1. Check the intercooler fins and tubes for punctures, bends or clogging by foreign matter.
2. Inspect the air hoses and air pipes for cracks, brittleness or punctures.
Caution: Be careful not to allow any dirt or other foreign objects to enter the hoses, pipes or intercooler.
Installation
Install in the reverse order of disassembly.
Torque value, intercooler to body: 9 - 11 ft lb (12 - 15 Nm)
Torque value, air pipe mounting bolts: 9 - 11 ft lb (12 - 15 Nm)
Torque value, air hose clamps: 3 ft lb (4 Nm)