
Laser FWD L4-1997cc 2.0L DOHC Turbo (1993)
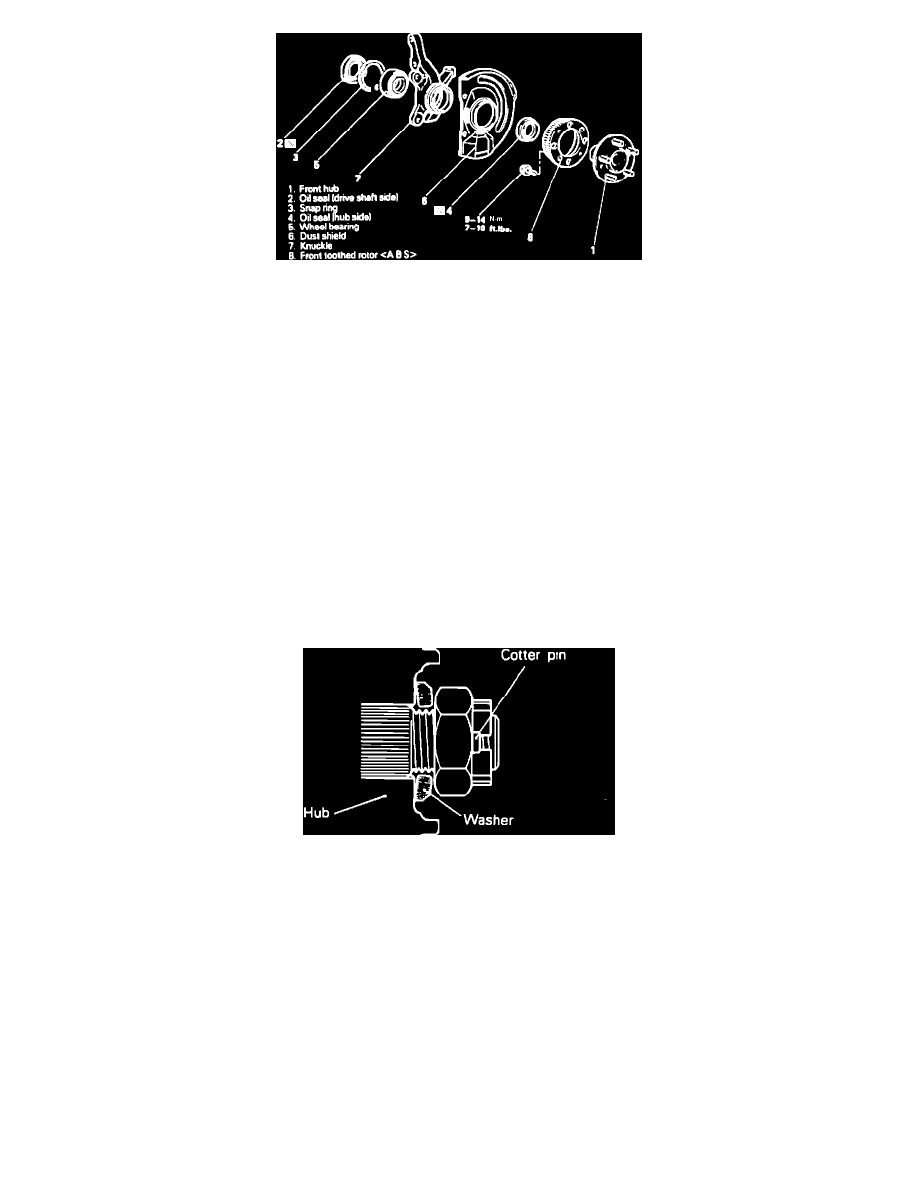
Fig. 3 Disassembling Hub And Knuckle
DISASSEMBLY & ASSEMBLY
Disassemble knuckle and hub assembly in numbered sequence, noting the following:
1. Use knuckle arm bridge tool No. MB991001 or equivalent, to separate hub from knuckle.
CAUTION: Do not strike with hammer, as bearing damage could occur.
2. Remove oil seal from knuckle.
3. Using puller, remove wheel bearing inner race from front hub. It may be necessary to crush oil seal so puller will catch inner race.
4. Remove snap ring from knuckle.
5. Remove bearings from knuckle.
6. Fill wheel bearings with grease, applying thin coating of grease to knuckle and bearing surfaces.
7. With wheel bearing inner race removed, press in bearing using oil seal installer tool No. MB990985 or equivalent.
8. Install wheel bearing inner race to wheel bearing.
9. Drive hub side of oil seal into knuckle until flush with knuckle end surface.
10. Mount hub assembly to knuckle and torque to specifications.
11. Rotate hub assembly to seat bearing.
12. Measure wheel bearing starting torque; torque should be 16 lb-in.
13. Measure endplay of hub; Endplay should be 0.008 inch.
14. If starting torque and hub endplay are not within specification, it is possible that assembly has not been installed correctly. Repeat disassembly and
assembly procedure.
Fig. 4 Installing Washer
INSTALLATION
Reverse removal procedure to install, noting the following:
1. Install washer and wheel bearing nut in direction shown.
2. After installing wheel, lower vehicle to ground, then final tighten wheel bearing nut.
3. If cotter pin holes do not match, torque nut up to 188 lb-ft.