
Laser FWD L4-1997cc 2.0L DOHC Turbo (1993)
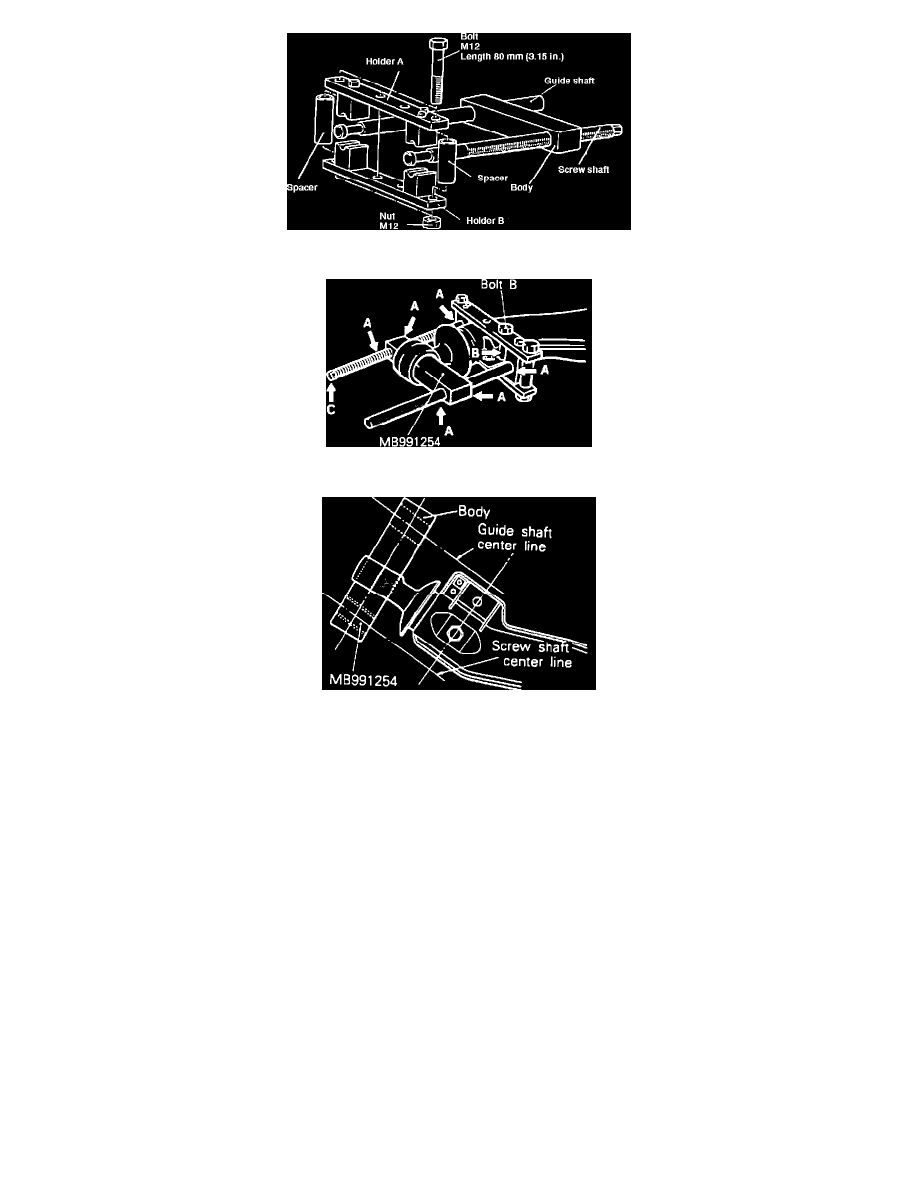
Fig. 14 Rod Remover Tool No. MB991254
Fig. 15 Lubrication Points
Fig. 16 Installing Rod Remover Tool No. MB991254
5. Replace connecting rod as follows:
a. Remove trailing arm bushing, then bolt and nut.
b. Using rod remover tool No. MB991254, set onto trailing arm as shown.
c. Apply lubricant to sliding portion of tool (A), then install bolt (B) in trailing arm.
d. Using suitable wrench, turn portion as marked (C) to remove connection rod.
e. Installation of body should be performed with screw shaft and guide shaft center lines aligned as shown.
f.
Apply soapy water to rubber portion of connection rod.
g. Reverse procedure to press fit, torquing bolt to specifications.
6. Temporarily assemble rear axle shaft to trailing arm.
7. Install companion flange to rear axle shaft, then install locking nut.
8. Ensure rear axle shaft does not turn when tightening locknut.
9. Reverse procedure to install.