
Neon L4-2.0L DOHC (1996)
Suspension Strut / Shock Absorber: Service and Repair
Front
Disassembly/Assembly
1. Clamp strut assembly by the clevis bracket into suitable vise.
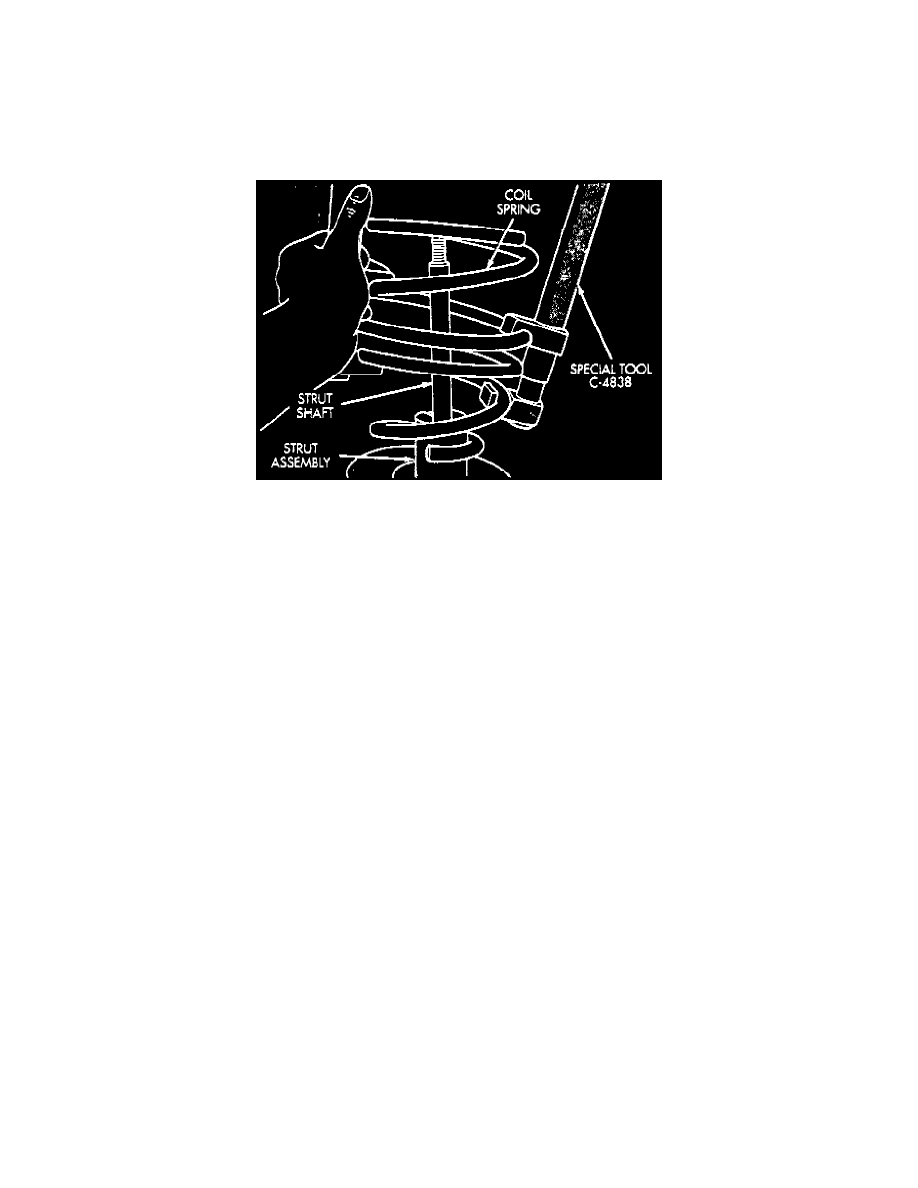
Coil Spring Removal
2. Scribe coil spring and strut assembly right or left, then using compressor tool No. C-4838, or equivalent, compress coil spring.
3. Install socket strut nut tool No. L4558A, or equivalent, on strut shaft retaining nut.
4. Install 10 mm socket on hex head of strut shaft and remove nut while holding strut to keep from rotating.
5. Remove upper spring seat, pivot bearing and dust shield as an assembly.
6. Remove coil spring.
7. Reverse procedure to install.
With ABS
1. Loosen wheel lug nuts, then raise and support vehicle.
2. Remove wheel and tire assembly, then disconnect the hydraulic brake hose routing bracket from strut bracket.
3. Speed sensor is combined with hydraulic hose routing bracket.
4. Remove two strut assembly clevis bracket to steering knuckle attaching bolts.
5. Remove three nuts attaching strut assembly upper mount to shock tower, then the strut.
6. Reverse procedure to install.
Without ABS
1. Loosen wheel lug nuts, then raise and support vehicle.
2. Remove wheel and tire assembly, then disconnect the hydraulic brake hose routing bracket from strut bracket.
3. Remove two strut assembly clevis bracket to steering knuckle attaching bolts.
4. Remove three nuts attaching strut assembly upper mount to shock tower, then the strut.
5. Reverse procedure to install.