
Neon L4-2.0L SOHC (1995)
12.
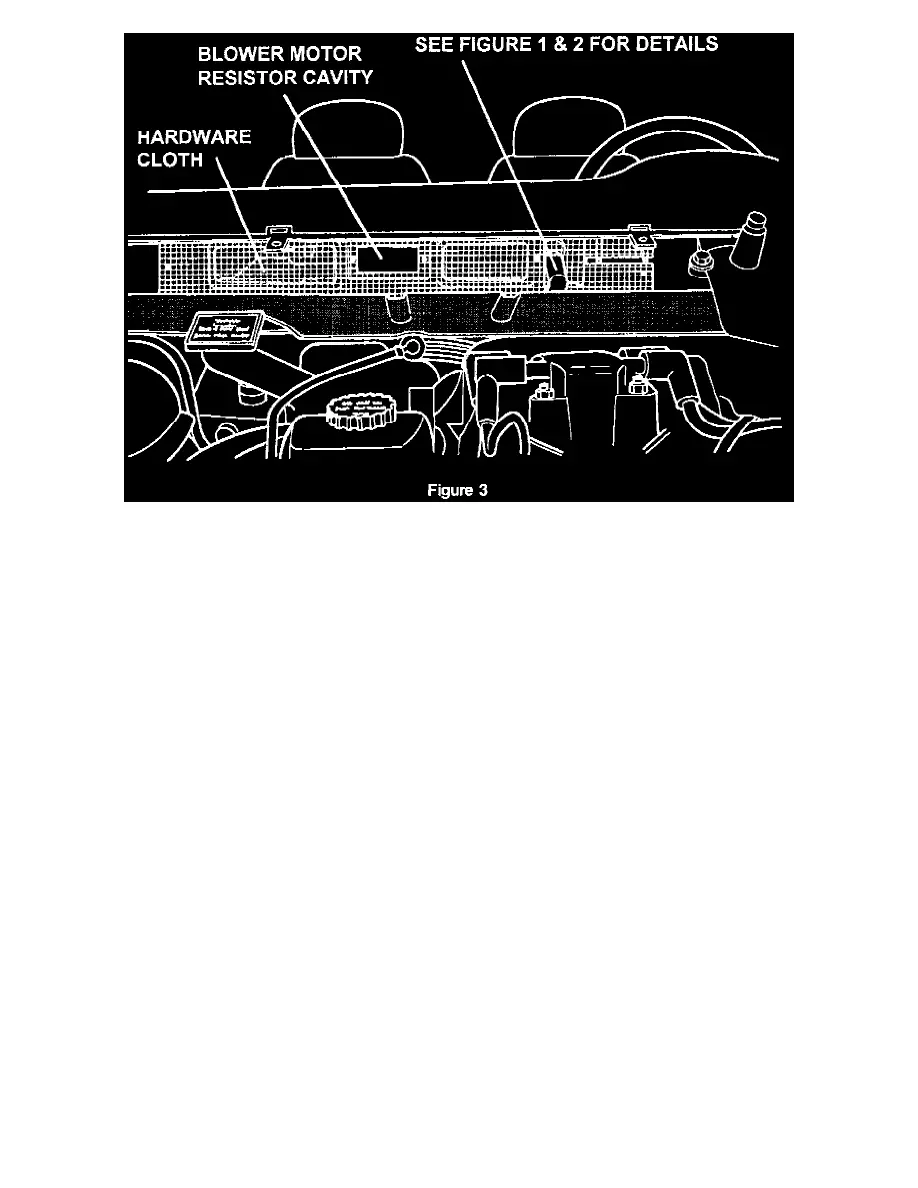
Align the pre-cut hardware cloth over the air inlet openings (Figure 3).
13.
Carefully slide the wiring harness up through the slit in the hardware cloth to the pre-cut opening.
14.
Install the resistor block over the screen. Make sure the screen does not come in contact with the elements in the resistor block (Figure 2).
15.
Install three screws, P/N 6032723, to secure the screen to the cowl plenum.
16.
Apply Mopar Silicone Glass Sealer, P/N 4467708, around the outside edge of the screen to eliminate any potential for buzz, squeaks or rattles.
NOTE:
VEHICLES BUILT PRIOR TO JUN. 6, 1994 (MDH 06-06-XX) REQUIRE A NEW WINDSHIELD COWL SCREEN, P/N 4655021.
17.
Install the windshield cowl screen and hood seal.
18.
Install windshield wiper arm/blade assemblies.
POLICY: Reimbursable within the provisions of the warranty.
TIME ALLOWANCE:
Labor Operation No.
Screen Cowl Install. Remove Debris from Heater Housing. A/C
Equipped Vehicles
23-43-68-90..........................................................................................................................................................................0.4 Hrs.
Screen Cowl Install. Remove Debris From Outlets and Heater Housing.
Heater Only Equipped Vehicles
23-43-68-91..........................................................................................................................................................................0.6 Hrs.
FAILURE CODE:
PS - New Part