
Neon L4-2.0L SOHC (1995)
9. Tighten upper bolt and nut from service kit until snug, but still allowing movement between strut clevis bracket and knuckle.
10. Remove original lower bolt and install bolt from service kit into lower strut clevis bracket hole. Install nut and tighten until snug.
11. Lower vehicle until full weight is supported by suspension, then jounce front and rear of vehicle an equal number of times.
12. Adjust camber to preferred setting by pushing or pulling top of tire.
13. Tighten upper and lower strut clevis bracket bolts.
14. Jounce vehicle an equal number of times and verify rear camber setting. When vehicle is at correct setting, torque both front strut clevis brackets
to 40 ft. lbs. plus an additional 1/4 turn.
TOE
Rear wheel toe must be set prior to setting front wheel
toe. Proceed as follows:
1. Center steering wheel and lock in place using a steering wheel clamp.
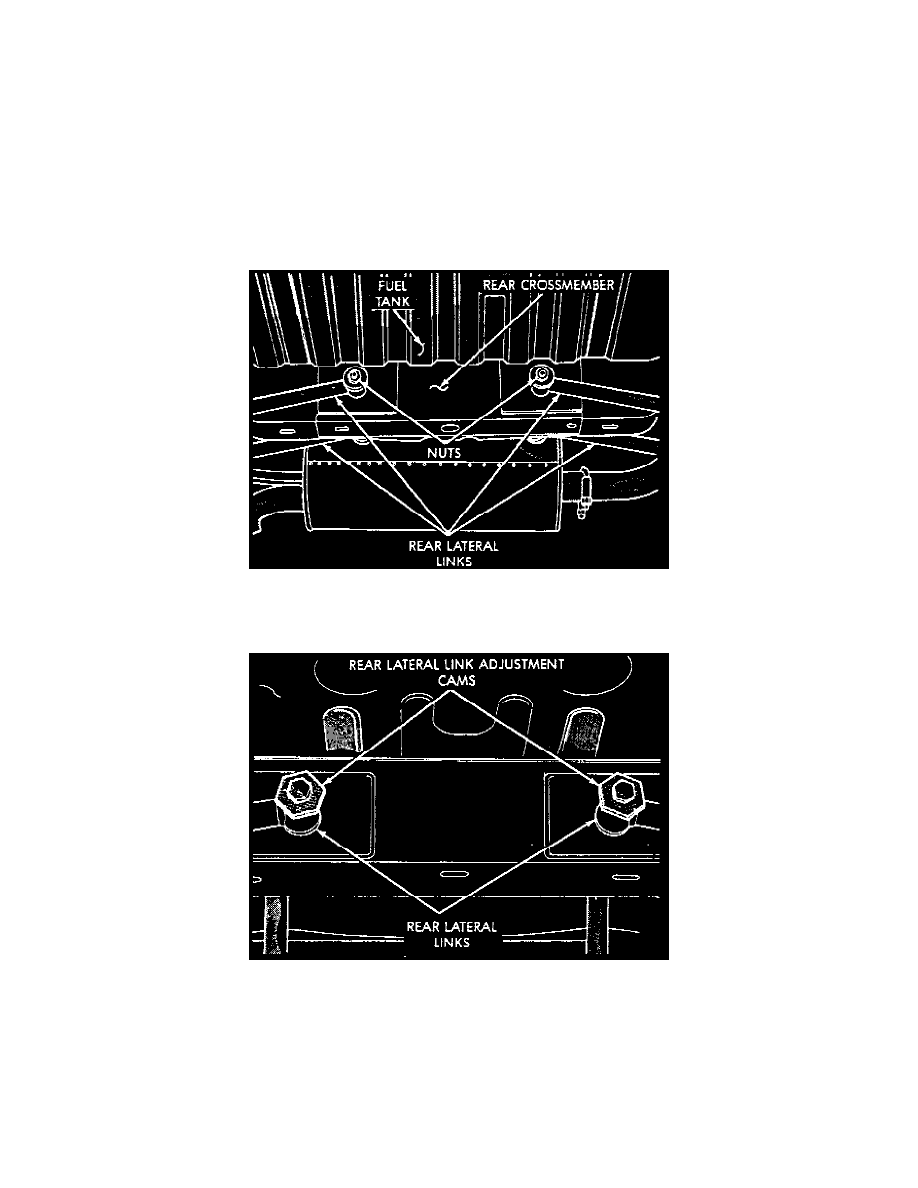
Rear Lateral Link Toe Setting
2. Loosen nuts on attaching bolts for left and right lateral links to rear crossmember.
Rear Wheel Toe Adjustment Cams
3. Rotate lateral link adjustment cams, until preferred rear toe specification is obtained.
4. While holding toe adjustment cams from turning, tighten right and left lateral links to rear crossmember attaching bolt nuts. This will securely hold
adjustment cams in position.
5. Hold lateral link attaching bolt and adjustment cam from turning and torque lateral link attaching bolt to 70 ft.-lbs.
6. Loosen front inner tie rod end jam nuts, then grasp inner tie rods at serration.
7. Rotate inner tie rods of steering gear and set front toe specifications.
8. Torque tie rod lock nuts to 45 ft.-lbs.