
Neon L4-2.0L SOHC (1995)
1.
Remove the cotter pin, nut lock and spring washer (Refer to Figure 1) from the end of the right driveshaft.
CAUTION:
DO NOT ROLL THE VEHICLE ON THE GROUND AFTER THE HUB NUT IS LOOSENED. BEARING DAMAGE WILL RESULT.
2.
Loosen but do not remove the hub nut while the weight of the vehicle is supported on the right tire/wheel assembly and the brakes are applied.
3.
Raise the vehicle on a frame contact type hoist.
4.
Remove the right front tire/wheel assembly from the hub.
5.
Remove the right front disc brake caliper to steering knuckle attaching bolts (Refer to Figure 2).
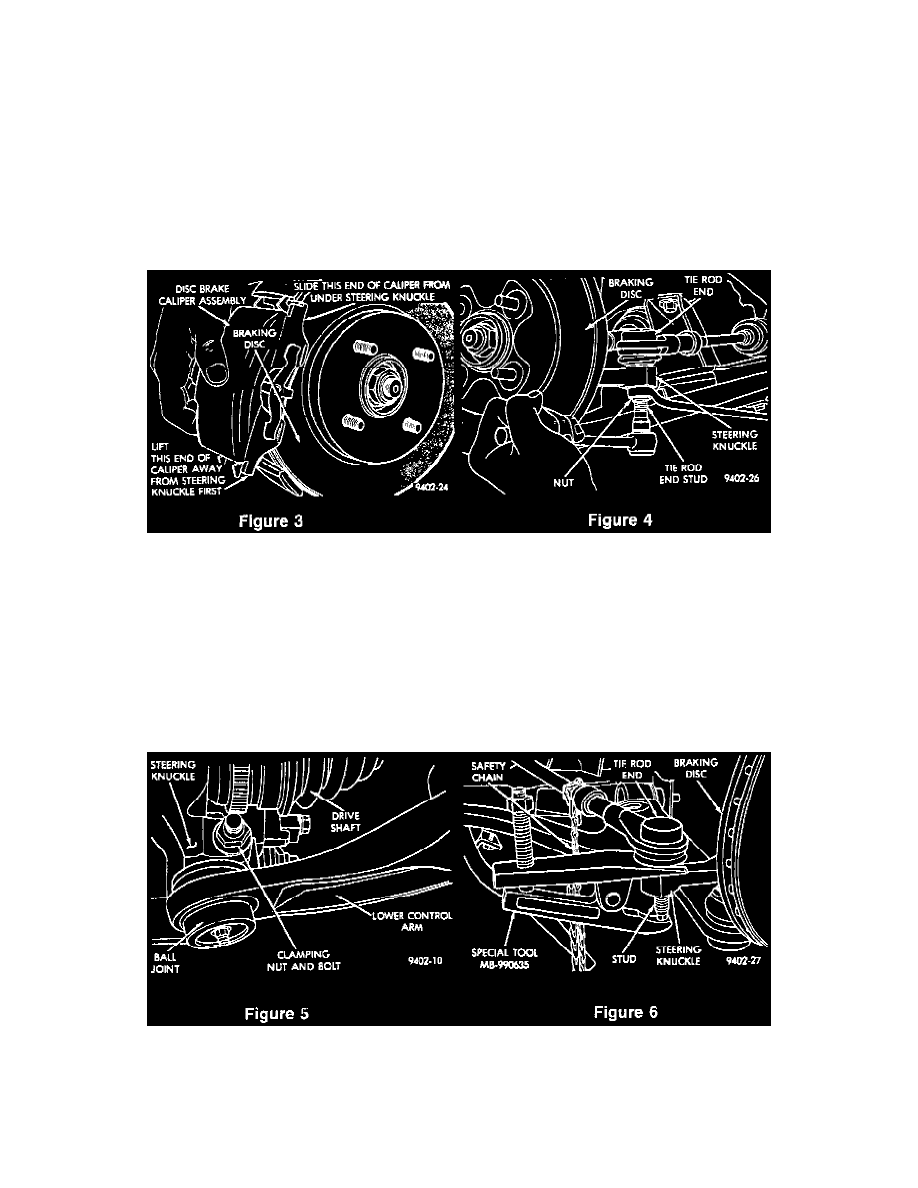
Figures 3-4
6.
Remove the disc brake caliper assembly from the steering knuckle. The caliper is removed by first lifting the bottom of the caliper away from the
steering knuckle, then removing the top of the caliper out from under the steering knuckle (Refer to Figure 3).
7.
Support the caliper assembly using a wire hook. DO NOT ALLOW THE CALIPER ASSEMBLY TO HANG BY THE BRAKE FLEX HOSE.
8.
Remove the brake disc from the front hub.
9.
Remove the nut attaching the outer tie rod end to the steering knuckle by holding the tie rod end stud with a 11/32 in. socket while loosening the
attaching nut (Refer to Figure 4).
Figures 5-6
10.
Use Special Tool MB 990635 to remove the tie rod end stud from the steering knuckle (Refer to Figure 5).
11.
Remove the nut and bolt clamping the ball joint stud into the steering knuckle (Refer to Figure 6).