
Neon L4-2.0L SOHC (1995)
2.
With the window in the full up position, using Mopar Lubriplate, P/N 4549615, or equivalent, lubricate the entire length of each regulator rail on
all four sides that come in contact with the plastic guides on both lift plates.
3.
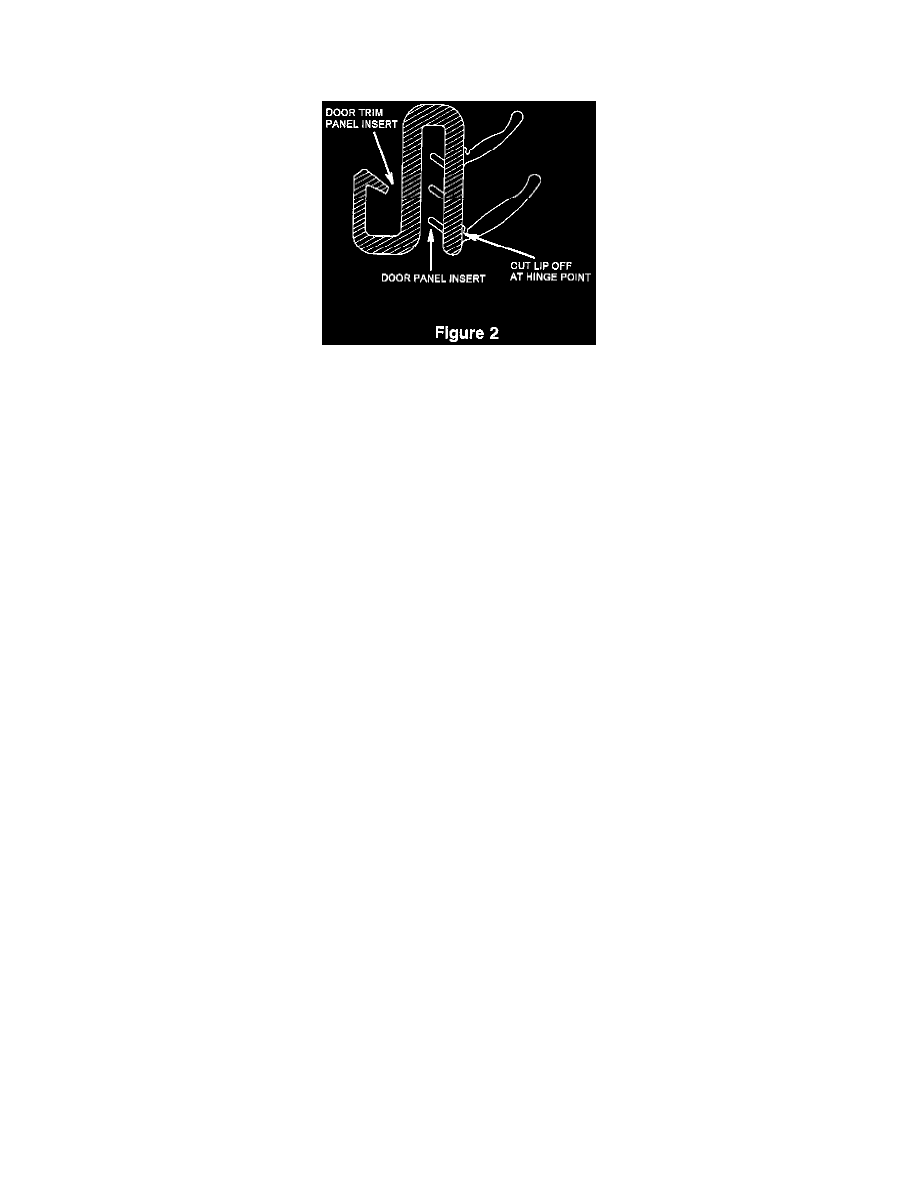
Remove the front door inner belt weatherstrip. Remove the entire length of the lower lip with a utility knife. Install the modified weatherstrip on
the door (Figure 2). Do not install the trim panel at this time.
4.
Loosen the two rear glass-to-lift-plate attaching screws so the washers are free to move. With the window half way open, crank the window up and
down a few inches several times and then tighten the screws to a maximum of 50 In.Lbs. (5.5 N-m).
NOTE:
OVER TORQUING COULD RESULT IN GLASS BREAKAGE.
5.
Check to ensure that the glass fit to the door opening weatherstrip is correct.
6.
Evaluate the window crank effort. If it is still excessive, replace the window regulator with the appropriate part called out in the parts required
section.
7.
Replace the door trim panel and attaching components.
POLICY:
Reimbursable within the provisions of the warranty.
TIME ALLOWANCE:
Labor Operation No:
Door Inner Belt Weatherstrip Modify, Adjust Window &
Lubricate Window Regulator Rails
23-51-17-95
0.6 Hrs.
Failure Code: XX - Service Adjustment
Window Regulator, front Door Glass, Right Side
23-34-10-98
0.5 Hrs.
Window Regulator, front Door Glass, Left Side
23-34-10-99
0.5 Hrs.
Failure Code: P8 - New Part