Neon L4-2.0L VIN C (1997)

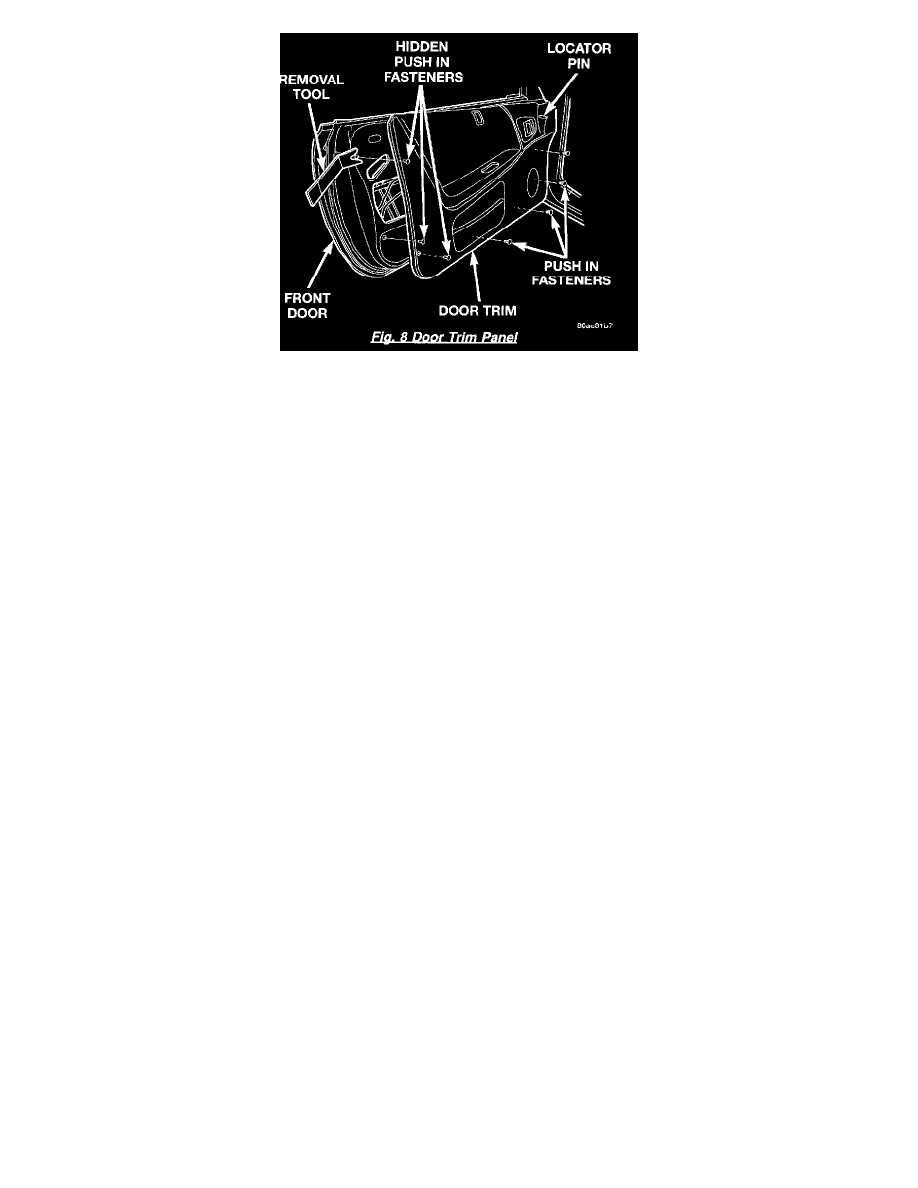
5. Disengage all push-in fasteners attaching trim to door panel. Ensure that each push-in fastener is disengaged using the removal tool.
6. Tilt trim panel outward to clear locator pins on backside of trim panel.
7. Lift trim panel to disengage from retainer channel on inner belt weatherstrip at the top of the door.
8. Disengage clip holding door latch linkage to back of inside door handle.
9. Separate latch rod from handle.
10. Disengage wire connector from power door lock switch, mirror switch, and power window switch, if equipped.
11. Separate trim panel from door.
Installation
1. Replace any damaged or missing push-in fasteners with original equipment push-in fasteners.
2. Place trim panel near door.
3. Engage wire connector into power door lock switch, mirror switch, and power window switch, if equipped.
4. Insert latch rod into inside latch release.
5. Engage trim panel into retainer channel at top of door and push down to seat.
6. Locate door trim panel to inner door panel by aligning locating pins on backside of trim panel to mating holes in inner door panel.
7. Engage push-in fasteners to hold trim to door panel around perimeter of trim panel.
8. With the window in the down position, orientate the window regulator crank handle appropriately. Install the right handle at the 10 o'clock position
and the left handle at the 2 o'clock position, if equipped.
9. Install screw holding trim panel to door from behind inside latch release handle.
10. Install screw inside pull cup holding door trim panel to bracket.
