
Neon L4-2.0L VIN C (1997)
Brake Pad: Service and Repair
Rear
Removal
WARNING: ALTHOUGH FACTORY INSTALLED BRAKE LININGS ARE MADE FROM ASBESTOS FREE MATERIALS, SOME
AFTER MARKET BRAKE LININGS MAY CONTAIN ASBESTOS. THIS SHOULD BE TAKEN INTO ACCOUNT WHEN SERVICING A
VEHICLE'S BRAKE SYSTEM, WHEN AFTERMARKET BRAKE LININGS MAY HAVE BEEN INSTALLED ON THE VEHICLE.
ALWAYS WEAR A RESPIRATOR WHEN CLEANING BRAKE COMPONENTS AS ASBESTOS CAN CAUSE SERIOUS BODILY
HARM SUCH AS ASBESTOSIS AND OR CANCER. NEVER CLEAN BRAKE COMPONENTS BY USING COMPRESSED AIR, USE
ONLY A VACUUM CLEANER SPECIFICALLY DESIGNED FOR THE REMOVAL OF BRAKE DUST. IF A VACUUM CLEANER IS
NOT AVAILABLE, CLEAN BRAKE PARTS USING ONLY WATER DAMPENED SHOP TOWELS. DO NOT CREATE BRAKE LINING
DUST BY SANDING BRAKE LININGS WHEN SERVICING A VEHICLE. DISPOSE OF ALL DUST AND DIRT SUSPECTED OF
CONTAINING ASBESTOS FIBERS USING ONLY SEALED AIR TIGHT BAGS OR CONTAINERS. FOLLOW ALL RECOMMENDED
SAFETY PRACTICES PRESCRIBED BY THE OCCUPATIONAL SAFETY AND HEALTH ADMINISTRATION (OSHA) AND THE
ENVIRONMENTAL PROTECTION AGENCY (EPA), FOR HANDLING AND DISPOSAL OF PRODUCTS CONTAINING ASBESTOS.
GENERAL INFORMATION
During service procedures, grease or any other foreign material must be kept off caliper assembly, surfaces of braking rotor and external surfaces
of hub. Handling of the braking rotor and caliper should be done in such a way as to avoid deformation of the rotor and scratching or nicking of
the brake linings.If inspection reveals that the square sectioned caliper piston seal is worn or damaged, it should be replaced immediately. During
removal and installation of a wheel and tire assembly, use care not to strike the caliper.
NOTE: Before vehicle is moved after any brake service work, pump the brake pedal several times to insure the vehicle has a firm brake pedal.
PROCEDURE
1. Raise vehicle on jackstands or centered on a hoist.
2. Remove rear wheel and tire assemblies from vehicle.
3. Remove the 2 caliper assembly to adapter guide pin bolts.
4. Remove caliper assembly from adapter and rotor by first rotating top of caliper assembly away from adapter, and then lifting caliper assembly off
lower machined abutment on adapter.
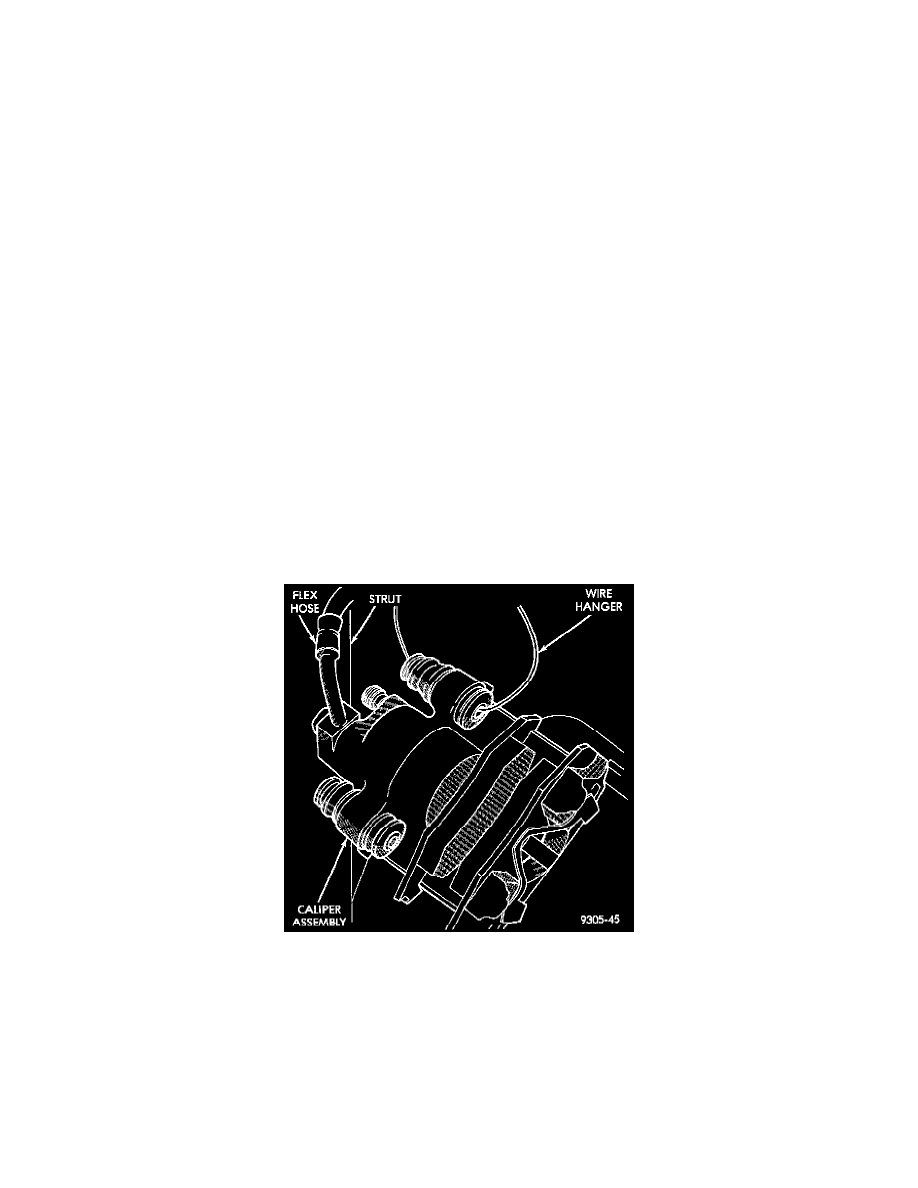
Storing Caliper
5. Support caliper assembly firmly from rear strut to prevent weight of caliper from damaging the flexible brake hose.
6. Remove rear rotor from hub/bearing assembly. Then inspect drum-in-hat parking brake shoes and parking brake braking surface on rotor for any
signs of excessive wear or damage. Replace parking brake shoes if required.