
Neon L4-2.0L VIN C (1997)
Brake Proportioning/Combination Valve: Service and Repair
Without Antilock Brakes
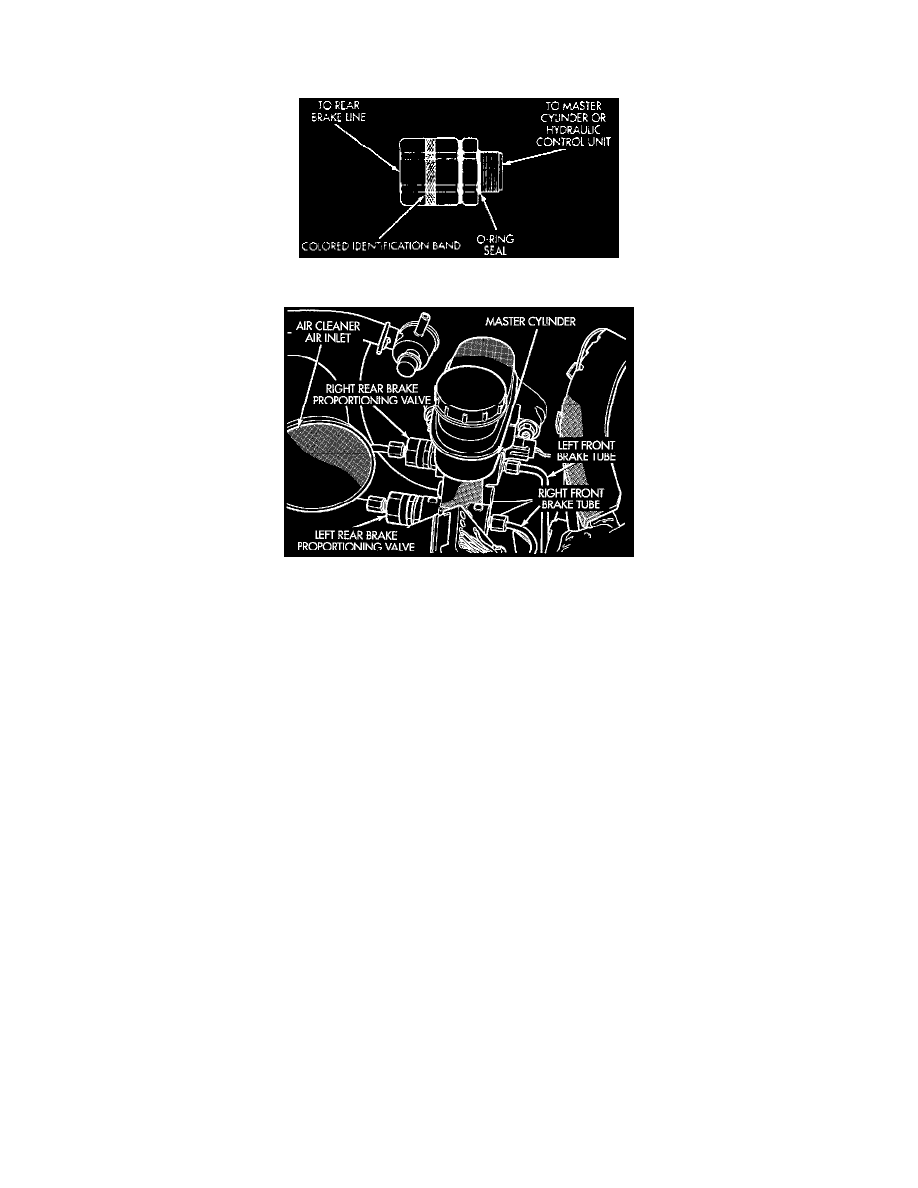
Fig 35 Type 3 Proportioning Valve Identification
Non-ABS Proportioning Valve Locations On Master Cylinder
CAUTION: Proportioning valves should never be disassembled.
GENERAL INFORMATION
There are two proportioning valve assemblies used in each vehicle. Due to different thread sizes, each proportioning valve has a different part
number. During any service procedures identify the proportioning valve assemblies by supplier part number and or the color identification band. If
premature rear wheel skid occurs on hard brake application, it could be an indication that a malfunction has occurred with one of the proportioning
valves. One proportioning valve controls the right rear brake, and the other proportioning valve controls the left rear brake. Therefore, a road test
to determine which rear brake slides first is essential. If a malfunctioning proportioning valve is suspected on a vehicle. Refer to Testing and
Inspection.
REMOVE
1. Disconnect brake tube from proportioning valve requiring removal from the master cylinder.
2. Remove proportioning valve from the master cylinder requiring replacement.
INSTALL
1. Wet 0-ring seal on new proportioning valve using clean fresh brake fluid.
2. Install proportioning valve in master cylinder and hand tighten until proportioning valve and 0-ring seal is fully seated in master cylinder. Torque
proportioning valve to 40 Nm (30 ft. lbs.).
3. Install brake tube on proportioning valve. tighten tube nut to 17 Nm (145 in lbs.) torque.
4. Bleed the affected brake line.