
Neon L4-2.0L VIN C (1997)
Hydraulic Control Unit: Service and Repair
Relay Box Replacement
GENERAL INFORMATION
The System Relay and Pump/Motor Relay are both serviced together as an assembly with the relay box. The relay box is mounted directly to the
Hydraulic Control Unit (HCU). To remove the relay box from the HCU, the HCU requires removal from the vehicle. This is to allow visual access
of the relay box to HCU electrical connection. Visual access to this connection is necessary to be sure connection is correctly made when installing
relay box on the HCU.
REMOVE
1.
Disconnect negative (ground) cable from the battery and isolate the cable.
2.
Remove the HCU from the vehicle. Refer to Hydraulic Control Unit Removal, for the required HCU removal procedure.
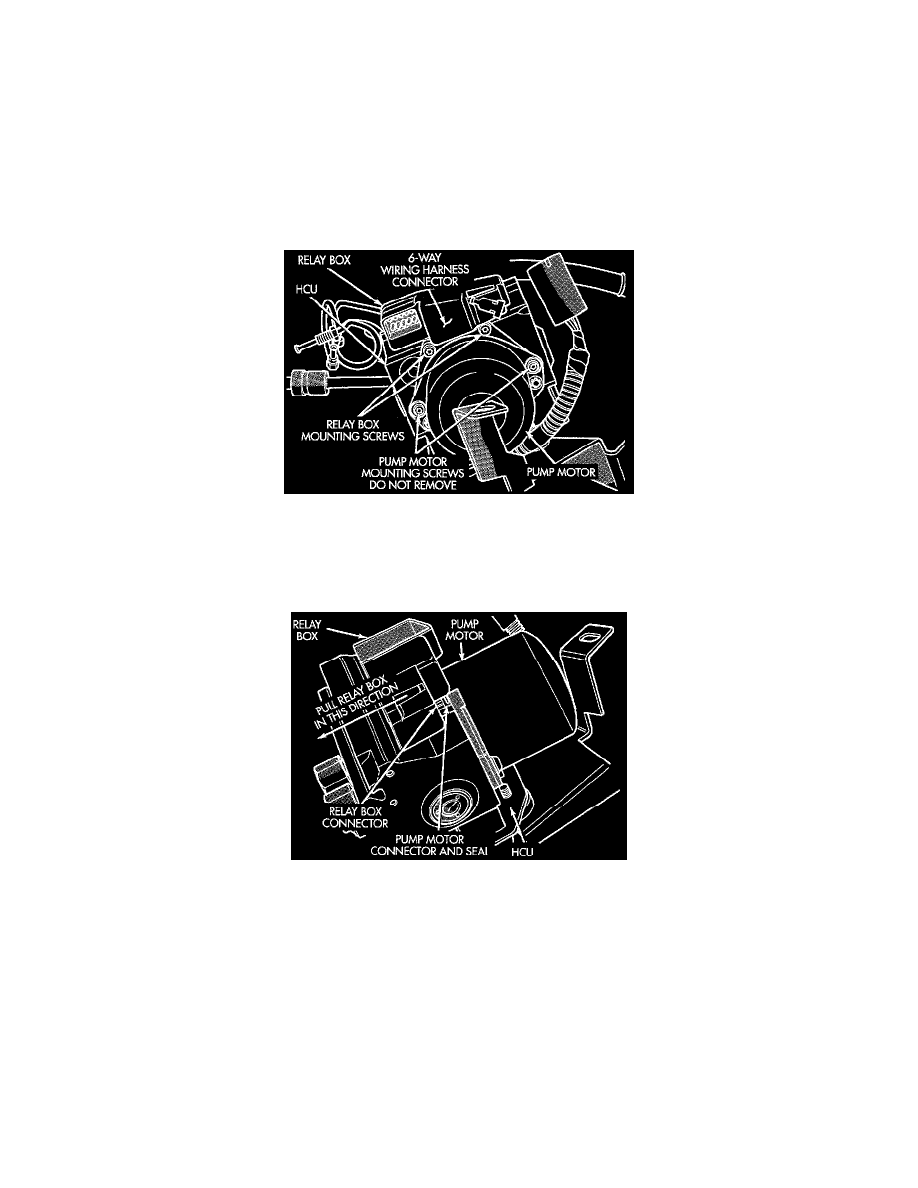
Relay Box To HCU Mounting Screws
3.
Unclip the 6 way wiring harness connector from the relay box.
4.
Remove the 2 screws attaching the relay box assembly to the HCU. Remove only the 2 screws mounting the relay box to the HCU. Do not
remove the pump motor mounting screws.
Relay Box To HCU Electrical Connection
5.
Grasp relay box. Without twisting or rocking, pull relay box away from pump motor housing until connector on relay box unplugs from the
pump motor terminal. This is a tight connection, relay box will require a good amount of force to unplug from pump motor.
6.
Remove relay box from HCU.
INSTALL