
Neon L4-2.0L VIN C (1997)
Expansion Valve: Service and Repair
WARNING: The refrigeration system must be completely empty before proceeding with this operation.
REMOVAL
1. Remove the boot-type wire connector from the pressure cut-off switch.
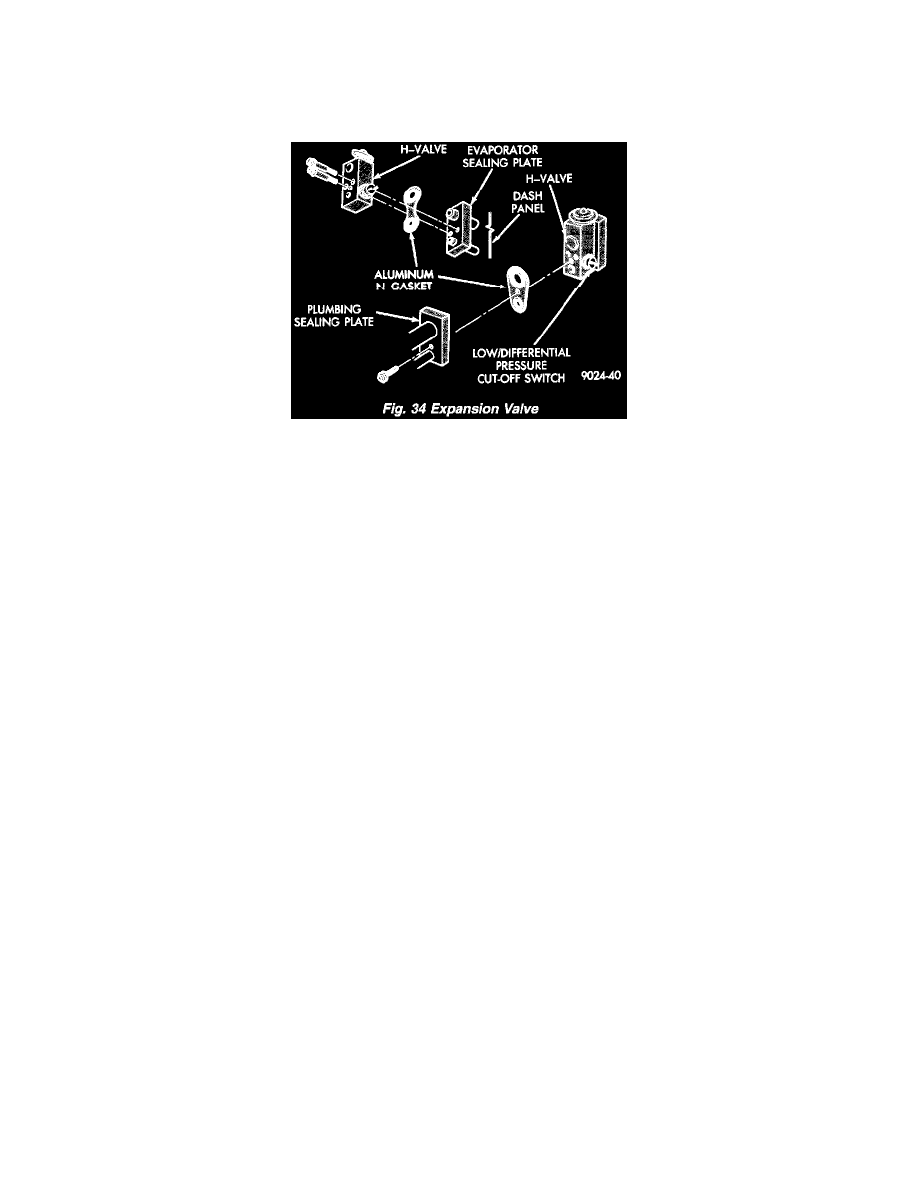
Expansion Valve
2. Remove the center bolt of refrigerant line plumbing sealing plate.
3. Carefully pull the refrigerant line-sealing plate assembly from the expansion valve towards front of vehicle. Do not scratch the expansion valve
sealing surfaces with pilot tubes.
4. Cover the openings on A/C line-sealing plate assembly to prevent contamination.
5. Remove two screws securing the expansion valve to the evaporator sealing plate.
6. Carefully remove valve.
INSTALLATION
1. Remove and replace the aluminum gasket on the evaporator sealing plate.
2. Carefully hold the expansion valve to the evaporator sealing plate so not to scratch the sealing surface. Install two screws and tighten to 8 to 14
N.m (70 to 130 in. lbs.).
3. Remove and replace the aluminum gasket on the refrigerant line- sealing plate assembly
4. Carefully hold the refrigerant line-sealing plate assembly to the expansion valve. Install bolt and tighten to 20 to 26 N.m (170 to 230 in. lbs.).
5. Connect wires to low pressure cut-off switch.
6. Evacuate and recharge system.
7. After expansion valve is installed, system is charged, and leaks have been checked, repeat A/C performance check.