
Neon L4-2.0L VIN C (1997)
8.
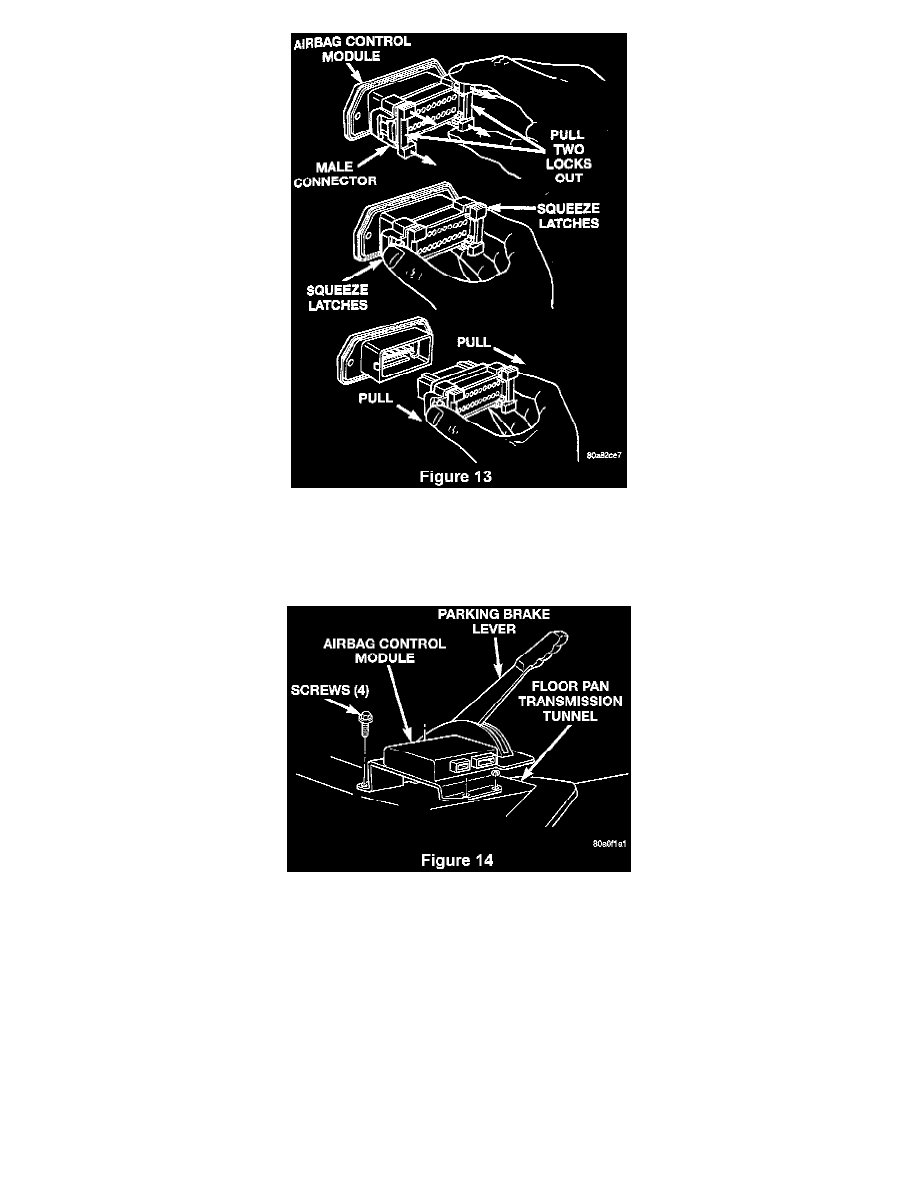
Disconnect the ACM wiring connector (Figure 13):
A.
Pull the two white lock bars out about 1/8" (3 mm) on each side of the connector.
B.
Squeeze the two (2) connector latch tabs between your thumb and forefinger while pulling the connector out of the module.
9.
Remove the four (4) screws that secure the ACM mounting bracket to the floor transmission tunnel (Figure 14).
10.
Remove the ACM and bracket assembly.
11.
Install the provided ACM and bracket assembly with the arrow on the module pointing forward.
12.
Tighten the four (4) ACM attaching screws to 95 in-lbs (10.7 N.m).
13.
Connect the wiring connector to the ACM. Make sure it is fully seated and the lock bars are engaged.
14.
Install the console and secure it with the attaching screws (Figure 12).
15.
Install the lamp socket into the transfer case shift bezel and then install the bezel into the console (Figure 12).
16.
Install the lamp socket into the transmission shift indicator bezel and then install the bezel into the console (Figure 12).