
Neon L4-2.0L VIN C (1997)
5. Remove two bolts attaching starter to transmission housing.
6. Remove starter/starter solenoid assembly from transmission housing. Position the starter to gain access to the wiring connectors.
Wire Connection
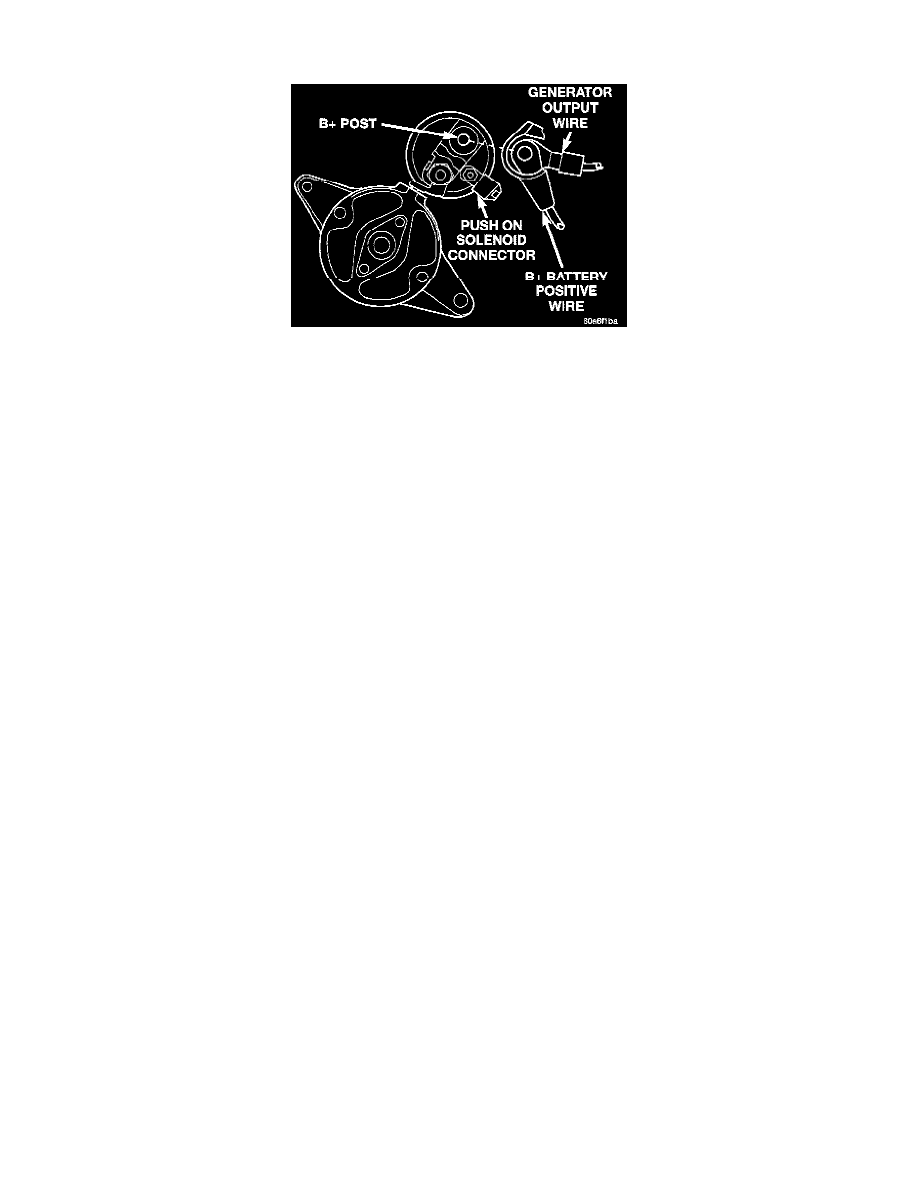
7. Remove the battery positive cable nut and remove the battery positive and generator output wire from the starter.
8. Disconnect push-on solenoid connector.
9. Position the starter vertically such that the pinion end faces downward.
10.
Remove the starter through the bottom of the vehicle. Move aside A/C plumbing as necessary.
INSTALL
1. Clean corrosion/dirt from the cable and wire terminals before installing wiring to the solenoid.
2. Connect the battery positive and generator output wire to the starter solenoid post.
CAUTION: It is critical that the generator output terminal be connected to the battery positive terminal of the starter solenoid, for proper
operation of the charging and cranking systems.
3. Connect the push-on solenoid connector.
4. Position the starter face into transmission housing. Support starter in pilot and start the top bolt.
5. Attach ground cable to lower mounting bolt and start bolt.
6. Ensure the proper starter alignment before tightening the starter mounting bolts to 54 N.m (40 ft. lbs.) torque.
7. Vehicles equipped with A/C:
a. Using a floor jack or jack stand, raise the engine and transmission assembly to the original position.
b. Install the front engine mount bolt through the insulator and front crossmember mounting bracket.
c. Tighten bolt to 54 N.m (40 ft. lbs.) torque.
8. Lower vehicle and connect battery cables.