
Neon L4-2.0L VIN C (1997)
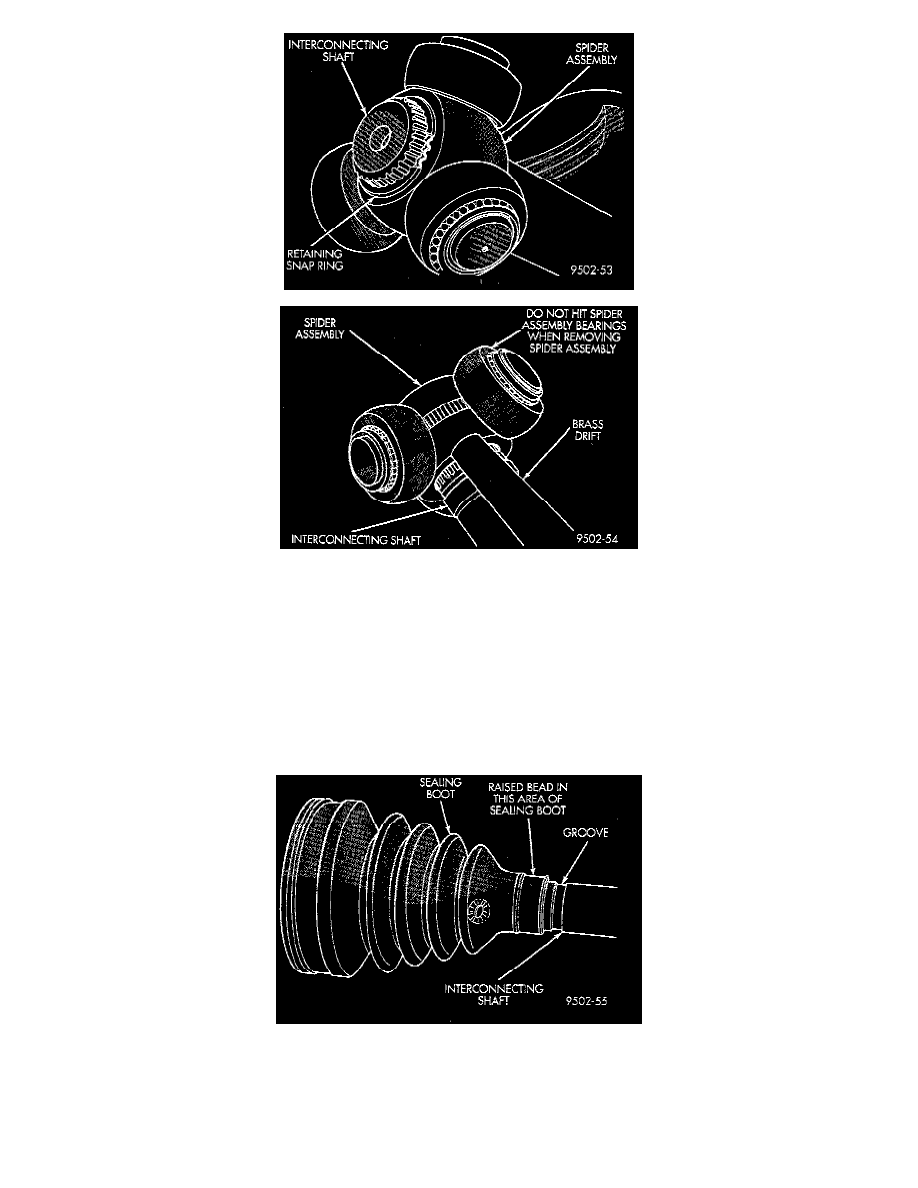
4. Remove snap ring that retains spider assembly to interconnecting shaft. Remove the spider assembly from interconnecting shaft. If spider assembly
will not come off interconnecting shaft by hand, it can be removed by tapping spider assembly with a brass drift. Do not hit the outer tripod bearings
in an attempt to remove spider assembly from interconnecting shaft.
5. Slide sealing boot off interconnecting shaft.
6. Thoroughly clean and inspect spider assembly, tripod joint housing, and interconnecting shaft for any signs of excessive wear. If any parts show signs
of excessive wear, the driveshaft assembly will require replacement. Component parts of these driveshaft assemblies are not serviceable.
Installation
NOTE: The inner tripod joint sealing boots are made from two different types of material. High-temperature applications use silicone rubber whereas
standard temperature applications use Hytrel plastic. The silicone sealing boots are soft and pliable. The Hytrel sealing boots are stiff and rigid. The
replacement sealing boot MUST BE the same type of material as the sealing boot that was removed.
1. Slide inner tripod joint seal boot retaining clamp, onto interconnecting shaft. Then slide the replacement inner tripod joint sealing boot onto
interconnecting shaft. Inner tripod joint seal boot MUST be positioned on interconnecting shaft, so the raised bead on the inside of the seal boot is
in groove on interconnecting shaft.