
PB 150 V8-318 5.2L VIN T 2-BBL (1983)
For additional information see Fundamentals and Basics. See: Fundamentals and Basics
NOTE: Examine linings for wear, damage or fluid contamination if linings are satisfactory they may be reused.
-
If not usable both front brakes must be relined with new lining.
-
If old linings are to be reused, be sure linings are installed in their original position.
1. Slide new outboard shoe and lining assembly in recess of caliper.
CAUTION: No free play between brake shoe flanges and caliper fingers should exist (which might cause brake shoe rattle).
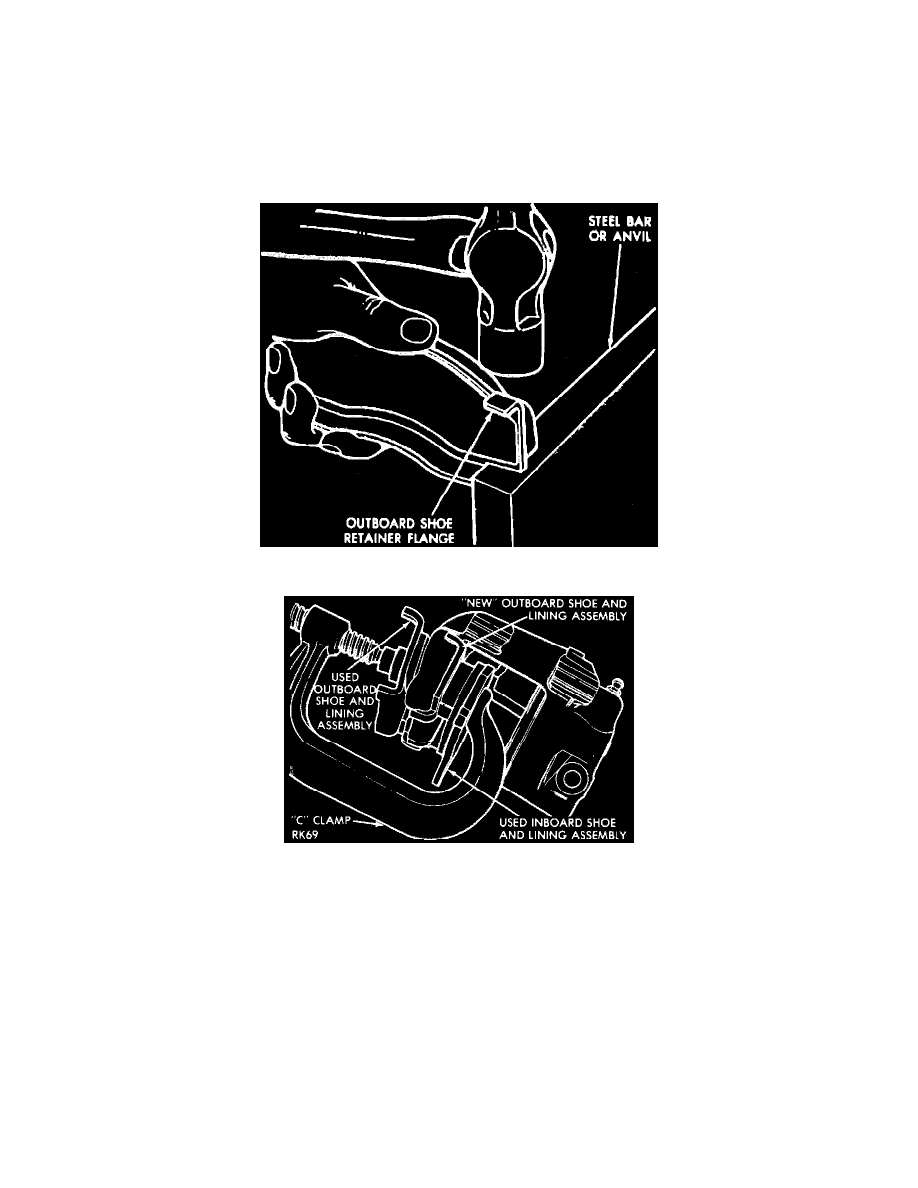
Fig. 7 Bending Outboard Pad Retaining Flange
Fig 12 Attaching Shoe To Caliper Fingers With C-clamp
NOTE: If free play is evident by vertical shoe movement after installation, remove shoe from caliper and bend flanges to create slight
interference fit to eliminate all vertical free play when shoe is installed.
-
Install shoe after above modification, if necessary, by snapping shoe into place with fingers or with light "C" clamp, protect new lining from
damage or contamination by using old pads over new lining and across caliper fingers.