
PB 150 V8-318 5.2L VIN T 2-BBL (1983)
Brake Adjuster: Component Tests and General Diagnostics
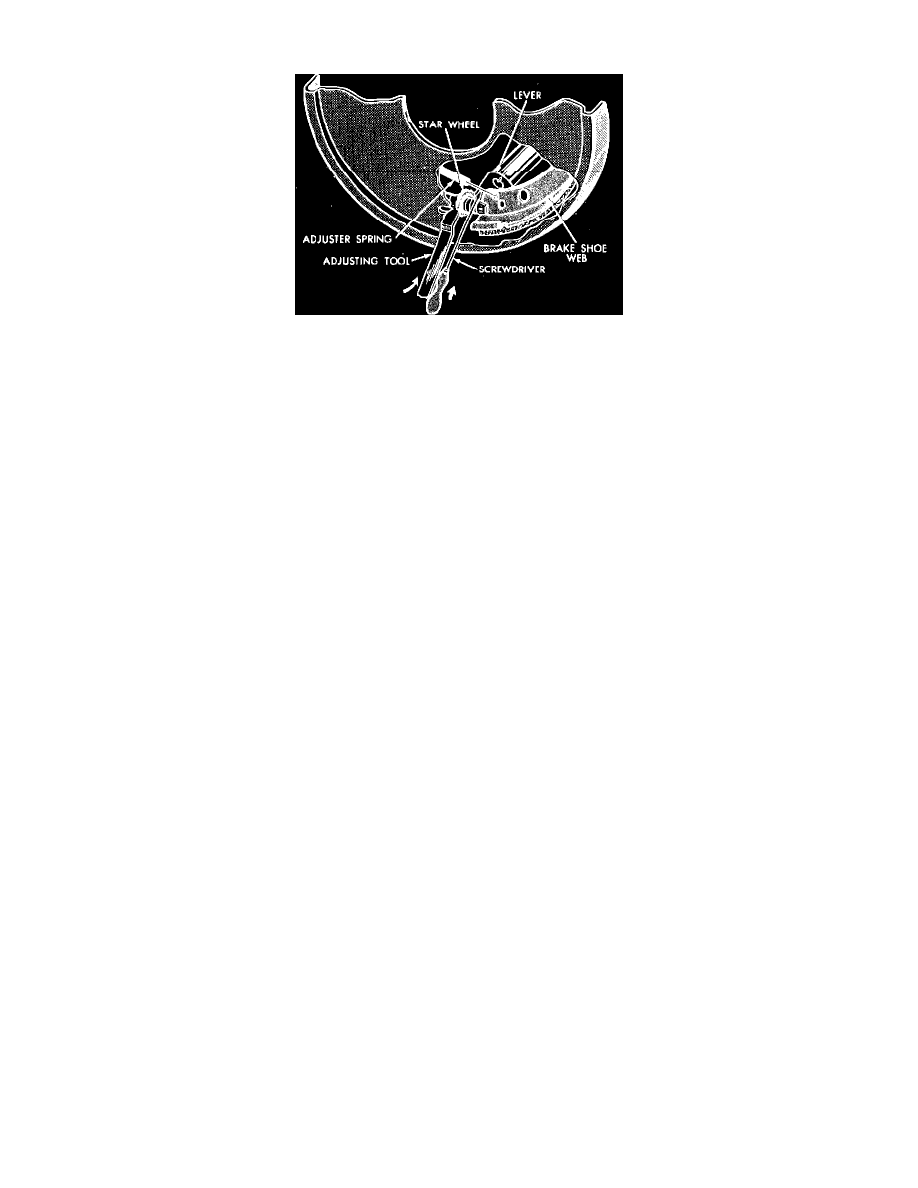
Fig. 6 Release type brake adjuster
1. Place the vehicle on a hoist, with a helper in the driver's seat to apply the brakes.
2. Remove the access plug from the rear adjustment slot in each brake support plate to provide access to the adjuster star wheel.
NOTE: It will be necessary to hold the adjuster lever away from the star wheel to permit the following adjustment.
3. Back the star wheel off approximately 30 notches.
-
This eliminates the possibility of maximum adjustment, whereby the adjuster does not operate because the closest possible adjustment has been
reached.
4. Spin the wheel and brake drum in the reverse direction and -- with greater than normal force -- apply the brakes suddenly.
-
This sudden application of force will cause the secondary brake shoe to leave the anchor. The wrap up effect will move the secondary shoe,
and the cable will pull the adjuster lever up.
-
Upon application of the brake pedal, the lever should move upward, turning the star wheel.
-
Thus, a definite rotation of the adjuster star wheel can be observed if the automatic adjuster is working properly.
-
If one or more adjusters do not function properly, the respective drum must be removed for adjuster servicing.