
PB 150 V8-318 5.2L VIN T 2-BBL (1983)
Brake Shoe: Service and Repair
Cleaning and Inspection
Brake Linings
For additional information see Notes, Warnings, and Hints.
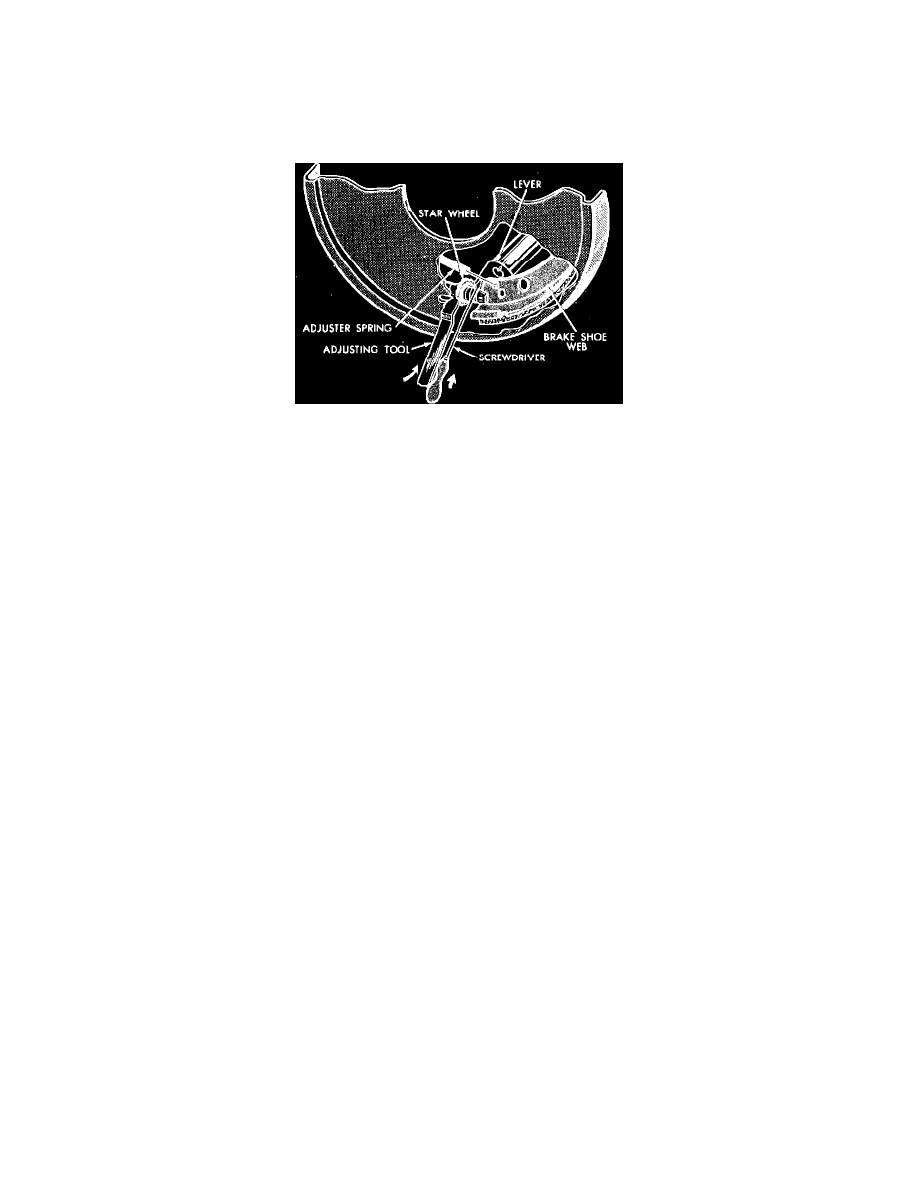
Fig. 6 Release type brake adjuster
1. Remove rear plug from brake adjusting access hole.
2. Insert a thin screwdriver into brake adjusting hole and hold adjusting lever away from notches of adjusting screw.
3. Insert Tool C-3784 or equivalent into brake adjusting hole and engage notches of brake adjusting screw. Release brake by prying down with
adjusting tool.
4. Remove rear wheel and clips from wheel studs that holds drum on axle. Discard clips. Remove drums.
5. Inspect brake lining for wear, shoe alignment, or contamination from grease or brake fluid.
Brake Linings & Springs
Inspect brake linings for: Excessive wear, physical damage, and oil, grease or brake fluid contamination.
-
If any of the above conditions exists, brake linings should be replaced.
WARNING: Do not attempt to replace only one set of brake shoes; they should be replaced as an axle set only to maintain equal braking
forces.
Inspect brake shoe webbing, hold-down and return springs for: Signs of overheating indicated by a slight blue color.
-
If any component exhibits signs of overheating, replace hold-down and return springs with new ones.
CAUTION: Overheated springs lose their pull and could cause brake linings to wear out prematurely.
Inspect hold down retainers, springs and pins for: Sags, bends and external damage.
-
Replace as necessary.
Inspect hold-down retainers and pins for: Bends, rust and corrosion.
-
If any of the above conditions exist, replace retainers and pins.