
PB 150 V8-318 5.2L VIN T 2-BBL (1983)
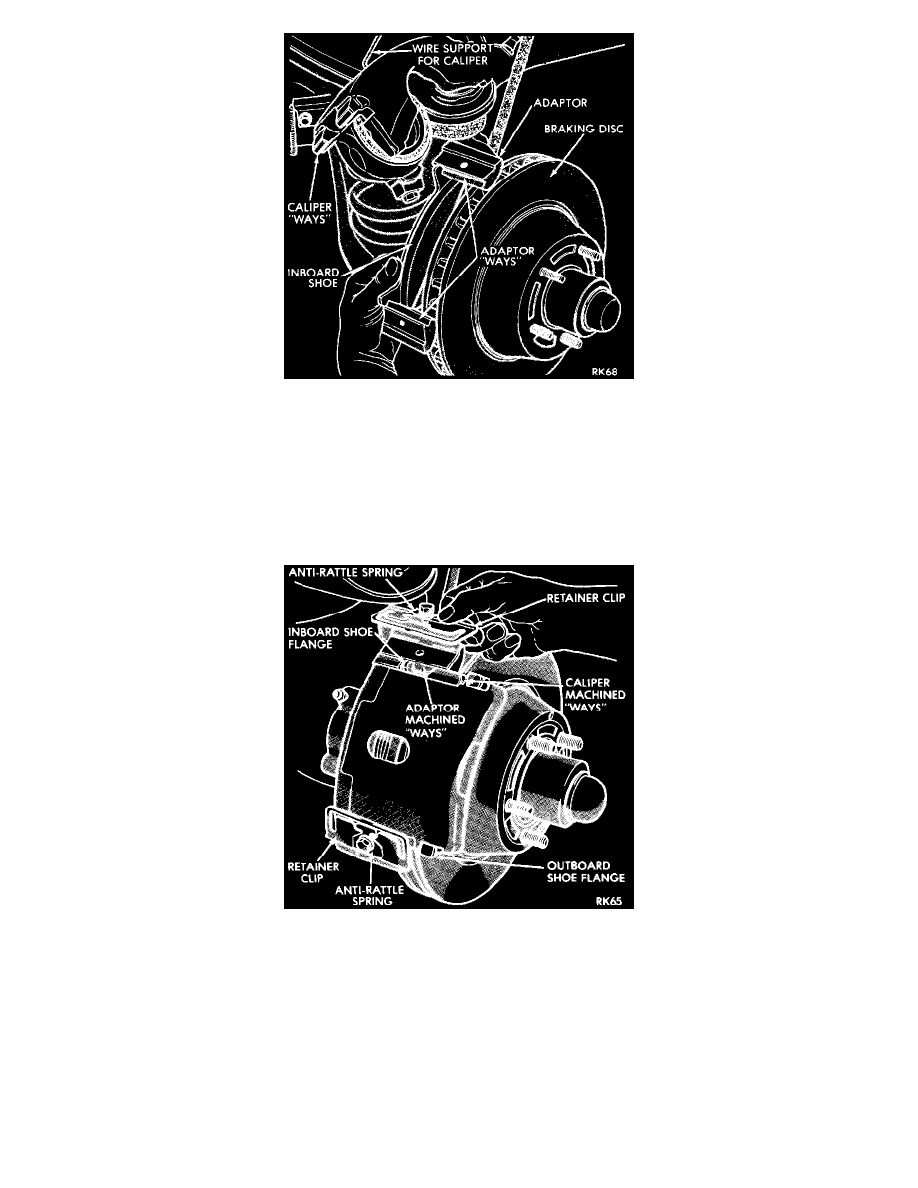
Fig 8 Removing Or Installing Shoe
2. Position inboard shoe in position on adaptor with shoe "flanges" in the adaptor "ways".
3. Slowly slide caliper assembly into position in adaptor and over disc.
-
Align caliper on machined ways of adaptor.
-
Be careful not to pull the dust boot from its groove as the piston and boot slide over the inboard shoe.
4. Install anti-rattle springs and retaining clips and torque retaining screws to 200 inch-pounds.
Fig 3 Adaptor And Caliper Machined "Ways" And Caliper Retention
NOTE: The inboard shoe anti-rattle spring must always be installed on top of the retainer spring plate.
5. With bleeder screw open, allow caliper to "Gravity" fill with brake fluid, then close bleeder screw. (Be sure all air bubbles have escaped; replenish
brake fluid in master cylinder. Bleed brakes.
6. Pump brake pedal several times until a firm pedal has been obtained.
7. After bleeding caliper, check for fluid tightness under maximum pedal pressures. (Recheck master cylinder reservoir level).
8. Install wheel and tire assembly.
9. Remove jackstands or lower hoist.
10. Road test vehicle and make several stops to wear off any foreign material on the brakes and to seat the linings.
-
The vehicle may pull to one side or the other if this is not done.