
PB 150 V8-318 5.2L VIN T 2-BBL (1983)
If spool valve is found to be defective, the valve assembly must be replaced.
9. Remove power piston seal.
Fig. 5 Removing accumulator
Fig. 6 Removing accumulator valves
Fig. 7 Accumulator valves
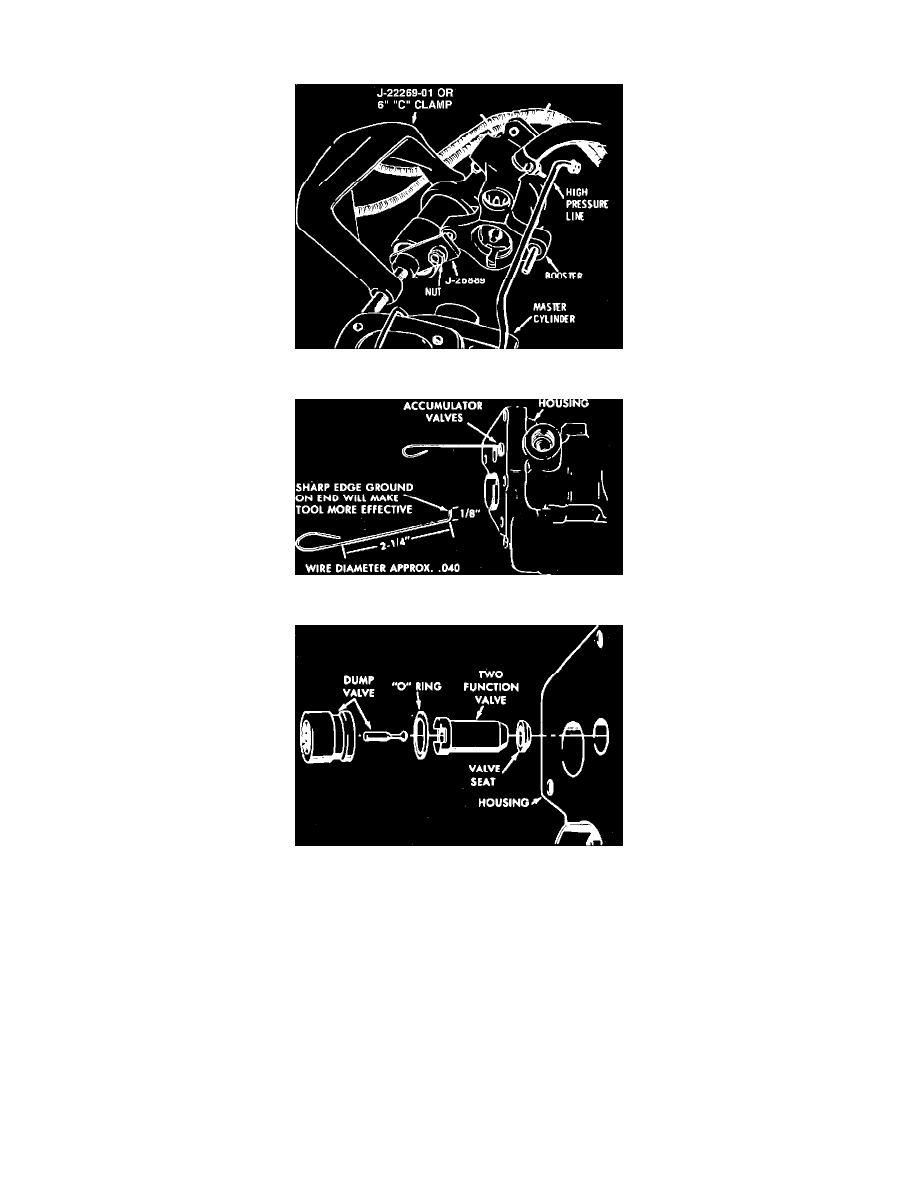
10. Install accumulator retaining cap tool No. J-26889 over master cylinder stud and install nut as shown.
11. Depress accumulator, using a suitable C-clamp, then insert a punch into hole in housing and remove retaining ring with a suitable screwdriver.
12. Slowly back off C-clamp until tension on the accumulator is released, then remove accumulator and O-ring.
13. If accumulator valve is to be removed, fabricate tool from 0.040 inch diameter wire as shown. Remove dump valve by catching tool under pin
guide near center of valve, then remove check valve assembly and seat.
14. Remove hose fitting O-ring, if necessary.
15. Remove spool plug retaining ring, then the spool plug and O-ring.
Assembly