
PB 150 V8-318 5.2L VIN T 2-BBL (1983)
heated rear window defroster.
Reconnect battery. Start the engine, and inspect the entire system for fuel leaks and proper wire and hose routing.
11.
Reinstall engine cover.
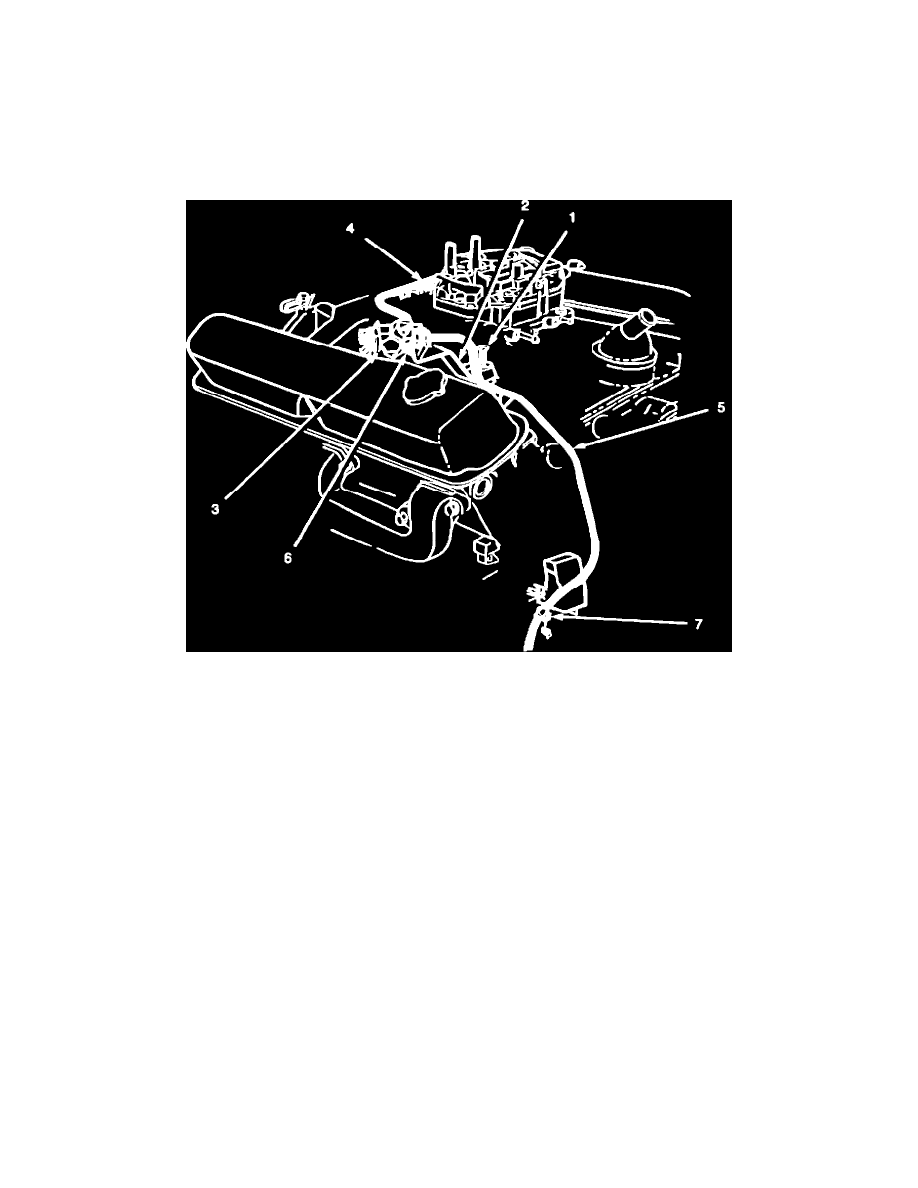
F.1981-1984 Models Equipped With Carter Thermoquad 4BBL Carburetor Only - Fuel Pressure
Regulator Package Installation (Pn 4397
FIGURE 5FUEL PRESSURE REGULATOR INSTALLATION
1.
Remove the original carburetor inlet fuel tube and fuel tube clip (attached to boss on intake manifold) and discard.
2.
Fasten the bracket, PN 4418010, to the fuel pressure regulator, PN 4418009, using the two (2) self-tapping screws supplied, PN 6033066
(Figure 5).
NOTE:
BE SURE THAT OUTLET SIDE OF REGULATOR FACES THE CARBURETOR INLET.
3.
At the tapped boss on the right side of the intake manifold, install bracket and fuel pressure regulator assembly using the screw and washer,
PN 6O22254, (Figure 5).
NOTE:
IF THERE EXISTS AN A/C ALTERNATOR BRACKET SUPPORT STRUT IN THIS LOCATION, THEN LOOSEN THE
OPPOSITE END OF THE STRUT FIRST. REMOVE AND DISCARD THE SCREW AND WASHER HOLDING THE
STRUT TO THE MANIFOLD. SLIDE REGULATOR BRACKET UNDER THE SUPPORT STRUT, AND SECURE WITH
SUPPLIED SCREW AND WASHER, PN 6O22254. THEN TIGHTEN THE OPPOSITE END OF THE STRUT.
CAUTION:
BE EXTREMELY CAREFUL NOT TO DAMAGE OR PINCH ANY HARNESS IN THE AREA.