
PB 150 V8-318 5.2L VIN T 2-BBL (1983)
construction. The maintenance free battery has a strong ability to withstand damaging effects of overcharge due to the heavy duty plates and premium
separators.
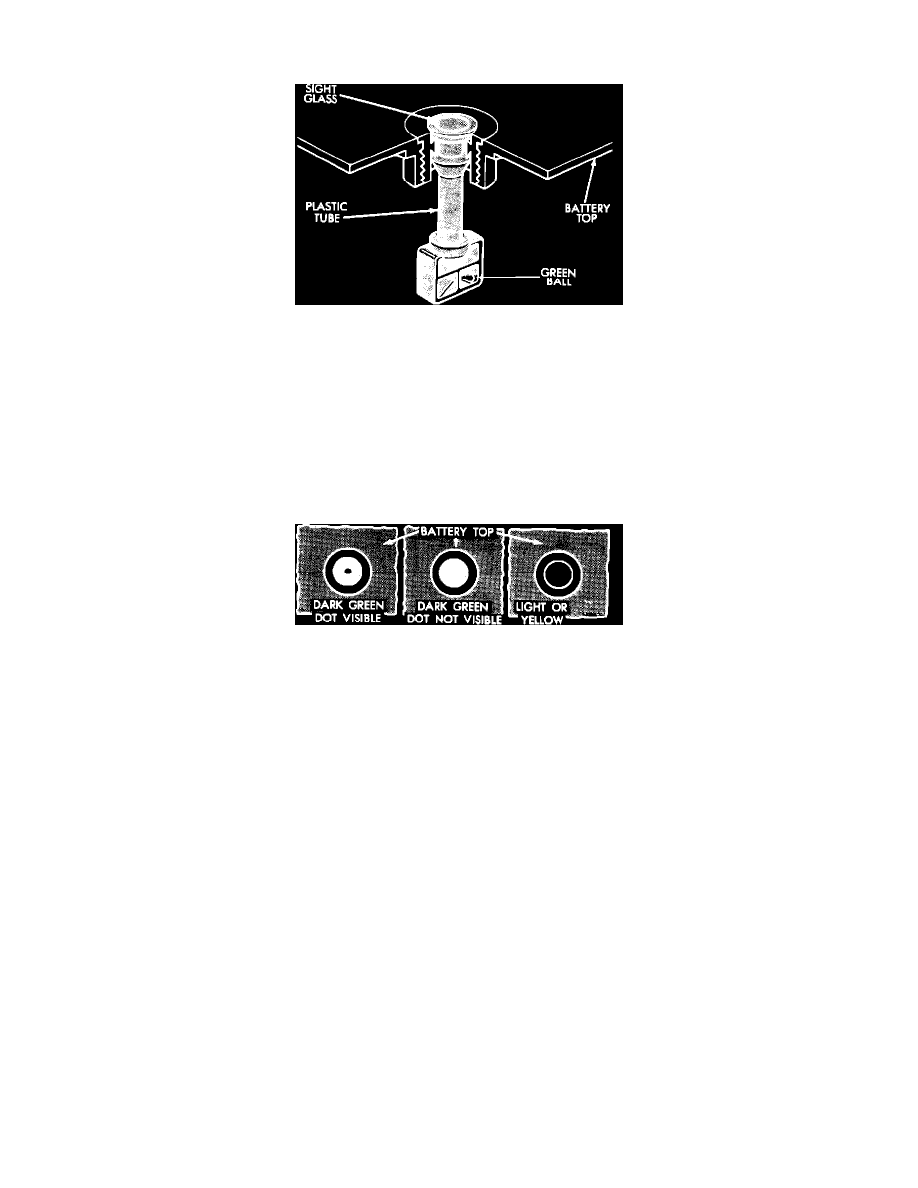
FIGURE 1
BUILT-IN TEST INDICATOR (HYDROMETER)
The test indicator is a built-in hydrometer on top of battery case and provides visual information for battery testing (Figure 1). The test indicator is to be
used with accepted diagnostic procedures only. It should not be used to determine if the battery is good or bad, or charged or discharged.
It is important when observing the test indicator that the battery be relatively level and have a clean top to see the correct indication. A light may be
required to view the indicator.
WARNING:
DO NOT USE OPEN FLAME
FIGURE 2
Under normal operation conditions two of three indications can be observed (Figure 2):
1.
Green dot visible in viewing port.
Any green appearance is interpreted as a "green dot" and the battery is adequately charged for testing. On rare occasions following prolonged
cranking, the green dot may still be visible. Should this occur, charge battery as described in "Battery Charging Procedures."
2.
Dark or green dot not visible in viewing port.
If there is a cranking complaint, battery should be tested as described in "Load Test" section and the vehicles charging system should be checked as
covered in the service manual.
WARNING:
ON RARE OCCASIONS TEST INDICATOR MAY TURN LIGHT YELLOW. IN THIS CASE, THE VEHICLE'S CHARGING
SYSTEM SHOULD BE CHECKED AS COVERED IN THE APPLICABLE SECTION OF THE SERVICE MANUAL. ALTHOUGH
THE BATTERY MAY BE CAPABLE OF FURTHER SERVICE, REPLACE THE BATTERY IF A CRANKING COMPLAINT HAS
BEEN REPORTED. DO NOT CHARGE, TEST, OR JUMP START.
Battery Inspection, Charging Procedure & Recommendations & Test Procedures Information
BATTERY VISUAL INSPECTION
1.
Make sure ignition switch is in "Off" position and all battery feed accessories are off.
2.
Disconnect battery cables at battery Negative first.
3.
Remove battery hold-down clamp and remove battery from vehicle.
WARNING:
CARE SHOULD BE TAKEN, IN THE EVENT BATTERY CASE IS CRACKED OR LEAKING, TO PROTECT HANDS FROM THE