
PB 150 V8-318 5.2L VIN T 2-BBL (1983)
Voltage Regulator: Testing and Inspection
Chrysler Alternator & Regulator
Voltage Regulator Test
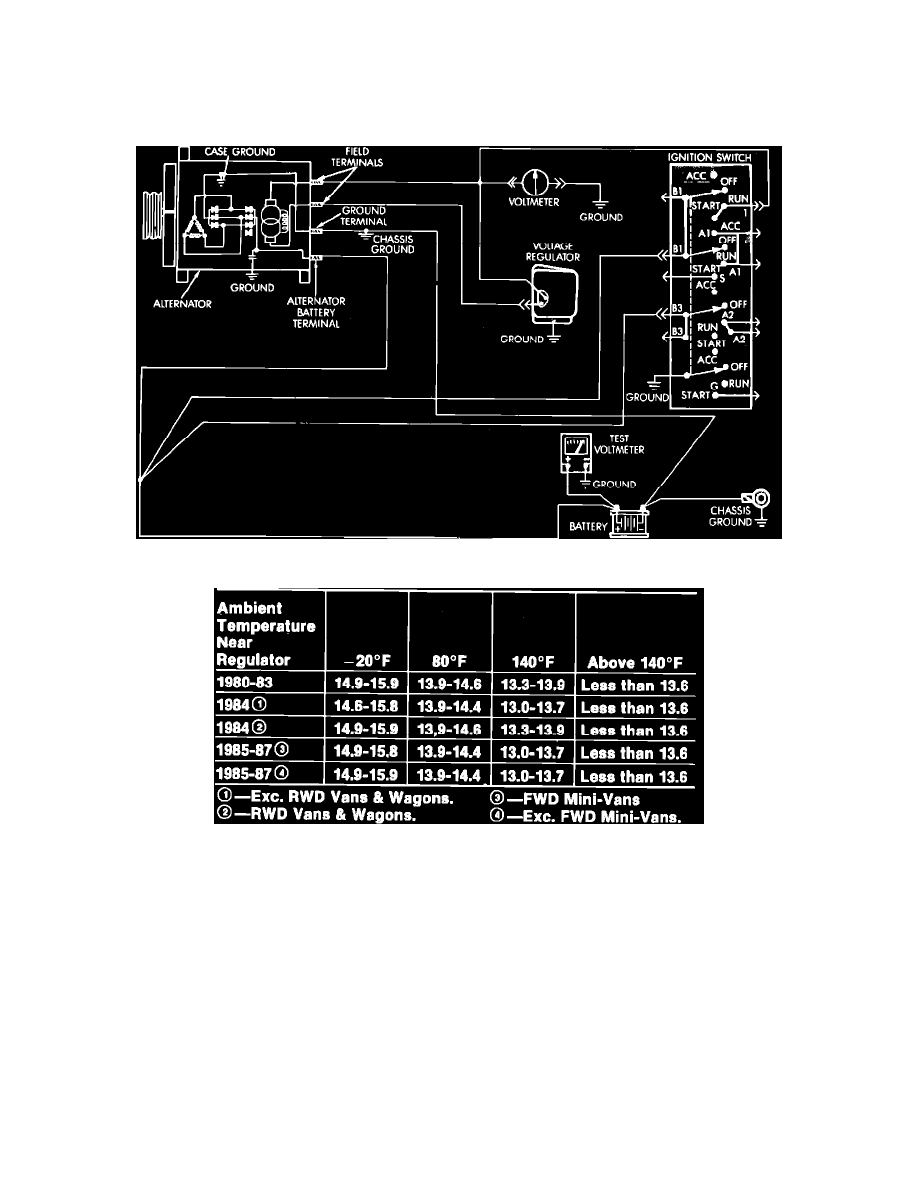
Fig. 3 Electronic voltage regulator test (Typical)
Fig. 4 Regulator test specification chart
TESTING
Battery must be fully charged for test to be accurate.
1.
Clean battery terminals, then connect positive lead of a suitable voltmeter to battery positive post and the negative lead to a suitable ground.
2.
Connect an engine tachometer, then start and operate engine at 1250 RPM with all lights and accessories in the "off" position.
3.
Note voltmeter readings, then refer to voltage chart. An ammeter reading registering an immediate charge, then gradually returning to normal, is
normal. The duration the ammeter remains positioned to the right depends on cranking time.
TEST RESULTS
1.
If voltage is fluctuating or below limits, proceed as follows:
a. Ensure voltage regulator has a proper ground through regulator case, mounting screws and chassis.
b. Place ignition switch in "off" position, then disconnect voltage regulator connector and inspect for a possible open circuit.
c. Place ignition switch in "on" position. Do not start engine or distort terminals with voltmeter probe.
d. Ensure battery voltage exists at blue and green leads at voltage regulator wiring harness terminals, then place ignition switch in "off" position.
If steps a through d are satisfactory, replace voltage regulator.
2.
If voltage is above limits, proceed as follows: