
PB 150 V8-318 5.2L VIN T 2-BBL (1983)
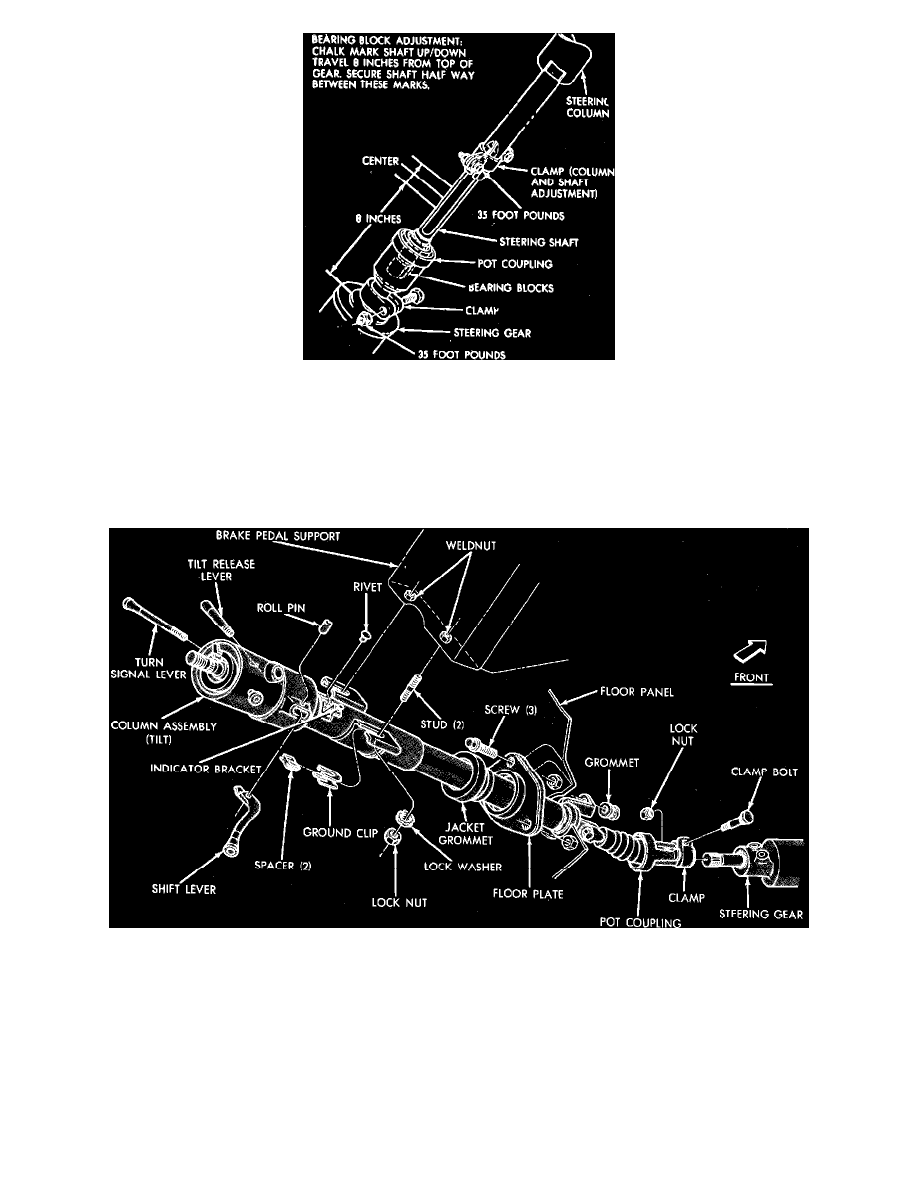
Fig. 2 Steering column coupling & shaft adjustment. Motor Home
Tilt Column Release Pedal Adjustment
1. Loosen pedal assembly locknut at adjustable mounting bracket assembly.
2. Move column adjusting assembly foot pad rearward, toward the driver, 0.040 inch from center line of rear column adjustable mounting bracket
bolt. While holding pedal in this position, tighten nut until column is locked securely.
3. Test operation of column adjusting pedal by depressing and releasing several times. If correctly adjusted, the pedal will return to the approximate
position shown.
Fig. 3 Steering column installation. Vans & Wagons exc. front wheel drive
VANS & WAGONS EXCEPT FRONT WHEEL DRIVE
Removal
1. Disconnect battery ground cable.
2. On vehicles with column shift, disconnect link rod(s) at lower end of column by prying out of grommet in shift lever. New grommets should be
used whenever rod(s) is (are) disconnected from lever.
3. Remove coupling roll pin at lower end of column, then the column jacket electrical connectors.
4. Remove steering wheel using a suitable puller. Do not attempt to remove steering wheel using a hammer as damage to the steering column
and shaft will result.
5. Remove turn signal lever.
6. Remove floor plate to floor pan retaining screws.