
PB 150 V8-318 5.2L VIN T 2-BBL (1983)
7. Remove cluster bezel and panel lower reinforcement to expose steering column bracket.
8. Disconnect automatic transmission shift indicator pointer cable from shift housing.
9. Remove steering column bracket to instrument panel support nuts.
10. Disconnect flex coupling from steering gear worm shaft and remove steering column.
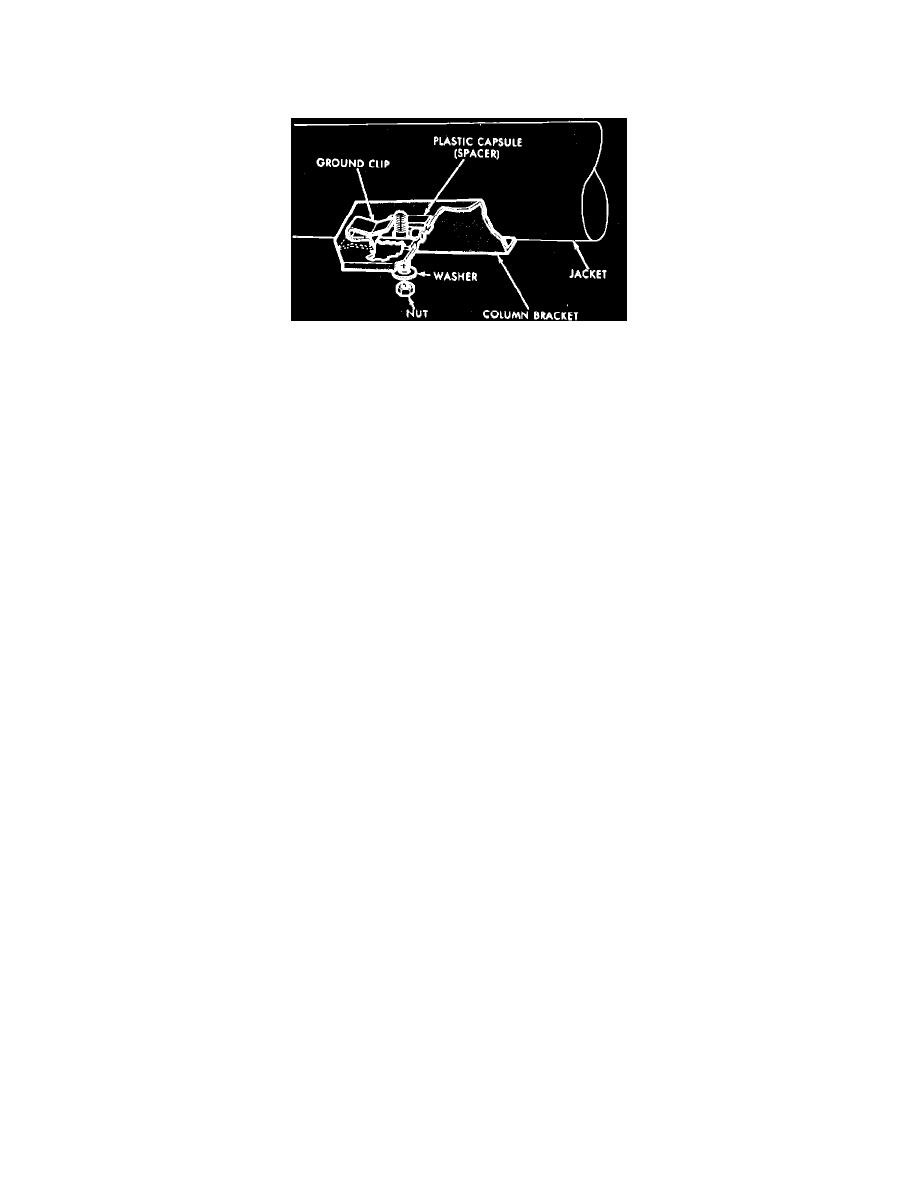
Fig. 4 Ground clip & plastic spacer installation
Installation
1. Install ground clip on left capsule slot, then making sure that both capsules are properly installed in bracket slots, insert column assembly through
floor pan opening.
2. With wheels in a straight ahead position and master splines on worm shaft and coupling aligned, engage coupling with worm shaft and install roll
pin. Do not apply end loads to steering shaft.
3. While holding column assembly over the mounting studs, install but do not tighten the two stud nuts.
4. After making sure that the two capsules, are fully seated in the column support bracket slots, torque the two stud nuts to 110 inch lbs.
5. Place floor plate over floor pan opening, then center it around column and install and tighten the retaining bolts
6. Install steering wheel and retaining nut. Torque nut to 60 ft lb on 1980 - 81 vehicles, or 45 ft lb on 1982 - 87 vehicles. Do not drive wheel onto
shaft, use nut to draw it down.
7. Install horn switch components and connect horn switch wire.
8. Connect electrical connector at steering column jacket and battery ground cable. Check operation of horns and lights.
9. Connect shift linkage to shift lever by snapping rod into grommet using pliers. Adjust shift linkage. A new grommet should be used when rod is
disconnected from lever.
10. On models with a column shift automatic transmission, connect gearshift indicator pointer cable to bracket. Slowly move gearshift lever from Low
position to Park position, pausing at each selector position. If necessary, bend indicator bracket to properly align pointer.
11. Install panel lower reinforcement and cluster bezel.
Disassembly