
Prowler V6-3.5L VIN G (1999)
Left Engine Mount Removal/Installation
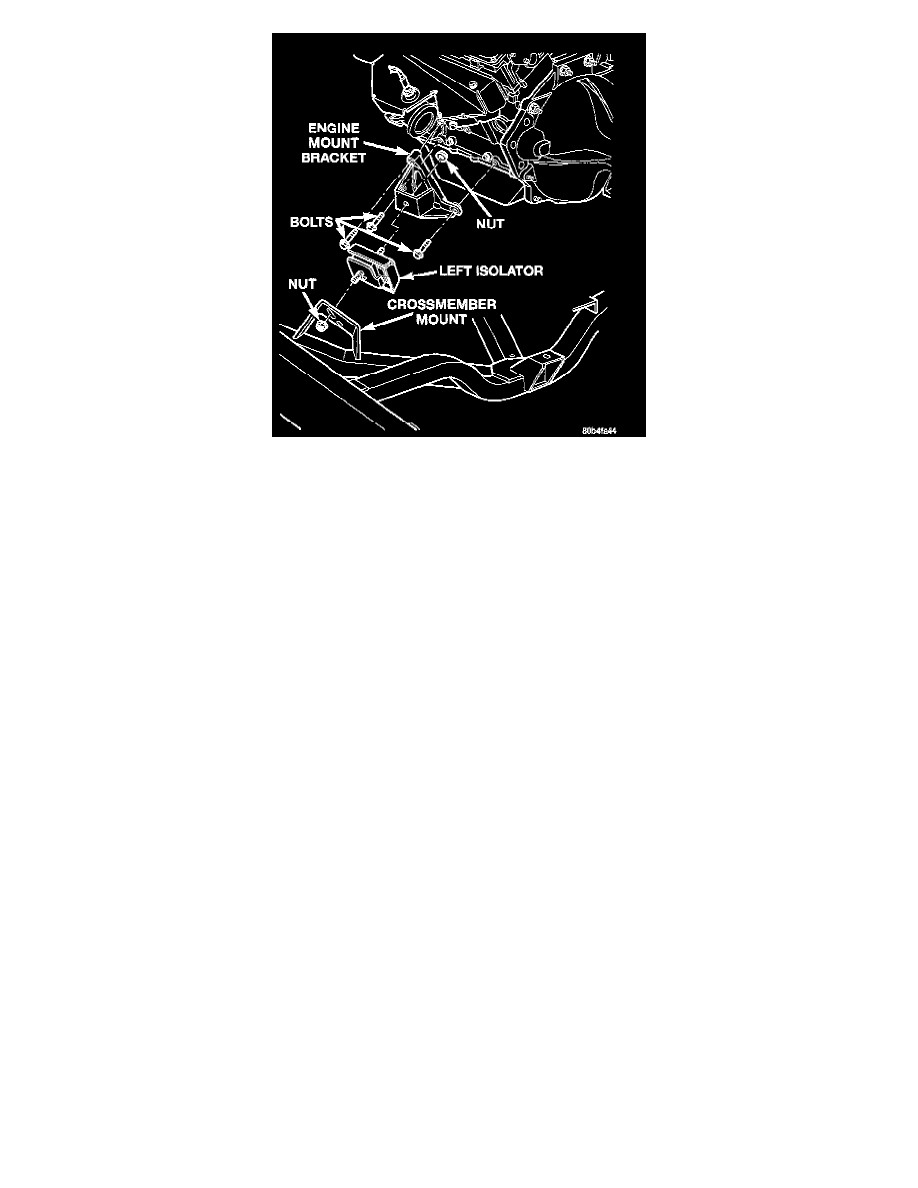
3. Remove right and left engine mount isolator attaching nuts from isolator to crossmember mount.
4. Support engine with a jack and a block of wood across the full width of oil pan.
5. Remove attaching nut from the engine mount isolator to engine mount bracket.
6. Remove engine oil filter.
7. Remove bolts holding engine mount bracket to engine.
CAUTION: To prevent damage to propeller shaft bushings, raise engine only enough for mount removal and installation.
8. Raise engine only enough for engine mount bracket removal.
9. Remove engine mount bracket.
10. Remove engine mount isolator.
Installation
1. With engine raised SLIGHTLY, position isolator onto crossmember mount, then install engine mount bracket. Install engine mount bracket bolts
to engine and tighten to 60 Nm (45 ft. lbs.). Install isolator to engine mount bracket nut and tighten to 101 Nm (75 ft. lbs.).
2. Install engine oil filter.
NOTE: The Left engine mount isolator has a locating dowel that aligns to a crossmember mount locating slot.
3. Lower engine while guiding engine mount isolator studs into crossmember mounts making sure that left engine mount isolator locating dowel is in
correct position.
4. Install right and left engine mount isolator to crossmember nuts. Tighten the nut to 101 Nm (75 ft. lbs.).
5. Remove jack and lower vehicle.
6. Connect negative battery cable.