
Prowler V6-3.5L VIN G (1999)
Crankshaft Main Bearing Seal: Service and Repair
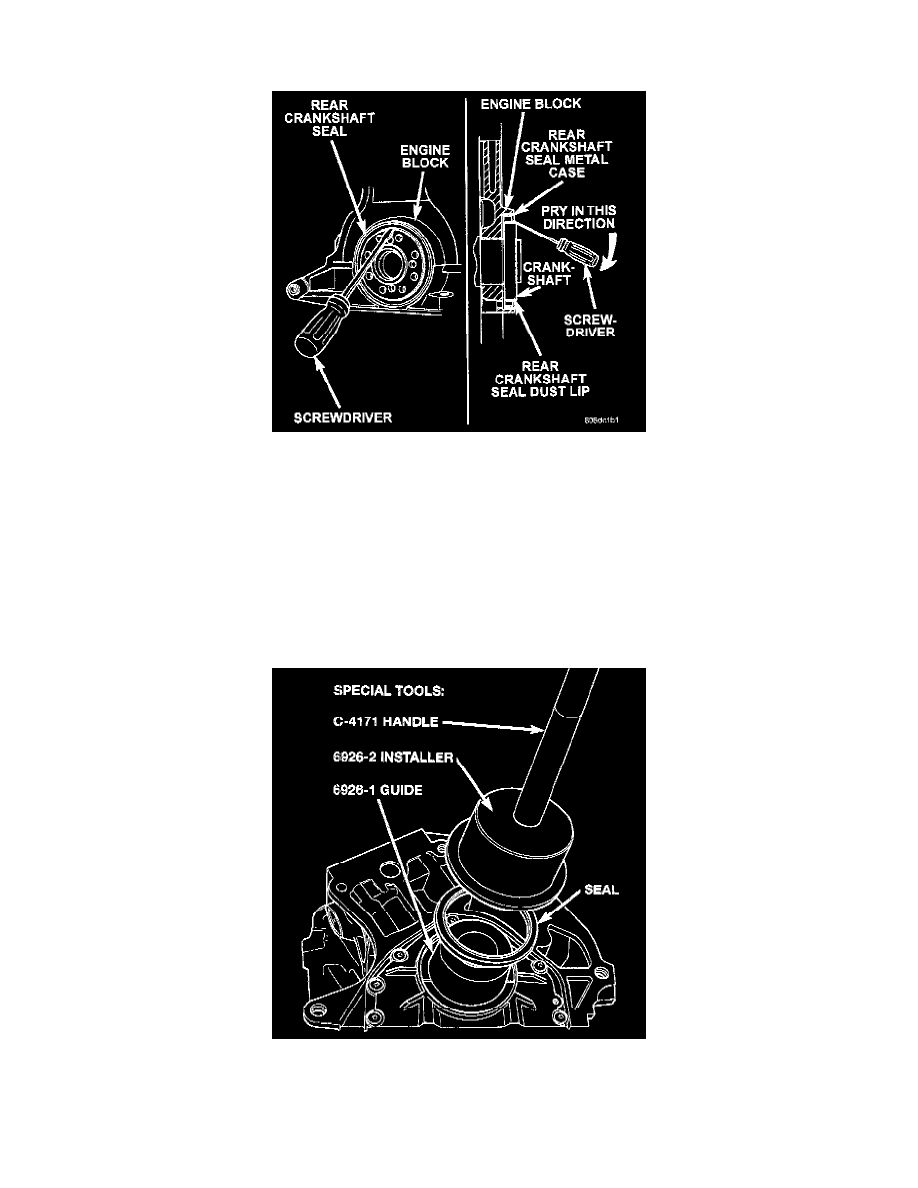
Removal
Rear Crankshaft Oil Seal Removal - Typical
1. Insert a 3/16" wide flat bladed screwdriver between the dust lip and the metal case of the crankshaft seal. Angle the screwdriver through the dust
lip against the metal case of the seal. Pry out seal.
CAUTION: Do not allow the screwdriver blade to contact the crankshaft seal surface. Contact of the screwdriver blade against crankshaft edge
(chamfer) is permitted.
Installation
CAUTION: If a burr or scratch is present on the crankshaft edge (chamfer), clean surface using 400 grit sand paper to prevent seal damage during
installation.
Rear Crankshaft Oil Seal - Installation
1. Place Special Tool 6926-1 Guide on crankshaft. This is a guide tool with a magnetic base.
2. Position seal over Special Tool 6926-1. Assure that lip of seal is facing towards the crankshaft during installation. The guide tool remains on
crankshaft during seal installation.