
Prowler V6-3.5L VIN G (1999)
Timing Belt - Installation
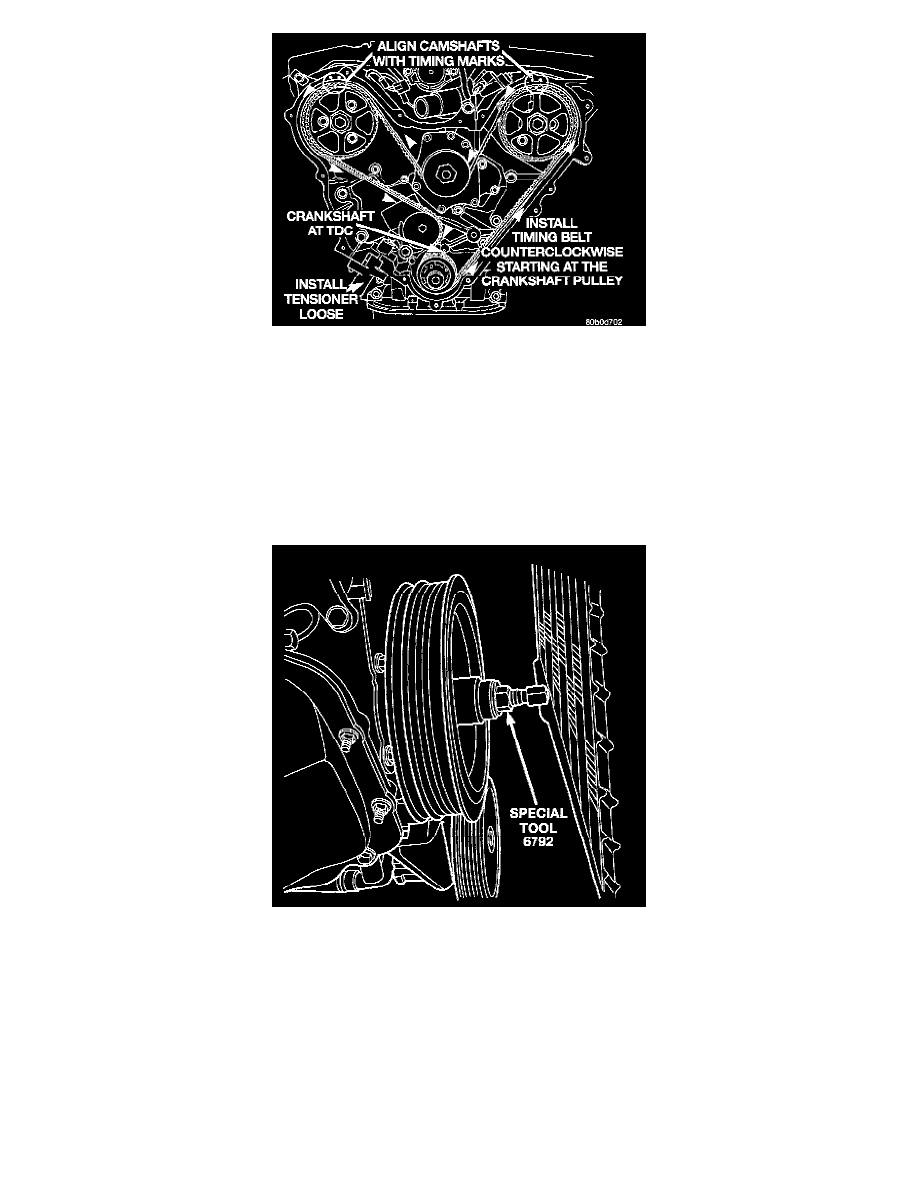
8. Install the timing belt starting at the crankshaft sprocket going in a counterclockwise direction. Install the belt around the last sprocket. Maintain
tension on the belt as it is positioned around the tensioner pulley. Each camshaft sprocket mark should still fall between the cover marks.
9. Holding the tensioner pulley against the belt, install the tensioner into the housing and tighten to 28 Nm (250 inch lbs.).
10. When tensioner is in place pull retaining pin to allow the tensioner to extend to the pulley bracket.
11. With number 1 piston at TDC, hold the camshaft sprocket hex with a 36 mm (1 7/16 inch) wrench and tighten the camshaft bolts to 102 Nm (75 ft.
lbs.) plus a 90 degree turn for the Right side and 115 Nm (85 ft. lbs.) plus a 90 degree turn for the Left side.
12. Remove dial indicator and install spark plug. Tighten spark plug to 28 Nm (20 ft. lbs.).
13. Remove camshaft alignment special tools 6642 and install cam covers and O-rings. Tighten fasteners to 28 Nm (250 inch lbs.).
14. Install timing belt covers.
Crankshaft Damper - Installation
15. Install crankshaft Harmonic Balancer.
16. Install accessory drive belts.
17. Install air conditioning condenser, radiator, and fan module.
18. Evacuate and charge air conditioning system.
19. Fill cooling system.
20. Start engine and allow to idle for approximately 1 minute. Then, preferably using a DRB III, operate the engine at speeds of 1600-2000 RPM for
10 minutes. This will help to bleed out any possible air in the timing belt tensioner.
NOTE: If air ingestion has occurred, the timing belt tensioner will be soft and may generate noise. This noise should disappear after no more than
15 minutes of engine running time.