
Prowler V6-3.5L VIN G (1999)
Front Steering Knuckle: Service and Repair
Installation
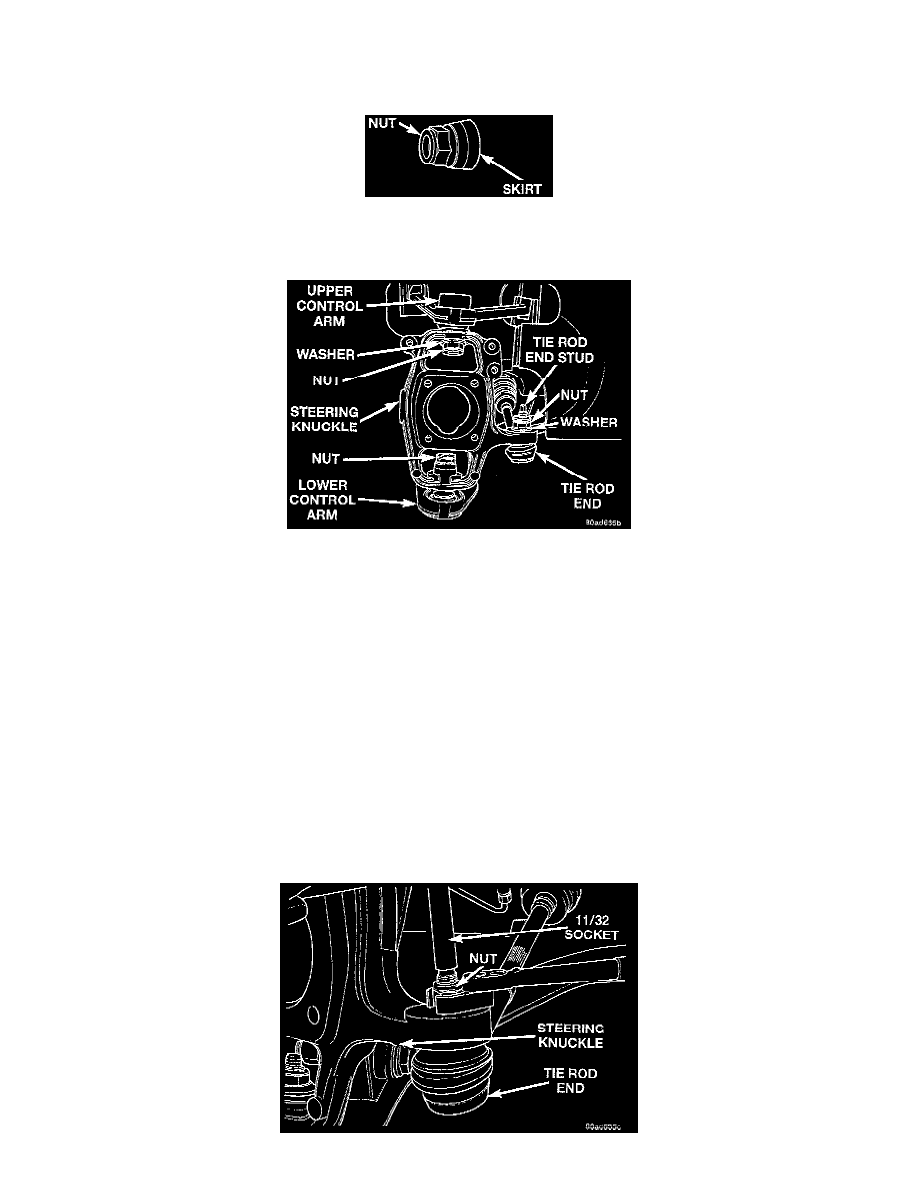
1. Install the steering knuckle on the stud of the upper and lower ball joint.
NOTE: A special lower ball joint to steering knuckle attaching nut is used on this vehicle. The nut has a plastic skirt attached to the bottom of it.
The skirt is used to pull the stud of the ball joint into the steering knuckle as the nut is tightened. This prevents the stud from rotating in the steering
knuckle allowing the nut to be properly torqued.
CAUTION:
-
To ensure the stud of the upper ball joint is adequately pulled into the steering knuckle the washer must be installed between the nut and the
steering knuckle.
-
When installing the lower ball joint on the steering knuckle a new mounting nut MUST be used. This is required to provide for the proper
torquing and torque retention of the ball joint attaching nut.
2. Install A NEW lower ball joint to steering knuckle attaching nut.
3. Install the washer and nut on the stud of the upper ball joint.
4. Install outer tic rod on steering knuckle.
CAUTION: To ensure the stud of the tie rod end is adequately pulled into the steering knuckle the washer must be installed between the nut and
the steering knuckle.
5. Install the washer on the stud of the outer tie rod end.
6. Install the outer tie rod to steering knuckle attaching nut.
7. Tighten the upper ball joint stud attaching nut to a torque of 115 Nm (85 ft. lbs.).
8. Tighten the lower ball joint stud attaching nut to a torque of 95 Nm (70 ft. lbs.). As the new ball joint nut is tightened, the skirt will fold upward.
Continue to tighten the nut until the specified torque is reached.