
Prowler V6-3.5L VIN G (1999)
Trailing Arm Bushing: Service and Repair
Installation
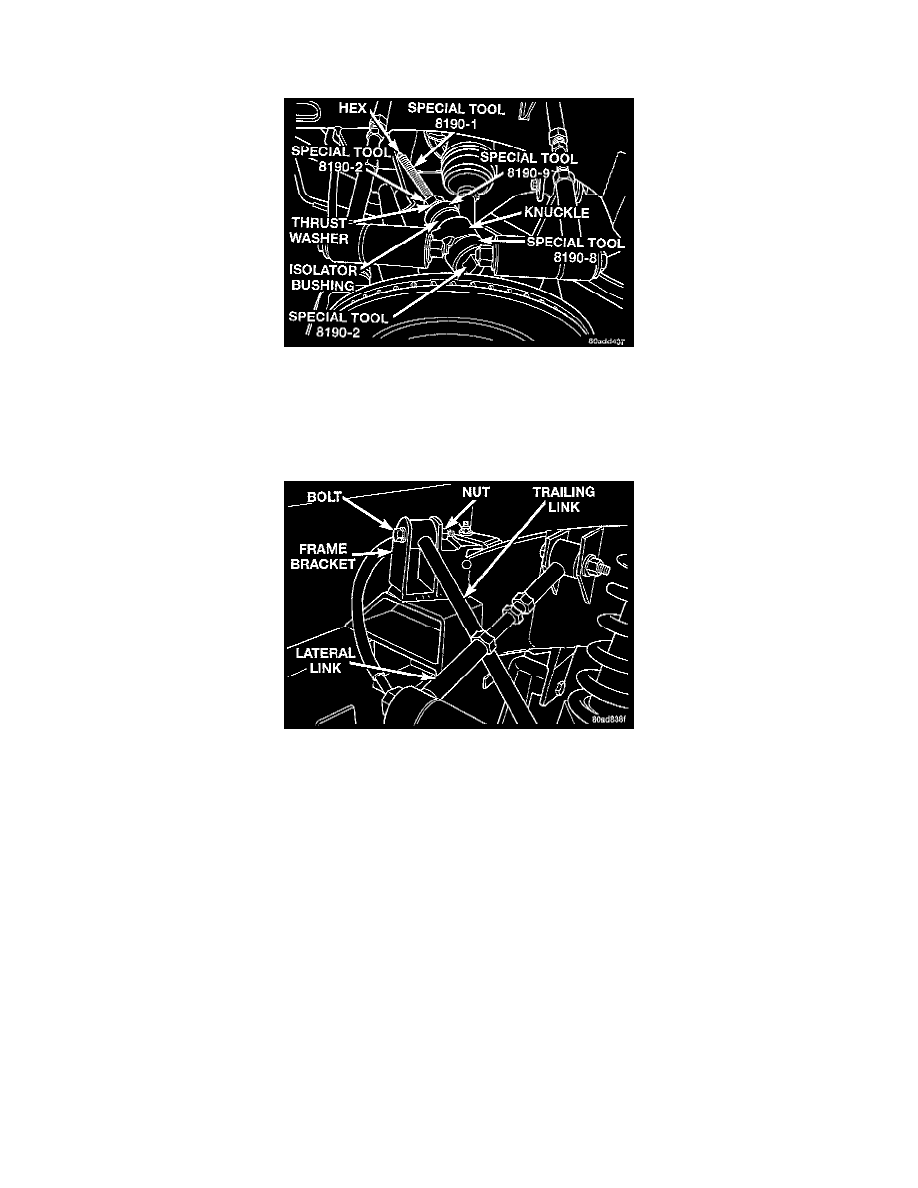
1. Assemble pieces of Bushing Remover/Installer, Special Tool 8190, or equivalent and the isolator bushing as shown.
2. Isolator bushing is installed in knuckle using following procedure. Keep Bolt, Special Tool 8190-1, or equivalent from turning by holding it with a
box end wrench on the hex. Turn Nut Special Tool 8190-2, or equivalent that is against the thrust bearing. This will push Special Tool 8190-9, or
equivalent against the isolator bushing pressing the isolator bushing into the knuckle.
3. Continue turning Nut Special Tool, 8190-2, or equivalent until it can no longer be turned. When the nut can no longer be turned, the isolator
bushing is seated against the knuckle.
4. Install trailing link in mounting bracket on frame of vehicle.
NOTE: Install the bolt and nut but do not tighten or torque at this time. The full weight of the vehicle must be supported by the suspension (vehicle
at correct curb height) before tightening the trailing link mounting bolt.
5. Install bolt and nut attaching trailing link to frame bracket.
6. Install trailing link on rear knuckle.
NOTE: Install the bolt and nut but do not tighten or torque at this time. The full weight of the vehicle must be supported by the suspension (vehicle
at correct curb height) before tightening the trailing link mounting bolt.