Prowler V6-3.5L VIN G (1999)

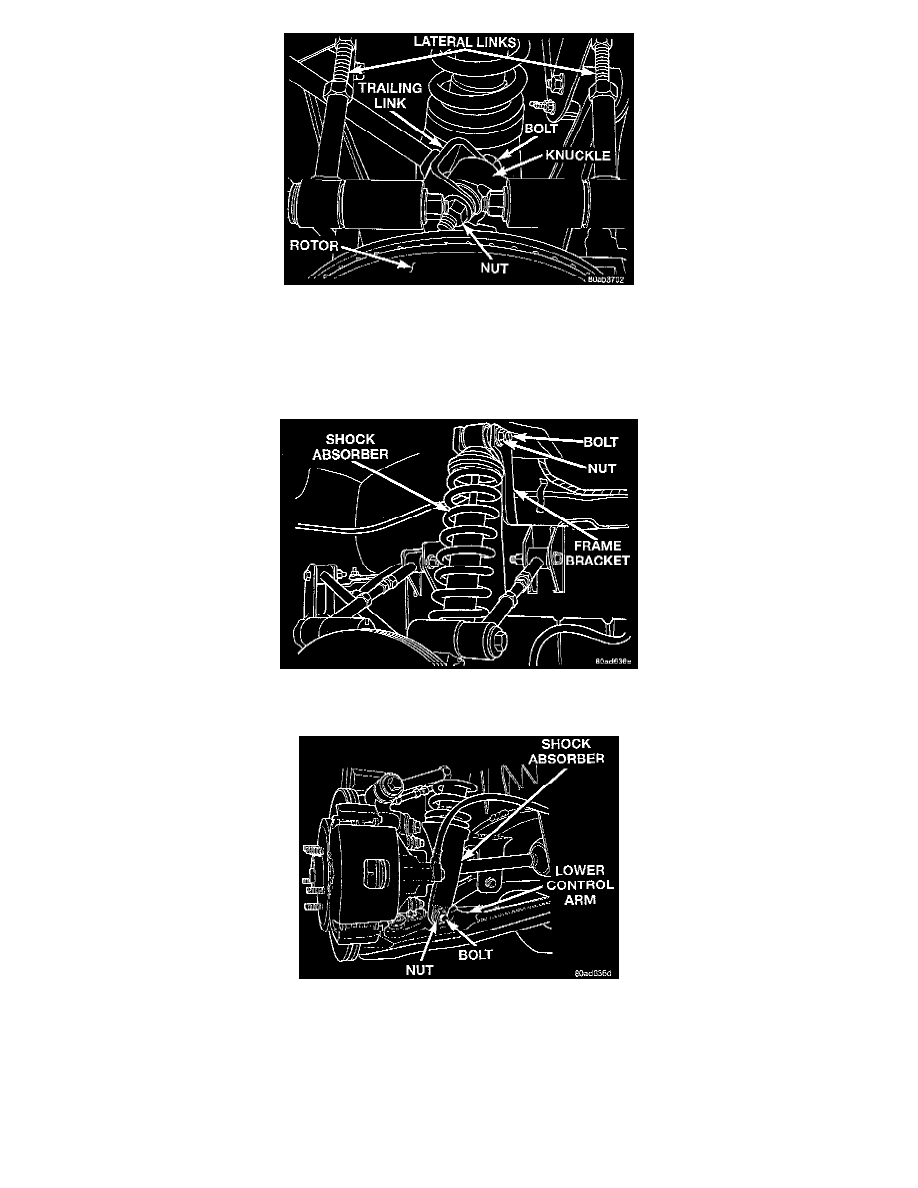
7. Install the bolt and nut, attaching the trailing link to the rear knuckle
CAUTION: When the shock absorbers are installed on this vehicle, the vehicle must be at curb height before either shock absorber mounting bolt
is tightened and torqued to specifications. This is required to maintain the vehicles correct curb height.
8. Install shock absorber/coil spring assembly on vehicle.
9. Install the top of the shock absorber into the frame bracket. Install the shock absorber to frame bracket bolt. DO NOT TIGHTEN BOLT AT THIS
TIME
10. Install the shock absorber clevis on the mounting bracket on the lower control arm. Install the shock absorber to placket bolt. DO NOT TIGHTEN
BOLT AT THIS TIME
11. Install the wheel and tire.
12. Tighten the wheel mounting nuts in the proper sequence until all nuts are torqued to half the specified torque. Then repeat the proper tightening
sequence to the full specified torque of 122 Nm (90 ft. lbs.).
13. Lower the vehicle.
14. Place the vehicle on a drive on type hoist an alignment rack.
NOTE: When jouncing the vehicle, the vehicle must be released at the bottom of the jounce cycle. This will ensure the vehicle's suspension will
