
Prowler V6-3.5L VIN G (1999)
Terminal Removal
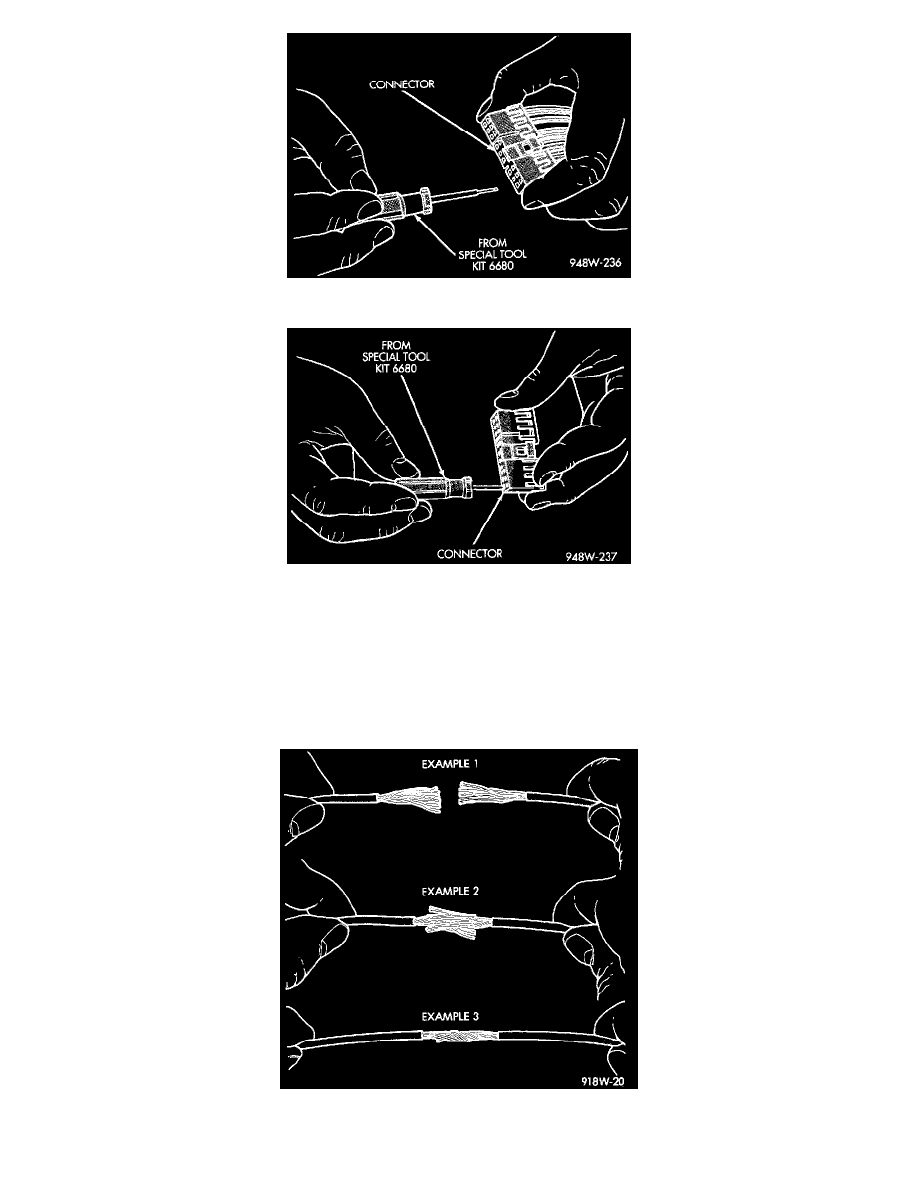
Terminal Removal Using Special Tool
4. Position the connector locking finger away from the terminal using the proper pick from Special Tool Kit 6680. Pull on the wire to remove the
terminal from the connector.
5. Cut the wire 6 inches from the back of the connector.
6. Remove 1 inch of insulation from the wire on the harness side.
7. Select a wire from the terminal repair assembly that best matches the color of the wire being repaired.
8. Cut the repair wire to the proper length and remove 1 inch of insulation.
9. Place a piece of heat-shrink tubing over one side of the wire. Be sure the tubing will be long enough to cover and seal the entire repair area.
Wire Repair