
Prowler V6-3.5L VIN G (1999)
9. Loosen nut on gearshift cable adjust lever (Fig. 15).
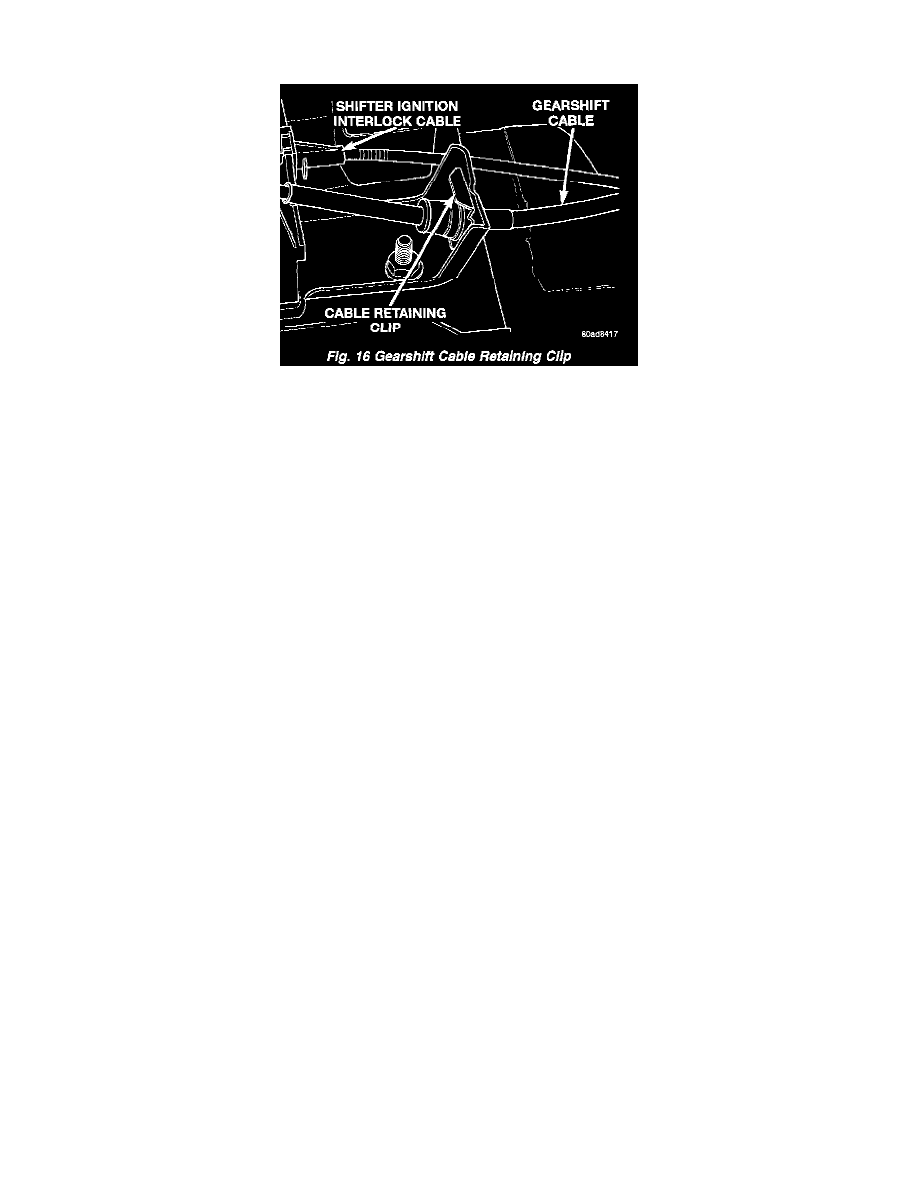
Fig. 16
10. Remove retaining clip from shift cable conduit bracket (Fig. 16).
11. Disconnect shifter cable from cable attach stud (pin).
12. Remove cable from center console routing. Leave flat on floor for ease of removal.
13. Remove driver's side seat.
14. Pull back carpeting from rear seat compartment on left side.
15. Locate and drill out rivets that attach cable retaining clips to the driver's side compartment.
16. Unseat grommet and remove cable from interior of vehicle.
17. Loosen bolt that clamps shift cable to transaxle.
18. Disconnect gearshift cable from shift lever assembly at transaxle.
19. Remove cable from underneath vehicle.
INSTALLATION
1. Reroute new cable from underside of vehicle. The cable must be routed correctly to ensure proper operation.
2. Snap new transaxle cable on to gearshift lever assembly at transaxle.
3. Set gearshift lever assembly in park position at transaxle. This is the most rearward position.
4. Place conduit end fitting in clamp and tighten mounting bolt.
CAUTION: Park sprag must be engaged when adjusting linkage. Rock vehicle back and forth to ensure that park sprag is fully engaged.