
Reliant-K L4-156 2.6L VIN G 2-bbl (1983)
E.
Pull valve and pinion assembly out (puller may be required) until the spiral motion stops. At that point, mark the pinion housing in line with the
stub shaft flat (master spline). Remove valve and pinion from housing.
CAUTION:
I. COVER THE VALVE AND PINION HOUSING TO PREVENT CONTAMINANTS FROM ENTERING HOUSING
WHILE PINION IS REMOVED.
II. DO NOT MOVE THE FRONT WHEELS FROM THEIR STRAIGHT AHEAD POSITION PERFORMED IN STEP IIC.
IIA THE FOLLOWING INSTRUCTIONS ARE FOR THE SAGINAW ASSEMBLY:
A.
Remove valve body rings.
B.
For ease in installing the rings, place them in hot water (150~F to 200~F) for approximately 10 to 15 minutes. This will increase the ring size.
CAUTION: DO NOT USE TRW ASSEMBLY SEAL EXPANDING TOOL C-4791 OR DAMAGE TO THE SEALS WILL OCCUR
AFFECTING THE SEALING CAPABILITY.
C.
Install the rings into the valve body grooves. Stretch the rings only enough to slide them over the valve.
CAUTION: DO NOT CUT SEALS WHEN INSTALLING.
FIGURE 9 - SEAL RING RESIZING & PROTECTOR SEAL (TRW & SAGINAW)
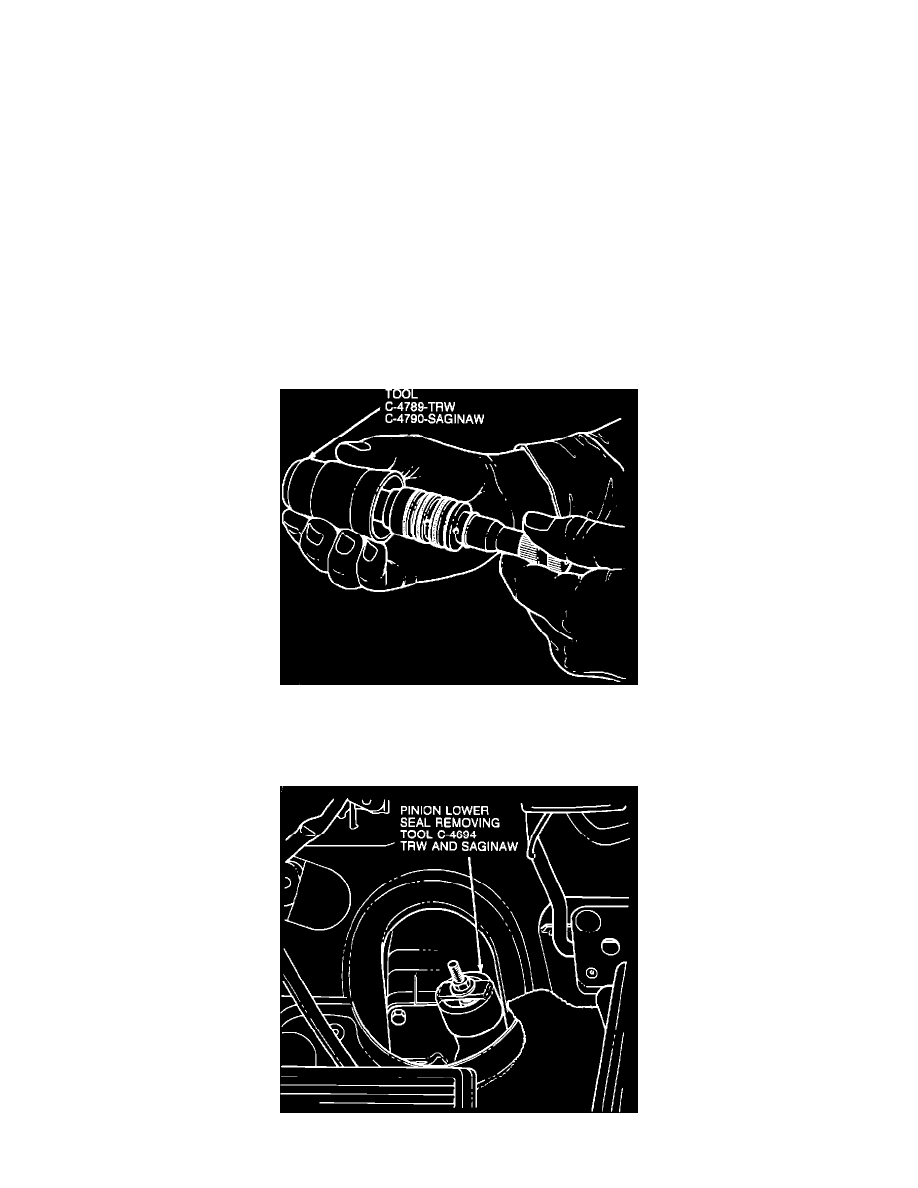
D.
Lubricate the valve and pinion rings with power steering fluid and place the assembly into Tool C- 4790 (Figure 9) and allow to set for 10 to
15 minutes before installing into housing. This will insure proper resizing of the rings.
FIGURE 12 - NO CALL OUT REQUIRED