
Reliant L4-135 2.2L SOHC (1985)
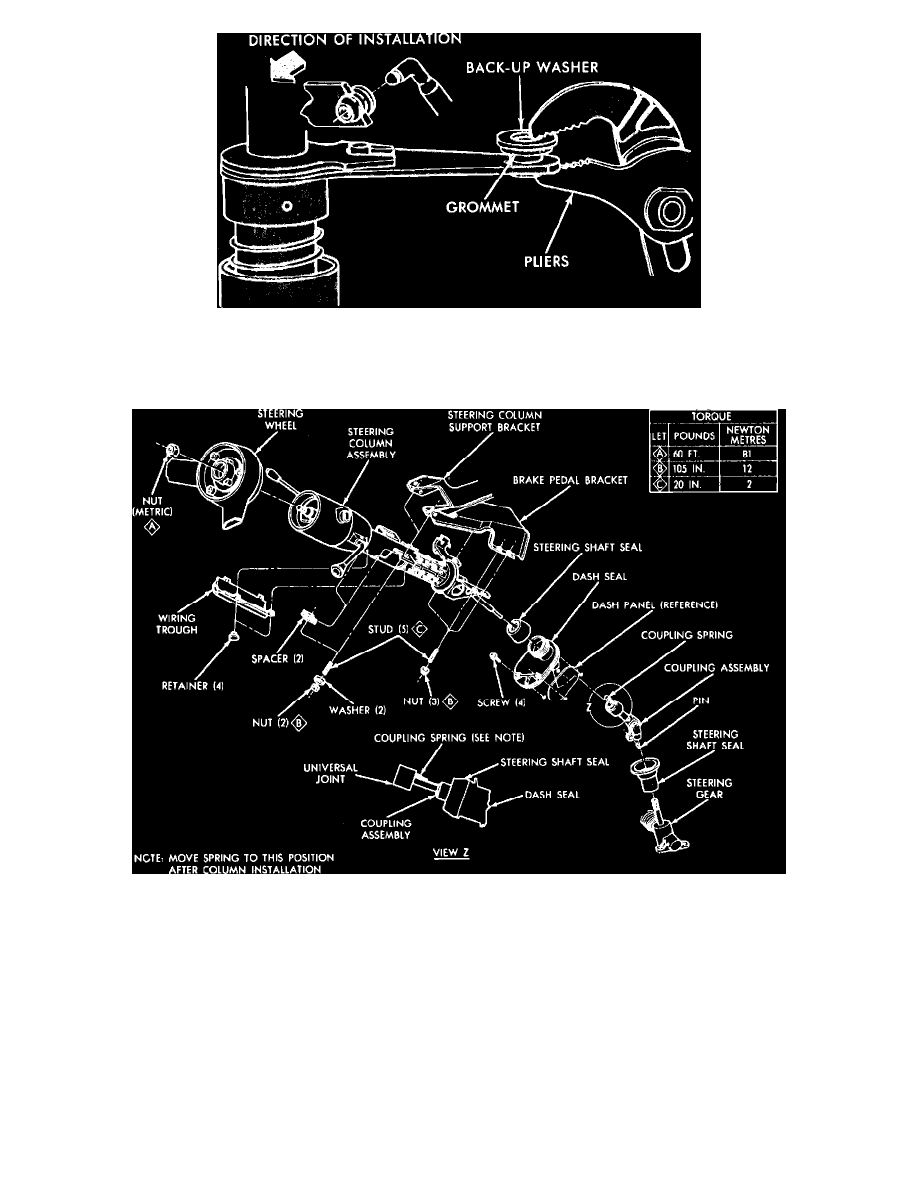
Fig. 3 Installing shift lever grommets
12. Cut plastic grommets from shift levers and install new grommets from rod side of lever using pliers and a backup washer. Apply grease to
grommets.
Fig. 6 Typical steering column installation. FWD w/standard column exc. Charger, Daytona, Horizon, Laser, Omni & Turismo; models w/tilt wheel similar
INSTALLATION
1. Align and insert lower stub shaft into coupling, raise column into position and loosely install bracket nuts. Pull column assembly rearward and
torque nuts to 105 inch lbs.
2. With needle nose pliers, pull coupling spring upward until it touches the universal joint flange.
3. Snap gearshift rods into grommets.
4. Readjust gearshift linkage, as necessary.
5. Install steering wheel and torque nut to 60 ft. lbs., except on 1982 - 87 models. On 1982 - 87 models torque nut to 45 ft. lbs.
6. Install horn switch and horn switch wire.
7. Connect all wiring connectors at steering column jacket and install steering wheel pad.
8. Connect battery ground cable and test operation of lights and horn.
9. On column shift vehicles, connect gearshift indicator pointer to its approximate original location. Slowly move gearshift lever from 1 (low) to
Park, pausing briefly at each position. The indicator pointer must align with each selector position. If necessary, loosen and readjust pointer
correctly.