
Reliant L4-156 2.6L SOHC (1984)
Timing Cover: Service and Repair
1.
Disconnect battery ground cable.
2.
Remove alternator locking screw, then loosen jam nut and adjusting screw. Remove drive belt.
3.
Remove distributor retaining nut, then the distributor from cylinder head and position aside.
4.
Remove front and rear A/C compressor to bracket attaching screws and A/C compressor and position aside.
5.
Remove power steering pump pivot and lock screws, then the drive belt.
6.
Remove power steering pump mounting screw and nut, then position power steering pump aside.
7.
Remove power steering pump bracket to engine attaching screws and bracket.
8.
Raise vehicle and remove right inner splash shield.
9.
Drain crankcase, then remove crankshaft drive pulley.
10.
Lower vehicle and position a suitable jack under engine.
11.
Remove engine mount to frame side rail through bolt, then the engine oil dipstick.
12.
Remove air cleaner assembly.
13.
Disconnect battery ground cable, then the spark plug wires.
14.
Disconnect vacuum hoses from cylinder head cover.
15.
Remove cylinder head cover screws and cylinder head cover.
16.
Remove oil pan attaching screws and oil pan.
17.
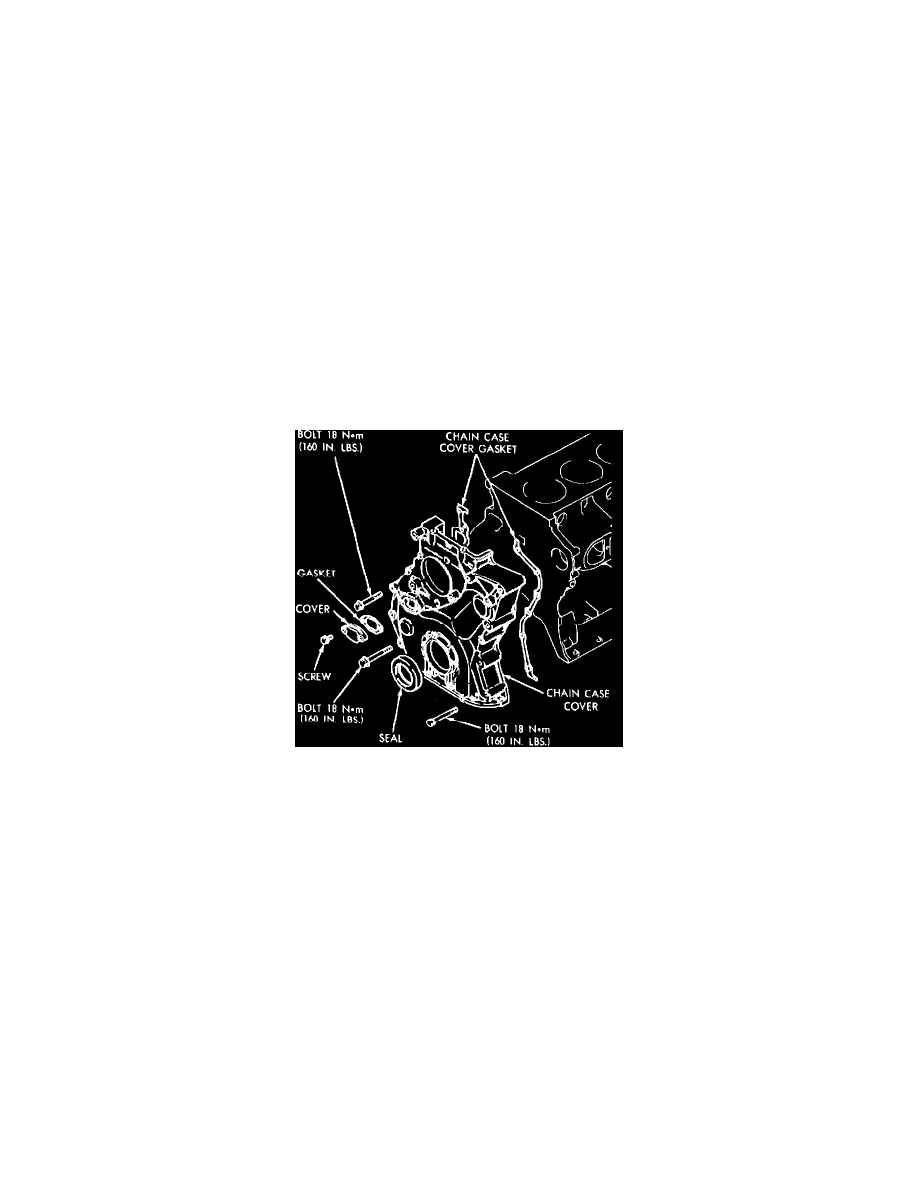
Remove timing indicator plate from timing chain case cover.
18.
Remove engine mounting plate from timing chain case cover.
19.
Remove cylinder head cover as previously described.
20.
Remove two front cylinder head screws. Do not disturb any other cylinder head bolts.
Fig. 7 Chain case cover removal
21.
Refer to Fig. 7 and remove remaining screws securing chain case cover to engine.