
Reliant L4-156 2.6L SOHC (1984)
b.
Vapor return hose from the fuel pump and reservoir to the chassis return line.
c.
Pressure regulator outlet to carburetor inlet hose (regulator-to-fuel flow sensor if so equipped).
d.
Fuel reservoir-to-pressure regulator inlet hose.
Close the top part of the clip over tbe hoses, attach clip with original hose clip screw, and tighten securely.
E.
Underbody Component Installation
1.
1983 & 1984 Cars
Remove existing fuel tank and install the new fuel tank assembly following the service manual procedure. Use a new positioning pad,
PN 4185506, and new insulator pads, PN 4185395 and 4279340. Use the new fuel tank straps, PN 4279175 and 4279174. Be sure to
attach the fuel tank vent hose to the fuel tank before it is raised against the floor pan.
1985 Cars
Remove existing fuel gauge sending unit from the fuel tank and install the new gauge/pump unit, PN 4075431, along with a new gauge
unit seal, PN 6031475. Follow the service manual procedure.
CAUTION:
USE CARE WHEN INSTALLING NEW GAUGE/PUMP ASSEMBLY IN TANK SO AS NOT TO BEND OR
DAMAGE NEW GAUGE/PUMP ASSEMBLY.
2.
Connect the 5-pin terminal of the body wiring harness to the fuel tank gauge unit.
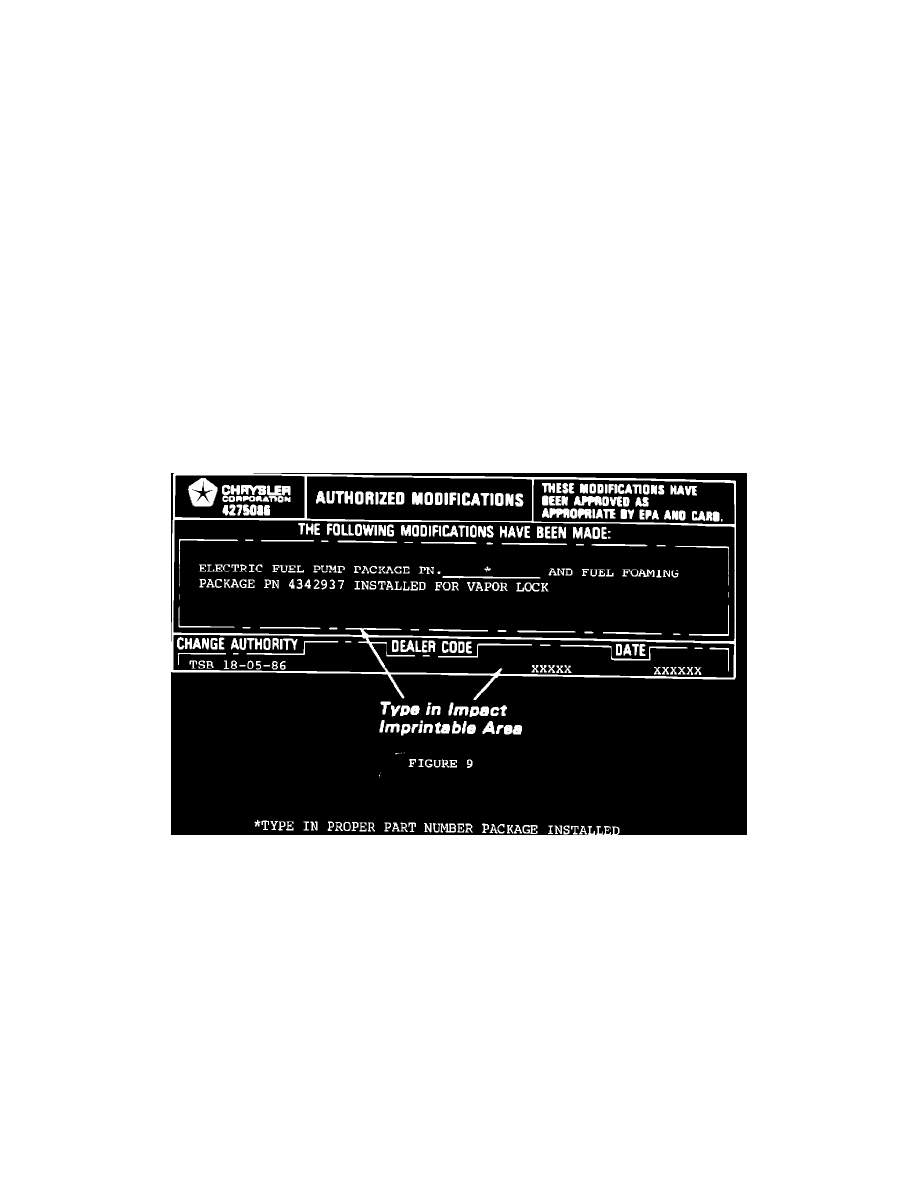
FIGURE 9
3.
Reconnect the battery.
4.
Type in Authorized Modification Label, PN 4275086, as shown in Figure 9 and attach near VECI label.
5.
Check the pressure regulator, fuel reservoir, and hose clip for secure mounting. Check all fuel hoses for proper routing, making sure
they are not contacting any sharp metal edges. Insure clamps are tight and make sure no sharp edges or clamp screws are contacting
adjacent hoses or wires. Inspect entire installation for proper wire routing.
6.
Start the engine and check the entire system for fuel leaks.