
Reliant L4-156 2.6L SOHC (1984)
13.
To gain access to the thermo valve, remove both the coolant temperature sensor (2-wire) and the temperature gauge sending unit (1-wire). If the
vehicle is equipped with a fuel reservoir, it will need to be set aside by removing the thermostat housing bolt that secures the reservoir.
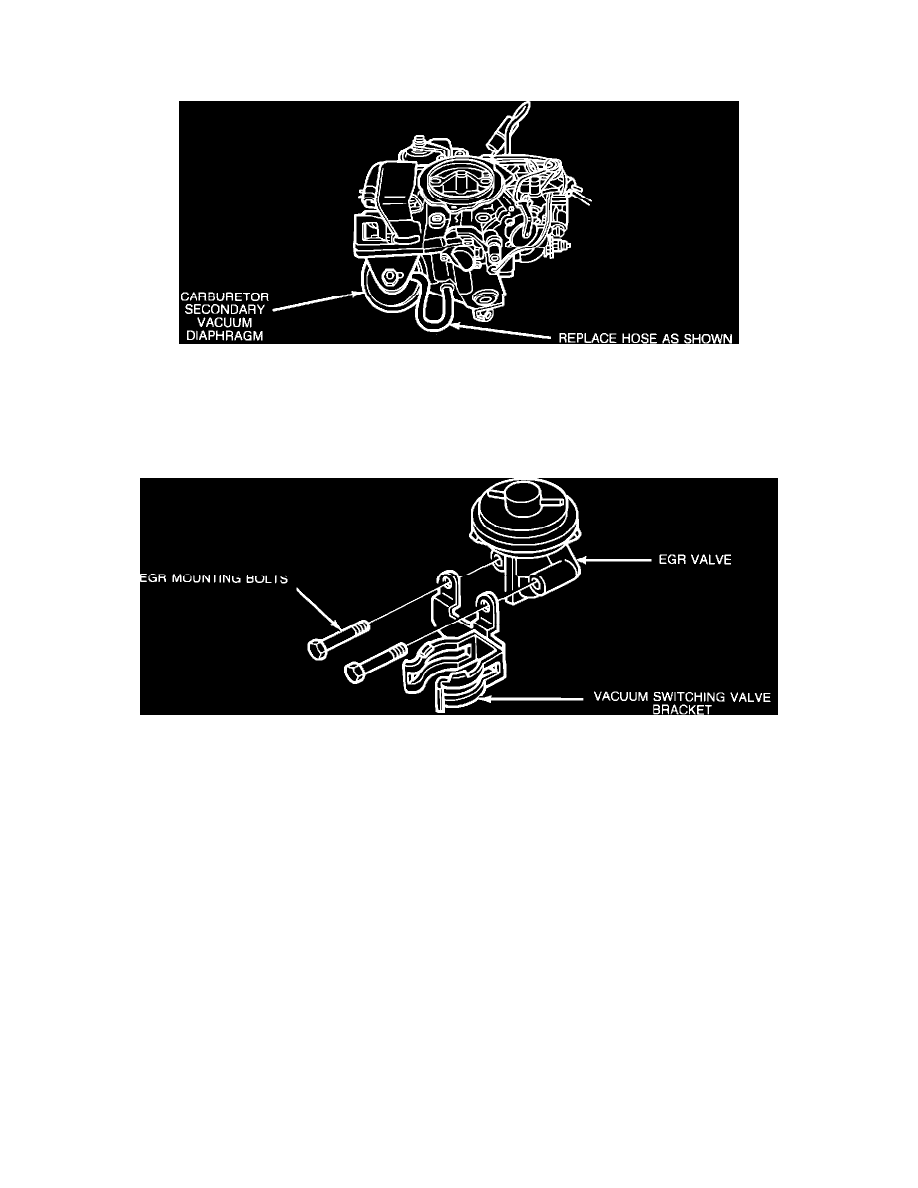
FIGURE 5
14.
Remove both vacuum lines from the thermo valve. Remove and discard the vacuum line at the thermo valve side of the EGR valve. Cut a piece of
this discarded hose and connect the secondary vacuum diaphragm to the carburetor base (Figure 5).
15.
Remove the thermo valve and replace it with the 3-port thermo valve, PN MD081274, provided in the kit (it may be necessary to loosen the
alternator mounting bolts and push the alternator out of the way). Use sealer on the threads to prevent coolant leakage.
FIGURE 6
16.
Replace the EGR valve with the new EGR valve, PN MD097314, which is included in the kit. Install the vacuum switching valve bracket, PN
MD100733, in conjunction with the EGR valve. This bracket is mounted using the two EGR bolts (Figure 6).
17.
Making sure it is properly positioned, install the distributor, distributor cap, and all wires to spark plugs and coil.