
Reliant L4-156 2.6L SOHC (1984)
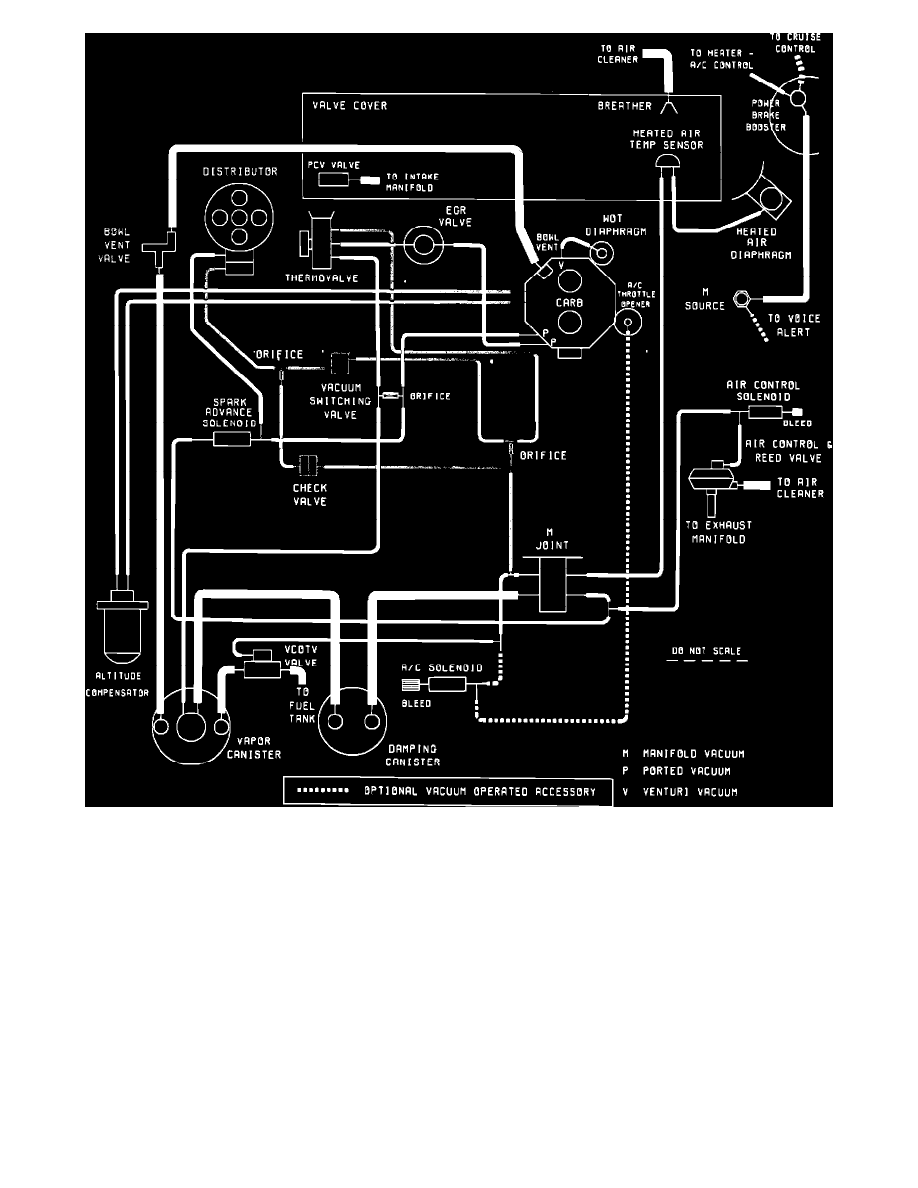
FIGURE A - HOSE ROUTING DIAGRAM
18.
Install the new vacuum overlay, PN MD107136 (Figures 7, 8, and 9), for proper routing and connections with existing and new parts.
19.
"Snap" the vacuum switching valve into the newly installed bracket, PN MD100733. This is accomplished by pushing the valve into the brackets
two "spring arms."
20.
If the vehicle is equipped with air conditioning:
a.
1984 Model Year
Install vacuum tee, PN 3671410, provided in the kit into the throttle kicker vacuum line located on the manifold tree. Gather the vacuum
hoses together near the manifold and secure with snap clip, PN MD470362.
b.
1985 Model Year
Locate the vacuum line going to the VCOTV (Vacuum Controlled Orifice Tank Valve) at the manifold vacuum tree. Insert the supplied
tee, PN 3671410, into this vacuum line.
21.
Reinstall coolant temperature sensor, temperature sending unit, and engine coolant. Reinstall the fuel reservoir if so equipped. Apply
Loctite/Mopar Sealant, PN 4318034, to the bolt threads before reinstalling. Torque to 15 foot pounds.