
Reliant L4-156 2.6L SOHC (1984)
12.
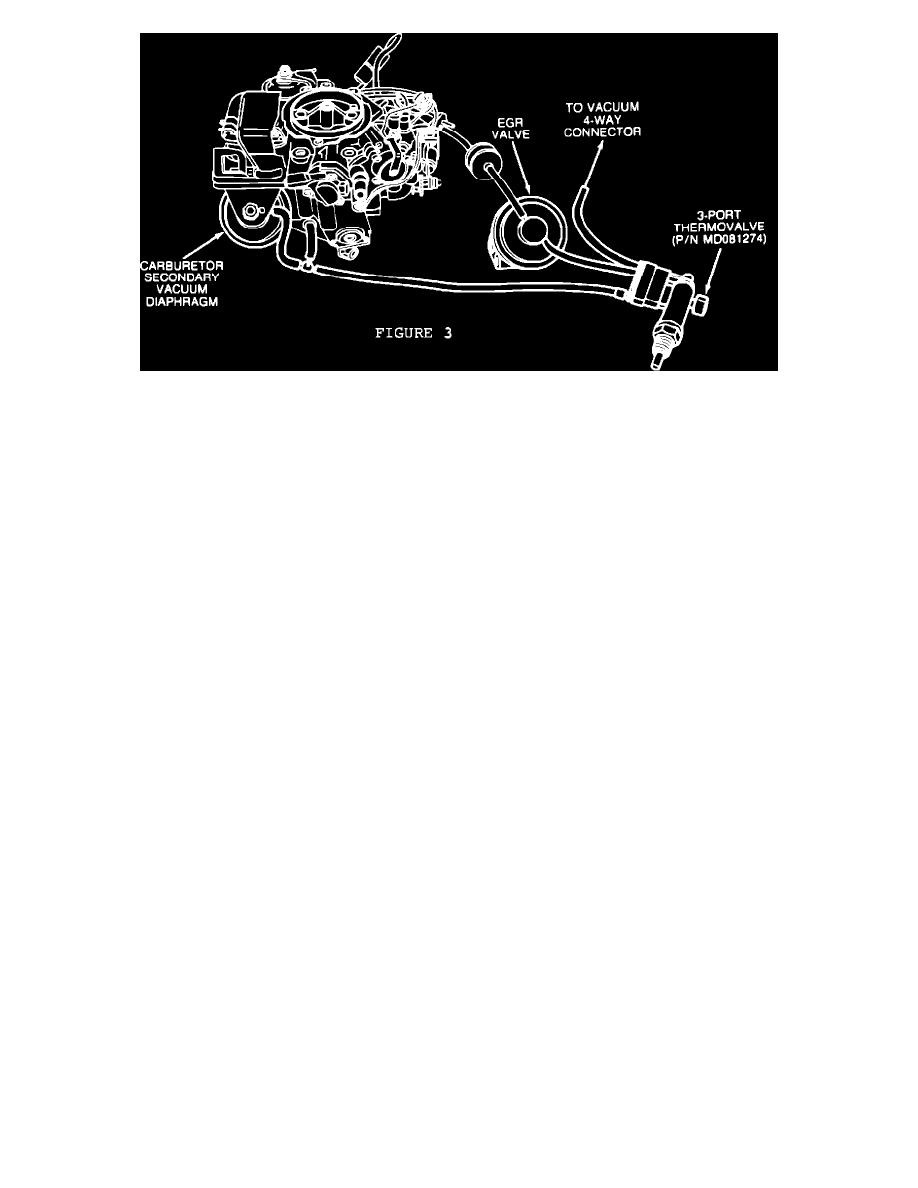
Install provided vacuum hose assembly, PN MD097333, to 3-port thermo valve, carburetor secondary diaphragm, and nipple on carburetor base
(Figure 3).
13.
Connect two hoses from original thermo valve connector to upper two nipples on new 3-port thermo valve connector (Figure 3).
NOTE:
IF VEHICLE WAS ALREADY EQUIPPED WITH 3-PORT THERMO VALVE, PROCEED TO STEP 17.
14.
Reinstall coolant temperature sensor and temperature gauge sending unit.
15.
Reinstall fuel reservoir, if so equipped. Apply Loctite/Mopar Sealant, PN 4318034, to the bolt threads before reinstalling. Torque bolt to 12 to 17
foot pounds.
16.
Add coolant.
17.
Install distributor rotor and cap.
18.
Disconnect vacuum hoses from EGR valve and remove EGR valve.
19.
Install provided EGR valve, PN MD097314, using gasket, PN MD026567, provided. Reconnect vacuum hoses.
20.
Start engine and bring to full operating temperature so curb idle can be attained.
21.
Disconnect and plug distributor vacuum advance hose.
22.
Set basic timing to 7~ BTDC.
23.
Remove plug and reconnect distributor vacuum advance hose.
24.
California vehicles only - clean the existing hose routing label surface and apply hose routing label, PN 4179571.
25.
1984 Federal vehicles only - remove the right front kick panel and note the part number on the electronic control unit. If any part number other
than MD080152 is present, replace ECU with PN MD080152.