
Sundance L4-135 2.2L SOHC (1987)
Remove the windshield wiper arm assemblies, and remove the five cowl-plenum grille attaching screws (Figure 1). Lift off the cowl-plenum grille. Water
test vehicle with the blower motor on high and water hose at the lower right corner of the windshield.. No water should be entering the plenum air inlet
grille (AC/heater air inlet).
Look for possible leak paths at the following locations:
^
Water runs past the seal on the right air intake shield and into the air inlet.
^
Water runs past mounting holes for the air intake shield and into the air inlet.
^
Water tracks along bottom lip of resistor block sheetmetal and is pulled into the air inlet.
^
Water collects on plenum floor and is pulled into the air inlet.
If water is entering the plenum air inlet from any of the above locations, proceed to repair procedure.
PARTS REQUIRED
1
Shield Assembly, Air Intake - Right
PN 4462121
1
Silicone Rubber Adhesive Sealant (RTV)
PN 4318025
Touch Up Paint as required.
REPAIR PROCEDURE
1.
Remove four air intake shield attaching screws and lift shield from vehicle. Remove any mastik patches which may have been located underneath
the shield and discard.
2.
Remove windshield washer bottle and resistor block and set aside.
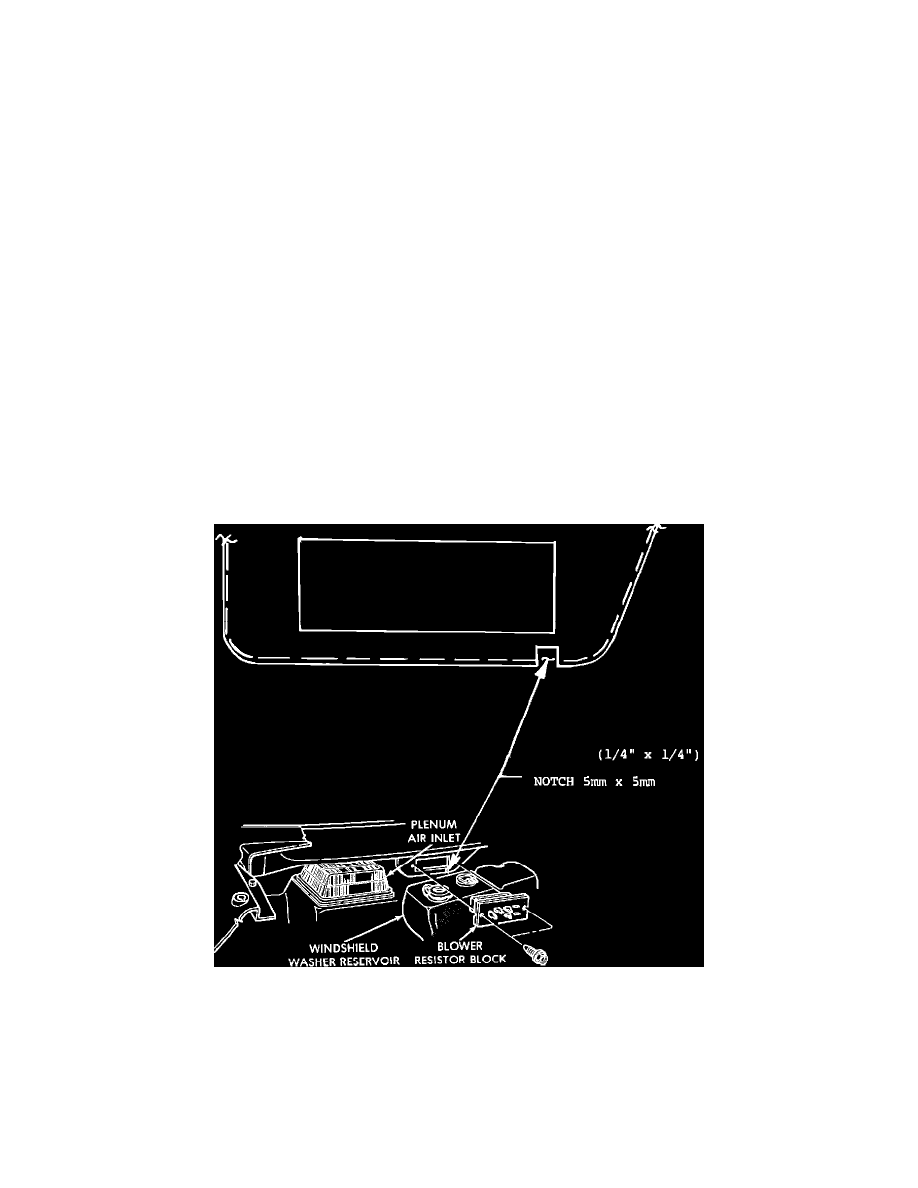
FIGURE 2
3.
With hacksaw, cut two 5 mm (1/4") slots into the bottom lip of the resistor block sheetmetal directly below the in-board edge of the resistor block.
Create a notch as shown in Figure 2, by bending tab between slots up and down until it breaks off. Touch up cut edges of sheetmetal with paint as
required.