
Sundance L4-153 2.5L SOHC (1988)
Ball Joint: Service and Repair
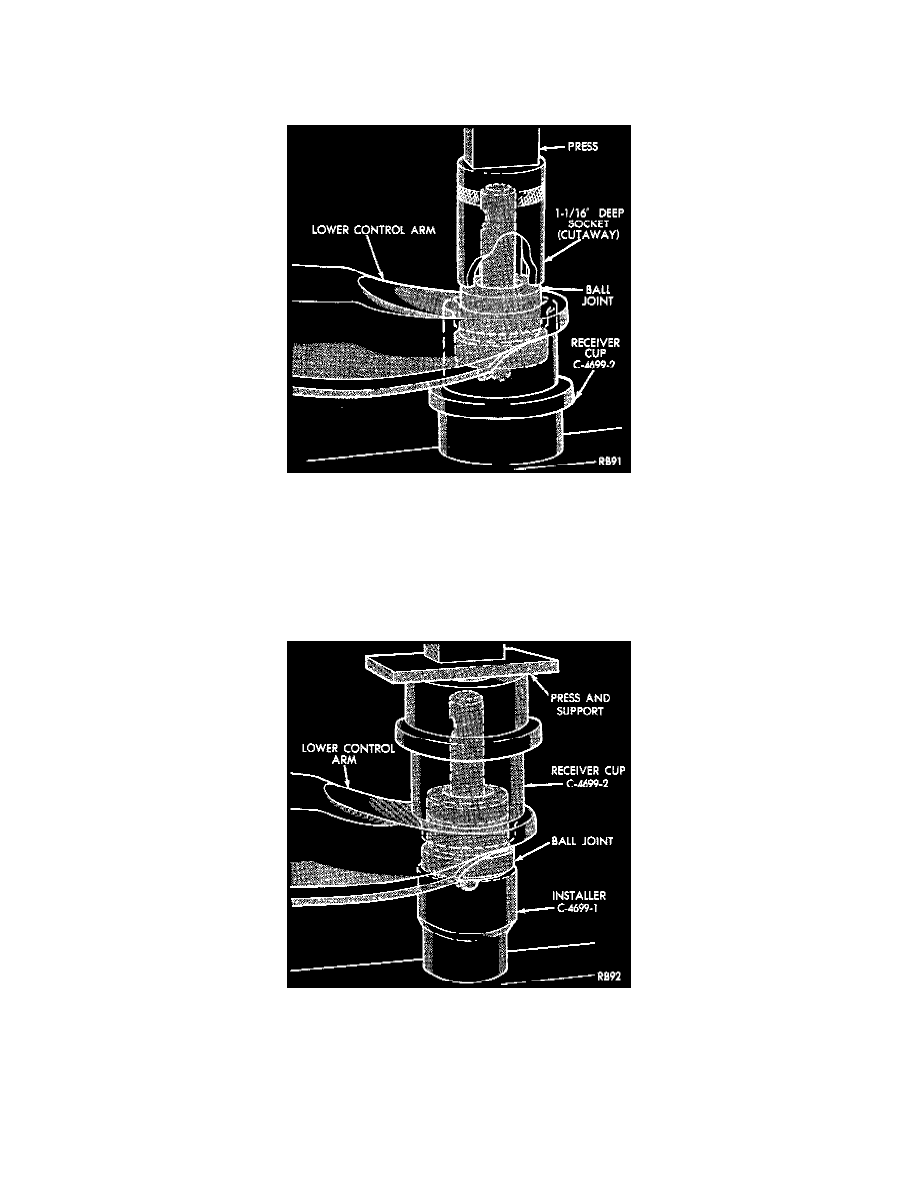
REMOVAL
1. Pry off seal.
Removing Ball Joint
2. Position Receiving Cup Tool C-4699-2 to support lower control arm while receiving ball joint assembly.
3. Install 1-1/16" deep socket over stud and against joint upper housing.
4. Press to remove joint assembly from arm.
INSTALLATION
1. Position ball joint housing into control arm cavity.
Installing Ball Joint
2. Position assembly in press with Installer Tool C-4699-1 supporting control arm.
3. Align and press assembly until ball joint housing ledge stops against control arm cavity down flange.
INSTALLATION OF SEAL
1. Support ball joint housing with installer tool C-4699-1 and position new seal (over stud) against housing.