Sundance L4-153 2.5L SOHC Turbo (1990)

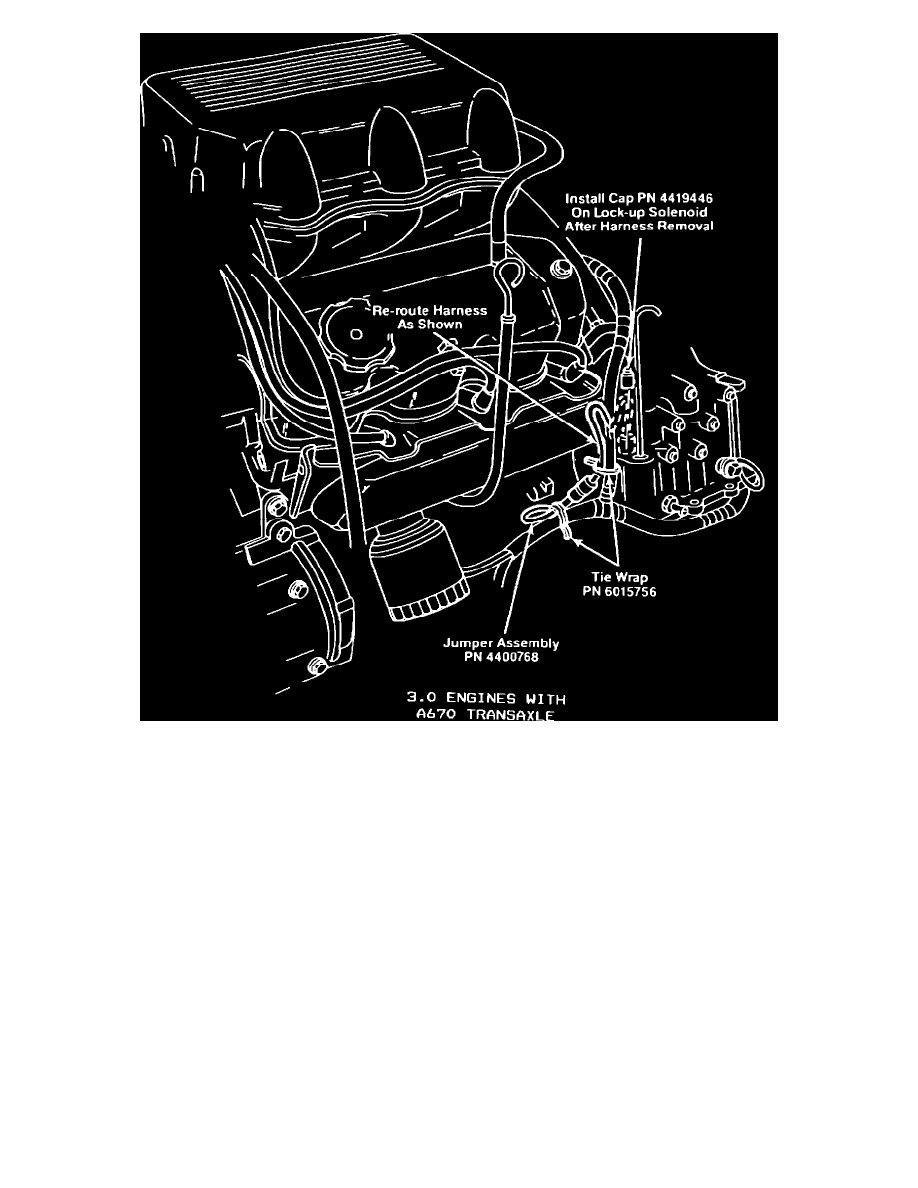
FIGURE B
1.
Disconnect the wiring connector from the lock-up torque convertor solenoid. This is located directly behind the transmission dipstick (Figures A
and B).
2.
Install wiring jumper assembly, PN 4400768, to the lock-up solenoid wiring connector removed in Step 1.
3.
2.2 & 2.5L Engines - Reroute new wiring assembly (jumper plugged into original lock-up wiring) under battery so that it loops back along original
lock-up wiring. Tie wrap looped harness to original lock-up wiring in two places, using supplied tie wrap, PN 6015756 (Figure A).
3.0L Engines - Reroute new wiring assembly (jumper plugged into original lock-up wiring) so that it loops back along original lock-up wiring.
Tie wrap looped harness to original lock-up wiring in two places using tie wrap, PN 6015756 (Figure B).
4.
Install supplied cap, PN 4419446, onto lock-up solenoid.
